social

Facebook Twitter Blogger Pinterest Instagram YouTube

menu

About Us Contact Us News Faq Tutorials Our Shop

giveaways ad

Showing posts with label Mod or Mash Pattern Tips. Show all posts

Wednesday, September 18, 2019

Adaptive Sewing Tutorial Series: Feeding Tube Pocket

In December 2018, my baby girl was born 8 weeks early due to pregnancy complications. She had a preexisting genetic muscle condition that was confirmed during the pregnancy. During her stay in the NICU, we learned that babies do not get the "suck, swallow, breathe" reflex until 34 weeks. We chugged along as she recovered from jaundice and learned how to breathe on her own. At 34 weeks we started her with a tiny amount of milk. It proved to be extremely difficult for her, and even though we practiced everyday, she grew so tired after just 15 mls (that’s just 1/2 oz!). We decided at the end of January 2019 to put in the G-Tube. It was a hard decision but the best decision for her!  
She was released a few weeks later and once we were settled at home, I realized she needed a few mommy made outfits that would work for her G-Tube. In March, however, she was put on a continuous feed due to illness and since she was hooked up all day we needed something that would work for that. On top of that the site got irritated--due to an allergic reaction to the gauze we were using--so she was constantly pulling at it. This meant we needed romper style outfits instead of 2-pieces that worked easier with feeding tubes. With my sewing skills,  I knew there had to be a way to make this work. So, I started experimenting and this is how I came up with what I am calling the “feeding tube pocket” .

Friday, May 17, 2019

Sleeveless Hack for Wanda's Raglan Bodysuit


We can't get enough of Tosha's amazing up-cycle bodysuits. Customers and fans have been crazy for the sleeveless version, so Tosha is sharing her hack with us today! *cue the cheers*


First things first, you will need Wanda's Pattern, which you can buy and download immediately as a PDF Pattern. It comes in baby, girls and women's sizes. 


Let's get started!  

Tuesday, April 23, 2019

Modifying Adult Skylan's for a Formal Occasion

It’s that time of year for teen proms, banquets, or maybe even a formal night on a cruise. Formal gowns can be very expensive to either make or buy, so I wanted to modify Skylan to be the perfect formal attire for your special occasion at an affordable price.


First off, you will need to get the pattern here: https://ckcpatterns.com/skylans-womens.html
To begin, be sure to read the fabric requirements on the pattern. I used a white/gold ombre sequin on heavy mesh for the main fabric. This is a four way stretch knit material. For the lining, I chose to use a black yoga performance material. Both fabrics are from So Sew English Fabrics. 

Friday, June 22, 2018

Make an Adjustable Waist Using Buttonhole Elastic

One of the features I have always looked for on my kids' storebought jeans is the awesome adjustable elastic on the inside of the waistband that gives the perfect fit no matter what body type they are.  (My kids are all different!)  Plus, you'd never know by looking at the outside of the jeans that they have hidden elastic to help keep the pants up without a belt.  It's fabulous! 

I'm not here to sell you on that kind of jeans though. I'm here to tell you that you and I can build it into any of our kids' homemade clothes too!  In fact, I'll show you right now:


Wednesday, April 4, 2018

Adding a Neck Placket to a Knit Outfit

Today we have a versatile tutorial for you that can be used on a bunch of different knit patterns!

Rainey's Top, as written
Neck Placket included in Mason's Romper

You have probably seen our adorable Rainey's pattern that came out recently in Girl, Doll, and Baby sizes.  Isn't it adorable?  It's made of comfy soft knit so it's easy to get on and off. 

That is, at least, for "most" kids. 

My kids seem to have larger-than-average heads though, so even stretchy knit neckbands can be hard to get on and off. (This is the case with storebought shirts especially!) I did figure out long ago though, that this can easily be remedied by adding a neck placket!  So when a tester came to me with the same issue, I knew just the thing that would help her out.  


Look at this adorable little cutie in her modified Rainey's!  You can see that her mother added a snap placket in back so the outfit is easier to get on and off. It turned out super cute!  (The placket can be done in front instead, if you prefer.)  Today's tutorial photos come to us from our fabulous tester Audra Chapin - yes, that's her darling model above. The instructions were adapted from our Mason's romper pattern, if you prefer to get that and have the calculations done and all in one place.  But for now, we'll show you how to do it on whatever pattern you choose!

Please note that we included a LOT of photos here to make the tutorial easy to follow.  It's really not a difficult or time-consuming project though. Just take it a step at a time and you'll be fine! For materials, you will need just a little more fabric (scraps will work) and a couple snaps or buttons.  Let's get started!


First, you will cut your placket piece and interfacing. They need to be 6" wide and however long you want the placket to be.  For example, a 4" x 6" placket will work for most baby and kid sizes. Cut that out of the placket fabric and interfacing. 

Then you also need to adjust the neckband from whatever pattern you're making.  Because the neckband needs to cover a little extra distance of the overlapping placket, you will need to add 2" to the neckband measurement.  (For example, if your pattern calls for a 2" x 16" neckband, you will need to cut it at 2" x 18" instead.)  

You will also need two 2" x 2" pieces of fusible interfacing to go on the ends of the neckband. 

Finally, you can cut all the remaining outfit pieces as instructed in your particular pattern. 

Now you're ready for construction!  

Tuesday, March 20, 2018

How to Add a Modesty Panel to a Bodice

You may have seen our new Shannon's dress pattern for women -- it's super comfy and stylish!  My daughter wanted one but it's a little low cut for her, so we decided to add a modesty panel to the bodice.  Our readers have requested a tutorial like this in the past, so it seemed like the perfect opportunity!   


This is what the original Shannon's pattern looks like. (You can click here for more images too.)  It's super pretty and has several length options. 

And now with today's blog post, you can have a modesty panel option as well!  It's the perfect modification when you need to make a dress or top more appropriate for school or church: 


We love how it turned out!  She wore it allll day on Sunday and probably would have slept in it if I'd let her.  We opted to do a fairly high neckline but you can easily make it lower if you want. (I will tell you how.) 

This same technique will work on lots of patterns with a few adaptions but for today we're focusing on Shannon's.  Let's get started! 

Monday, February 5, 2018

Reversible Apron for Amorette's Lovely Knot Dress

Did you see Amorette's Lovely Knot Dress that just released? It's simply adorable!  While we were perfecting it a few weeks ago, one of our fabulous testers, Deanna Plebuch, came up with a gorgeous modification to add to the pattern if you choose.  This change isn't needed of course -- it's just super cute if you want to do something a little different! 


Isn't that pretty?!  We have several "apron" style dresses this modification could be used on. Here's Deanna with the tutorial:

You will need:
¼-1/2 yard of fabric depending on size
3-6 buttons depending on size
Interfacing is optional

Hi my name is Deanna and I have been testing patterns for CKC for over a year now. I have been sewing since I was 10 and I have a sweet little girl who is 2.5 years old! I created this hack as a way to get more uses out of this gorgeous dress and to make it more fun for my sweet girl! I hope you like it and I can’t wait to see what you all create!


Step 1: Cut the apron yoke. To get the correct size use the length that is in the pattern for the front sash. For the width, measure across the top of the bodice after you have cut the arm curve. Add ½ inch to that measurement and that will become your yoke. For example, I made the size 2T at 3" x 8.5".


Wednesday, November 29, 2017

How to Make Adorabella's with a Store Bought Tee

You're in for a treat today, as we welcome our fabulous tester Jamie Duke to share a tutorial she made just for our new Adorabella's pattern! I will save the rest of the details for Jamie to tell you herself, so here she is! 


Are you like me and usually steer clear from the knit patterns because it just makes you a bit anxious even thinking about working with THAT material? CKC does have some amazing knit patterns that are truly written for beginners in many cases, but I just have a hard time building the courage to even begin working with knit. Not that we can’t, it’s just a little more intimidating to sew. 

Maybe knit isn’t your fear, but you just need a cute outfit by tomorrow because you completely forgot about picture day. We all have those moments where we need to produce an outfit in a race against time. Well this tutorial is a simple hack in making Adorabella’s Boutique Style outfit by using a store bought t-shirt. This will be a quick, step-by-step instructional guide (and minimal sewing with knit material) to sew up an “Adorabella” outfit! 

Don’t forget to post your pictures to CKC fan Facebook page and #ckcadorabellas with your unique creations. We can’t wait to see what you sew!

Monday, July 31, 2017

Hacking Willa's Wrap Pants into a Romper!

Hey everyone! Willa’s Wrap Pants released today! They are amazing as-is and we thought you would also really enjoy this fun romper hack for the women’s pattern!


Thursday, July 27, 2017

Modify Rayna's Romper to Have a Button Back

You have probably already seen and fallen in love with our Rayna's Retro Romper pattern!  It's simply adorable!  It has those cute ties that come to a bow in the back. But if your little one doesn't like having that sort of bow on her back (especially for long car rides)  then we have the perfect modification tutorial for you today!


Thursday, July 13, 2017

Modified Briar's: Bodice Ruffle and Crop Top

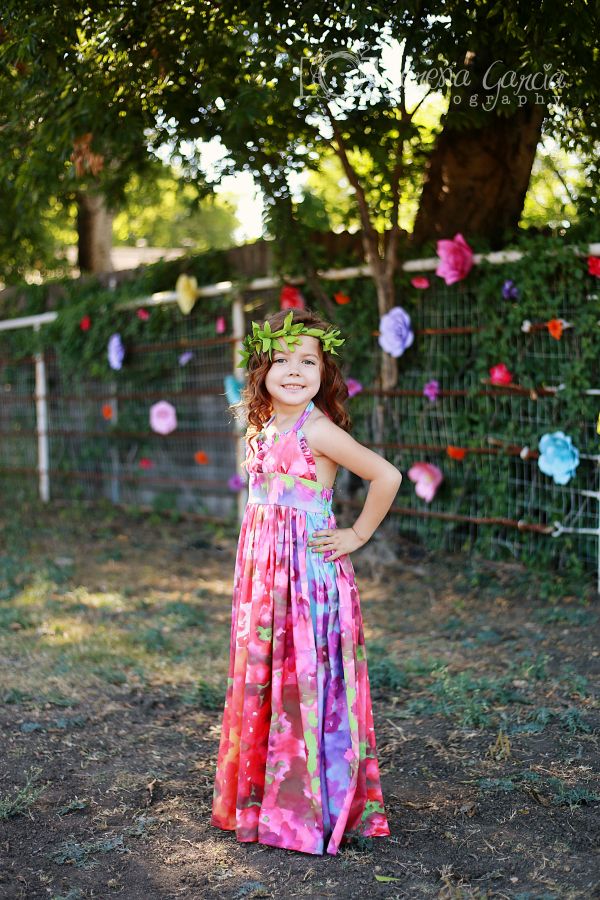
Today we’ve got a special guest, Serena Garciadiaz with Serena Garcia Photography. You may have seen her work before, and she is the one that captured the fabulous unicorn photos that inspired #CKCUnicornWeek!! She happened to test Briar’s and then just kept on making them, adding her own spin to it each one. She’s here to share how she did it all! Without further ado, here is Serena.


Who is as excited as me for Briar’s pattern release? We LOVE Briar's and all it has to offer. This is the perfect dress for a wedding, flower girl dress, costuming, ball gown, and we loved it for our unicorn photoshoot!


The pattern comes with many different options, a top, dress, maxi, and romper! It’s the perfect pattern to add all those pretty ribbons and trims, mix/match fabric, and the list can go on and on.

Monday, July 3, 2017

Sleeveless Mod for Paxlynn's

Have you seen Paxlynn's Pocket Knit Dress yet?  It's amazing with all its details and comfy cuteness! The pattern is fabulous as written, and today we have a super fun modification to make Paxlynn's sleeveless for the hot summer months!  


Perfection, right?  And seriously, look at those unique pockets! 

Alright, let's get started on the tutorial:


Tuesday, June 6, 2017

Reversible Mary's

Reversible dresses are so much fun!  Two looks in one dress, I mean, it’s just one of those things every seamstress should try!  We have a couple of patterns written to be reversible, like Martha’s and Jillian's.


Mary’s is another pattern that can be made reversible with just a few tweaks of the original pattern.  And it’s totally cute!  

https://youtu.be/lewztA0tl3k

Fun, right!  Here’s my little’s one in her reversible Mary’s.


Wednesday, March 29, 2017

Layered Fringe Tank

 You may have noticed that we are in love with fringe styles around here!  Just type "fringe" into our search box and you'll see what I mean!  Well, today we have another fabulous fringe tutorial for you, and it's also perfect for showing off your favorite phrases or cut files. Take a look!


Isn't it fabulous?  Tosha's little girl is stylin'!  She used our Leslie's tank pattern and turned it into a layered fringe tank with just a few extra steps!  


Super duper cute!  Are you ready to learn how?  

Wednesday, October 28, 2015

Creating a New Look with Chantelle's Cardigan

Hey everyone!  I’m Nikki here, with a hack for the new Chantelle’s Cardigan pattern.  Today I am going to show you how to slightly alter the front pattern piece, then add a snap and some trim to make the cardigan with a completely new look!


Let's get started!

Monday, October 26, 2015

How to Slim {Skinny} Pants

We are so excited to have a boys' woven skinny pants pattern at CKC now!  I'm sure Ryker's will quickly become a trendy staple for your little guy!  Today we are going to show you how to get exactly the right fit for your boy, even if he is not standard sized. 


If your boy has wider-than-average legs, you will want to make the pants one size larger for the width and then follow the tutorial below. 

And if your boy has thinner-than-average legs, you will want to make his usual size and then follow the same tutorial below.  

So either way, you're going to get what you need from today's tutorial! 

Monday, October 12, 2015

Box Pleat Modification for Eleanor's Pattern

Did you get a chance to grab your copy of our new Eleanor's Pintuck Dress and Top pattern while it was on sale? There are so many adorable options included in the pattern!  And today on the blog we have the designer here with us to show yet another modification that you can do to your Eleanor's -- an adorable box pleat on the front bodice!  


Isn't it pretty?  Most of the steps are written right in the pattern so this tutorial will show you just the changes that you need to make.  First we will show you step-by-step photos, and then at the end we even have a video if you want to watch Susan do it herself! Here we go: 


Monday, September 14, 2015

Fox and Raccoon Dresses

Woodland animal prints are super trendy right now, which I personally love. And the only thing cuter than a woodland fabric is an entire woodland dress!  How adorable are these?!


Renee Pullings from Whimsical Dragonfly made these clever dresses using our Maggie's Color Clock Dress pattern with a few minor adaptations, and today she is sharing her tips and tutorial with us! By the end of this post you'll be all ready to make a super cute fox or raccoon (or tiger etc.) dress for your own little girl!  Let's get started!  

Thursday, August 13, 2015

Making a Casual Version of Vera's

Hi. It's Cynthia! A few weeks ago CKC released the beautiful Vera’s. I fell in love the moment I saw it and couldn’t wait to get my hands on some chiffon. My modified top was so well-received in the group that Kristi asked me to make a blog post, and of course I’m super honored and thrilled to do so. So here goes!


My “casual” Vera’s modification has smaller chiffon pieces that hit at the thigh and there is also less chiffon on the top of the blouse. I hope you find this little tutorial to be a super easy twist on this amazing top.

Materials:
All supplies listed in the pattern
Paper to make a pattern piece
Pencil
Ruler
Scissors

Step 1 - Choose your version.
I made two tops and used different sizes for the chiffon so you can choose the one you prefer. I will show each version below:


Red Flowers Version- I used a smaller rectangle shape for the chiffon. To wear it you simply fold the edge of the chiffon under, when crossing it over your body. This creates a very slim and smooth look across the bust. You do need to make sure and wear a supportive belt, though, to hold the chiffon in place. My black belt has a nice wide elastic in the back. Because the chiffon is much shorter than the pattern, it might still shift a tad if you were to head out for a night of vigorous dancing at the club. Just glance in the mirror every once in a while and you’ll be golden!


Pink with Owls Version- I cut the top line of the chiffon pieces wider so that there’s more chiffon reaching across the body and down toward the belt. This will create a fuller look across your front, which may be nice if you want to enhance your bust. The bottom cut line is the same, though, so it still hits at the thigh.

Tuesday, August 11, 2015

How to Add a Second Circle Layer to Libby's Leggings


Hello again! It’s Shannon Buckbee from the CKC tester group. I'm here today to show you how to modify the adorable Libby’s Circle Leggings, by adding a second circle layer to the leggings. Really, adding an extra circle ruffle just brings the cuteness factor of these leggings up 100 extra points! Best of all, it is very easy to modify and make these. Let’s get started, shall we?