Today's blog post and free pattern comes to us from the fabulous Shannon herself! Here she goes:
♫ On the fifth day of Christmas, CKC gave to me...
Coraline's Coffee Cup Cozy
We are excited about today's tutorial because it's something that so many of you will use! If you're a coffee lover like us--which you have to be if you're a seamstress, right--then this is the tutorial for you...and I guess all the coffee lovers in your life ;)
We are excited about today's tutorial because it's something that so many of you will use! If you're a coffee lover like us--which you have to be if you're a seamstress, right--then this is the tutorial for you...and I guess all the coffee lovers in your life ;)
Difficulty Level: Beginner
Materials Needed:
- Pattern Piece
- 2 Fat Quarters of choice
- Batting
- Pins
- Thread
- Thread
- Button
- Small Elastic (I used a hair tie!)
Cutting Chart:
Everything you need to cut out is in the pattern piece link above. Just click "Pattern Piece" under "Materials Needed" and it will pull up the file.When printing out the pattern piece, make sure the page scaling is set to "None". This is very important.
Once the pattern piece is cut out, cut out one each of your main fabric, fabric lining, and batting. (We did change the shape of the cup cozy a little from when I took these pictures).
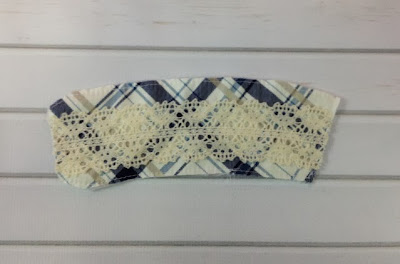
Step 1: If you choose to add an embellishment, like the lace that I did, now is the time to add it! I just pinned the lace in place and sewed it on.
Step 2: Place the batting on wrong sides together with your main fabric. Pin in place and baste them together. To baste, you will move your stitch length to it's longest measurement and sew a regular straight stitch. This holds the batting in place without it stretching it around.
Step 3: Take the elastic approx. 2.5" (I used half of a hair tie), fold in half to make a loop, place it on the edge of one of the sides of your cup cozy, and pin it in place. It should be on the right sides of your fabric with the loop on top of the fabric as pictured below. Baste it in place.
Step 4: Place the outer fabric and lining fabric pieces right sides together and pin in place. Sew around the cup cozy as shown in red leaving one side open to turn it right side out through.
Step 5: Turn the cozy right side out. Fold the edges of the open side in 3/8" and press with an iron. Topstitch around the entire cozy. To topstitch sew 1/8" in from the seam around the entire cozy.
Step 6: Sew on your button on the outside of the cozy approx 1" in from the end as pictured below.
And you're done in six simple steps! How fast and easy was that?
Now just wrap it around your cup, put the loop around the button, and your cup is officially cozy!
Thanks for stopping by and be sure to come by Monday for another free tutorial for Christmas!
Happy Sewing!
Shannon
Shannon


