

So we see them all the time, all over CKC and well really all over the web. Those adorable rosette headbands that the little models are rocking! Well today is the day to pull out some scraps and make them yourself. Thats right! Its time for another ''Scrap Buster". DISCLAIMER... These can become very addicting! Okay so to start out with lets get our supplies together.
You will need...
*3 strips of fabric. 2" by the WOF (most likely 42")
(for the rosettes shown in this tutourial we only used 22')
*3 felt circles close to the size in which you would like your rosettes
*Scrap piece of leftover felt--big enough to fit all the roses on
*Elastic for your headband. Here was a great Etsy shop I found with a great selection

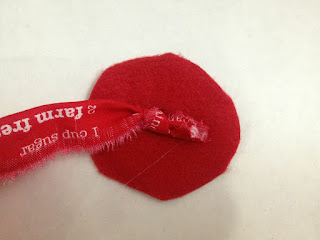
Step 1: Tie a knot at the end of your first strip and hot glue the knot to the center of one of your prepared felt circles, like shown.


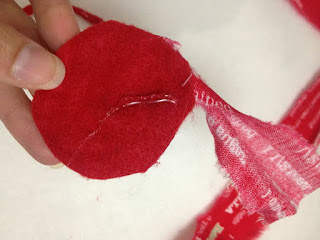
Step 2: Now while twisting the strip of fabric, continue to use a small amount of hot glue to create and secure the rosette to the felt. Continue to this until you have reached your desired size.

Step 3: Trim the excess felt fabric and hot glue the remaining fabric tail to the back of the rosette as shown below.


FANTASTIC you now have your first rosette completed!

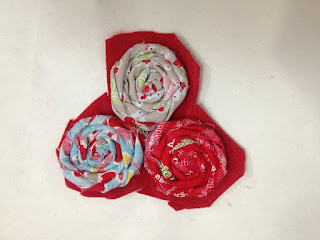
Now repeat Steps 1-3 with the remaining two scrap fabrics, to complete the final two rosettes.


Now its time to construct the headband. Taking your big piece of scrap felt, arrange the rosettes in your desired pattern. Then roughly trim the excess felt away.

Next we will attach the elastic in which was cut to the circumference of your child's head. Secure the elastic using a small amount of hot glue, like pictured below.


Finally we will attach the the fabric rosettes to the felt scrap on the headband so that we are covering the elastic. Make sure to use the smallest amount of hot glue needed to complete the job. After attaching the rosettes to the headband you will once again closely trim away any excess felt around the edges.


Lastly you will embellish the headband to your hearts content! And then your done!! Can you believe you can create such an stunning little headband in under 10 minutes?

Here are some additional inspirational photos.


And these stunning photos that was a collaboration between Create Kids Couture and Wild Pixie Couture.


Now go and get to y'all!
Happy Sewing,
Morgan