

🎶 On the 3rd Day of Christmas, CKC gave to me 🎶
A DIY gift card holder!
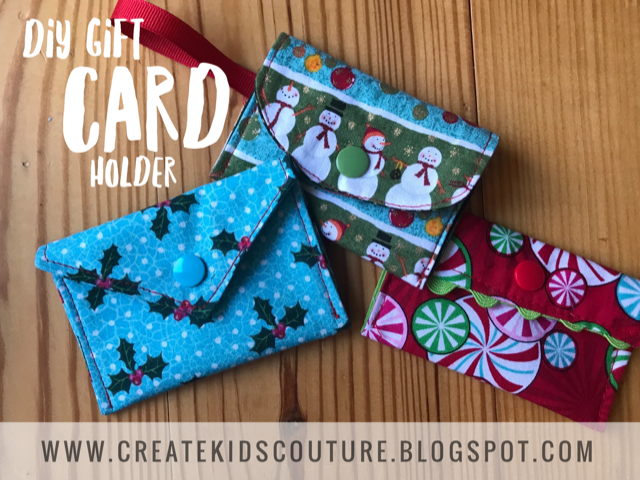
These fabric gift card holders are a perfect scrap buster and personalized addition to your gifts this season. And did I mention fun to make? I can't wait to make more!!!!
Materials Needed:
- Woven fabric scraps (about 12" x 5" each)
- Iron on fusible interfacing
- Snaps
- Ribbon or other embellishments (optional)
- Optional pattern pieces can be downloaded here and printed
- If not using pattern pieces, cut your rectangles 6.5" x 4.5" (length x width)
***Note we are using a 1/4" seam allowance for this project.

Construction:

Step 1: If you are using the pattern piece, place it on your fabric and cut out. NOTE my snowman ARE upside down on purpose! If you have directional fabric, you will want the curve or point to be upside down at this point because we will fold it over when done.
Repeat with the lining and the fusible interfacing.

Step 2: Iron the interfacing to the wrong side of your main fabric according to the instructions for your interfacing.


Step 3: Optional - if you are adding embellishments, you can do that at this time. You can baste them on with a longer stitch. If you want to add a loop, you will cut about 4" length of ribbon and pin or baste it in place 4" up from the bottom of the rectangle (where the loop in white is in the picture above). Also if you were going to add pom trim, it would hang upside down here (not like pictured).


Step 4: Place the lining right sides together with the main fabric and sew all the way around, leaving a 2-3" gap at the bottom to turn right sides out.


Step 5: Clip the corners, making sure not to cut the thread, and turn right sides out. Press the seam allowance where the opening is to the inside. Now you can sew just along the bottom where the opening is. Make sure to backstitch at the beginning and end.


Step 6: Now with the lining fabric facing you, fold the bottom of the rectangle up 2" and pin in place. Now sew along the sides and top as shown here, making sure to backstitch at the beginning and end.


Step 7: Now you can apply our snaps. Simply find where you would like to place them and make sure they will meet when you fold the top down. Click here for some more help with snaps.

You're all done! Slip your gift card in and you're good to go with a personalized and easy to please gift for anyone!

We can't wait to see your version! Come on over to our fabulous community on Facebook and Instagram and share your creations.
🎁Stay tuned for more projects and freebies coming your way!🎁
~ Sew Inspired,
Emily