Today we have a unique bow pattern for you from Sheri over at Izzy's Bow-tique! She's always so sweet to share her new bow designs with our readers. This one is super cute and I'll turn you right over to Sheri to get started. Here she is!
Hey everyone, I’m super happy to be back here at CKC for another fun tutorial.
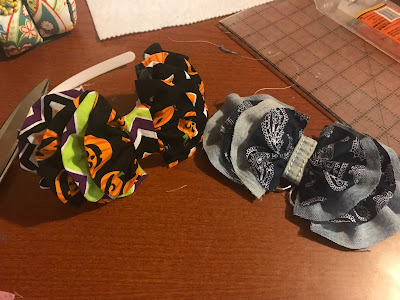
Today I'm going to show you how to make this beautiful fabric hair bow with measurements and all. There are two ways to make this bow and you can choose based on your own preference.
The Ruffled Wavy Bow
Supplies needed:
-glue gun and glue sticks
-scissors
-needle and thread
-2 fatquarters or jeans (as im going to show you below)
-ruler
-iron (for one version)
-scrap of felt
-french barrette or headband to finish.
First thing first, plug that glue gun in so it can get nice and hot by the time we need it.
Ok so let's get started.
First were going to cut out our pieces:
For raw edge shabby look: (cut 2 of each piece)
-1 ¾” x8” cut felt piece 2”x4”
-1 ¾” x7” cut 1 center piece 1 ½” x 5”
-1 ¾” x6”
-1 ¾” x5”
For no raw edge clean look: (cut 2 of each piece)
-3 ½” x8” cut felt piece 2”x4”
-3 ½” x7” cut 1 center piece 1 ½” x 5”
-3 ½” x6”
-3 ½” x5”
Here is what that should look like: left is no raw edge right is raw edge.
Next step is for the no raw edge look.
Take your pieces and fold them in half long edge to long edge and iron flat. Repeat for all pieces.
Now for both versions:
Take your center piece and fold the long edges in to meet in the middle and iron good. (Set aside for now)
Now we're going to start making our ruffles.
Tip: Keep your pieces in order in sets of 2. Once they are ruffled it’s hard to tell them apart unless they are in order.
Thread that needle kinda long and tie a knot in the end!
Now take your first piece (I’m starting with the smallest piece) and starting on the front side, start stitching a running stitch. The closer your stitches the more ruffled it will be, the farther apart the less ruffled it will be. Tie it off with a good knot.
Now when you get to the end of the piece end your stitch on the top side of the fabric. This makes it to where the beginning and end both fold back a bit creating a more clean look.
Repeat this step for all pieces. (8 total) This is what you should have:
Once you have finished that, we can now start putting it together.
Starting with the biggest pieces (we're working from outside in), flip the piece over and add some hot glue making sure to kinda fan out your ruffled piece so it lays well.
Now start by putting that piece almost to the very edge of your felt.
Do the same to the other side of the felt.
Now when we move on in to the rest of the pieces, stack them to where the bottom cinched up part of your ruffled piece is almost pushed up against the previous one. This will create a full look and make sure you have a tiny space for that middle piece.
Now repeat going from large to small until your hair bow looks similar to mine.
Now for that middle piece. Flip it over and add a strip of hot glue to the middle part then press it to the middle of your bow, folding it behind the bow on each end and gluing those in place.
Now you can add it to headbands or add the french barrette to the back. You're finished!
My preference is hard and wide nylon headbands. But I used a plastic one in this pic. All you need is a small scrap of felt to sandwich the plastic headband between the bow and the scrap felt and hot glue together.
Thanks for joining me for this fun hair bow! And thanks to CKC for having me once again!!
~ ~ ~
A huge thank you to Sheri for this fun tutorial! I know my daughter will want to help me make some too! If you love this style, be sure to go show Sheri some love over at Izzy's Bow-Tique! You can also watch her video tutorials on YouTube by clicking here. I personally can't wait to see what she comes up with next.
Let's Create! ~ Kristen


