
Today we have an exciting guest project to share with you, and it's so fun that my daughter and I already tried it out ourselves! This project comes to us from Education.com, a fantastic resource for educational activities for kids. Raise your hand if you need something great for your kids to do this summer! The Education.com website has put together thousands of these projects, and we're honored to be an exclusive host for today's free pattern!

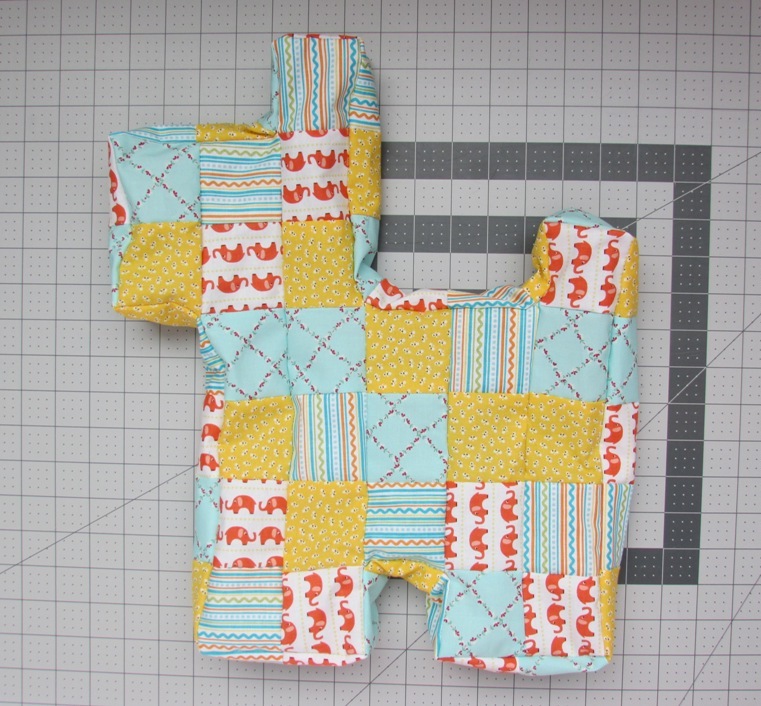
Isn't this Patchwork Scotty Dog so fun and adorable?! My daughter helped sew all the squares together and it matches her bedroom perfectly. It took us just a couple hours to complete (with a ton of interruptions) and it's even bigger than we had expected. The perfect afternoon project for the two of us! I took step-by-step photos as we went so you can see our progress, if you're a visual person like I am. But first, here is the official pattern from Education.com!
Patchwork Scotty Dog
Turn old scraps of fabric into an adorable patchwork dog. Three-inch squares of fabric are sewn together into a geometric design to create this stuffed patchwork canine—a perfect addition to a beloved stuffed animal collection or a thoughtful gift for your favorite dog-lover. This unique sewing project introduces young artists to sewing while teaching geometry and measurement on the sly.
What You Need:
84 3-inch squares of cotton fabric in different patterns and colors
(fat quarter bundles from the fabric store work great)
Sewing needle
Thread
What You Do:
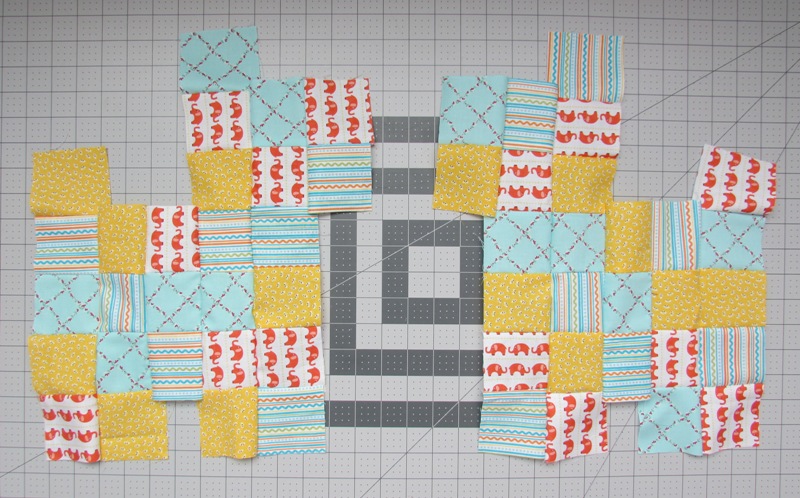
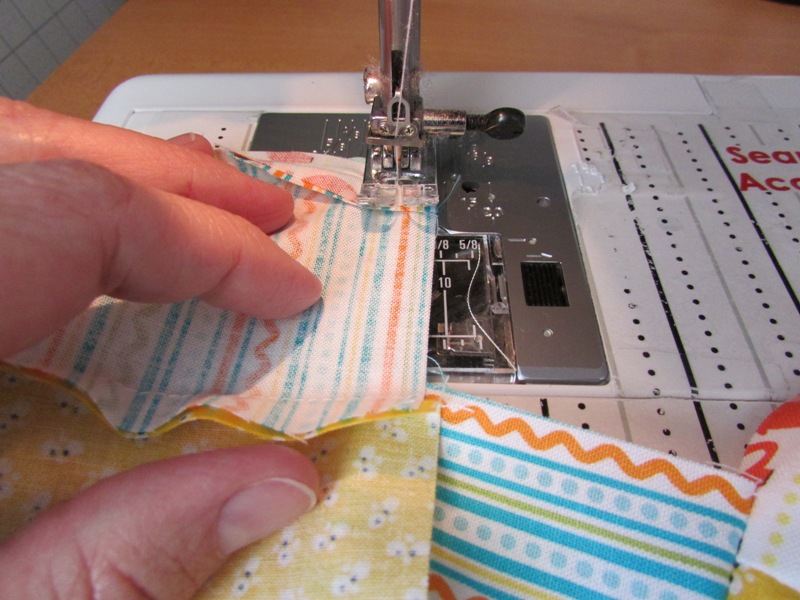
- Following the design template, use a sewing machine to sew each of the six columns that form the dog’s body. You will place each square back-to-back with the fabric pattern on the inside, and continue adding the number of squares needed for each column.
- When the six columns are complete, sew them all together according to the design template (it may help to iron the seams flat). Again, place the fabric together with the pattern on the inside. You will now have one complete side of the dog’s body.
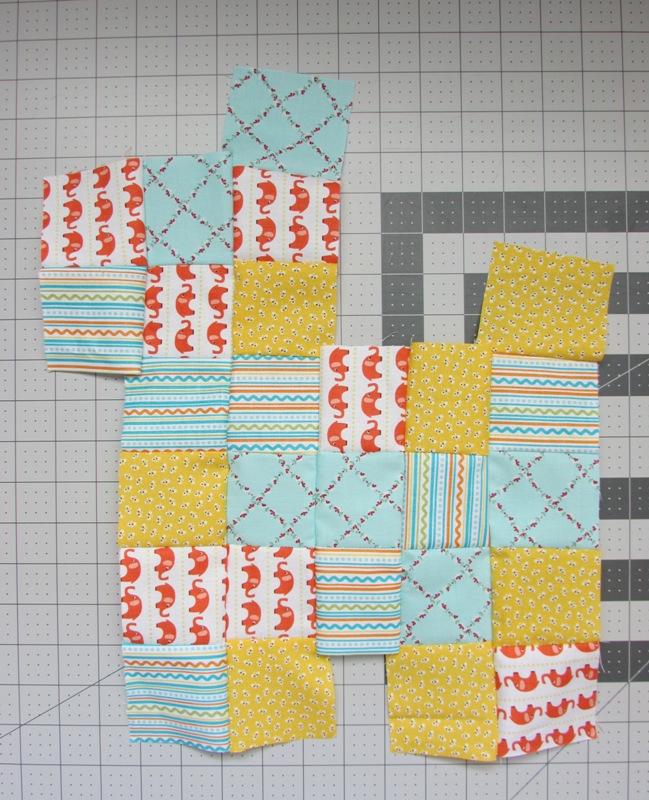
- Repeat the above process for the other side of the dog’s body, but this time with the design facing the opposite direction (the dog’s nose will be to the right, not the left).
- In the same manner, sew 30 squares into one long column.
- Now it’s time to sew the column of squares to the dog’s body. Choose one side of the dog’s body to start with (it doesn’t matter which one). Starting with the tail, align the first square of the column to the first square of the tail, pattern sides facing in, and sew them together.
- Continue sewing the column to the dog’s body, making sure that the seams match up. Each square in the column should be aligned with a square on the dog’s body.
- Now take the other side of the dog’s body and, starting with the tail, match the squares up to the column in the same way and sew them together one by one–but this time, leave the last three squares unsewn. At this point, the sewing can get tricky, so take your time, think about how each part will fit together, and go slowly. Remember, if you make a mistake, you can easily pull out the stitches and correct the problem!
- Turn the dog right-side-out so the right side of the fabric pattern is showing. Take small handfuls of the stuffing and place inside the dog, making sure to fill out every corner. It may be helpful to use a long knitting needle or stick to push the stuffing into the edges.
- Once your dog is fully stuffed, sew the remaining squares by hand to close up the body.
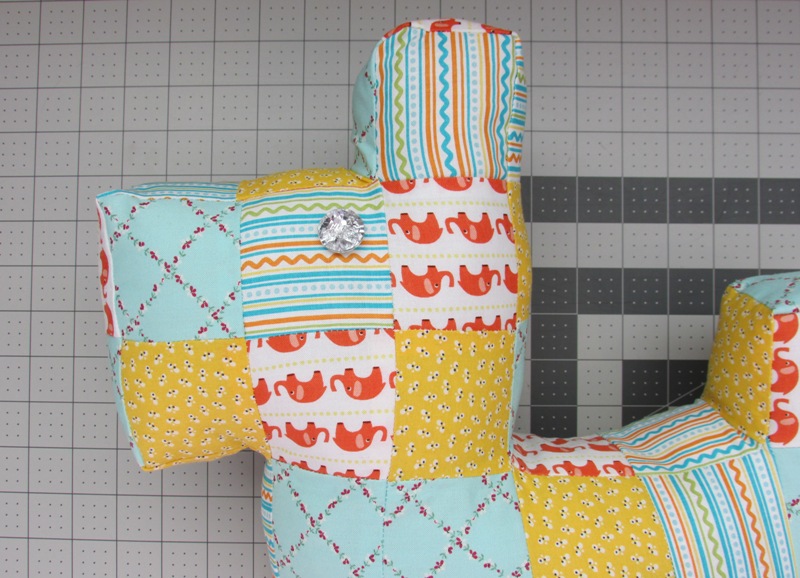
- Sew a button on each side of the dog’s face where you want the eyes to be.
And that's exactly what Nicole and I did! If you follow the instructions straight through, you'll be just fine! There was one place where we made a little mistake and forgot to mirror the second dog shape (oops), but I came back and looked at the instructions, and that important detail was there the whole time, explained very clearly! The good news is, you can learn from our mistake and catch that the first time through without having to pull out your seam ripper.
Below are our progress photos to give a visual, but again the instructions above are what you will want to follow! You can use any amount of different fabrics; we chose four but you could do whatever you want, per the instructions. Ready, set, go:
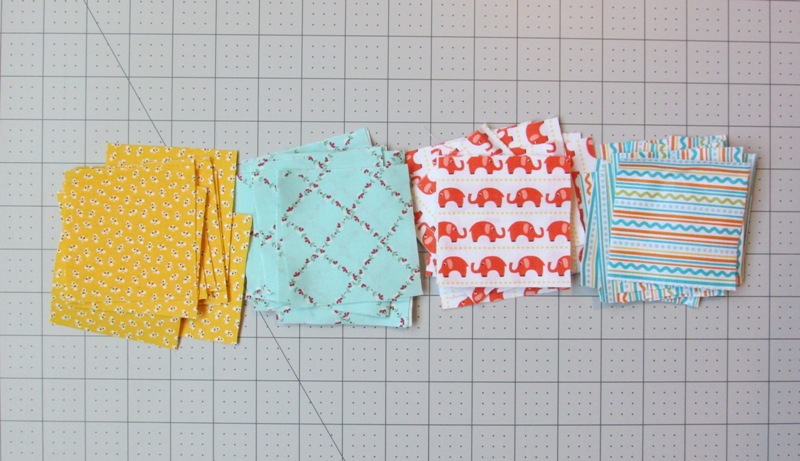
Step 1:
 |
| (create first row) |
 |
| (create second row) |
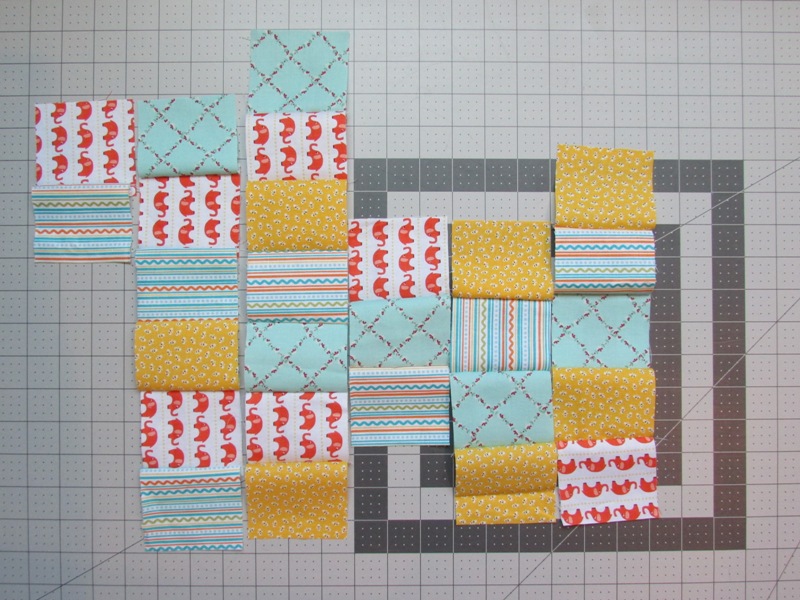 |
| (create remaining rows) |
Step 2:
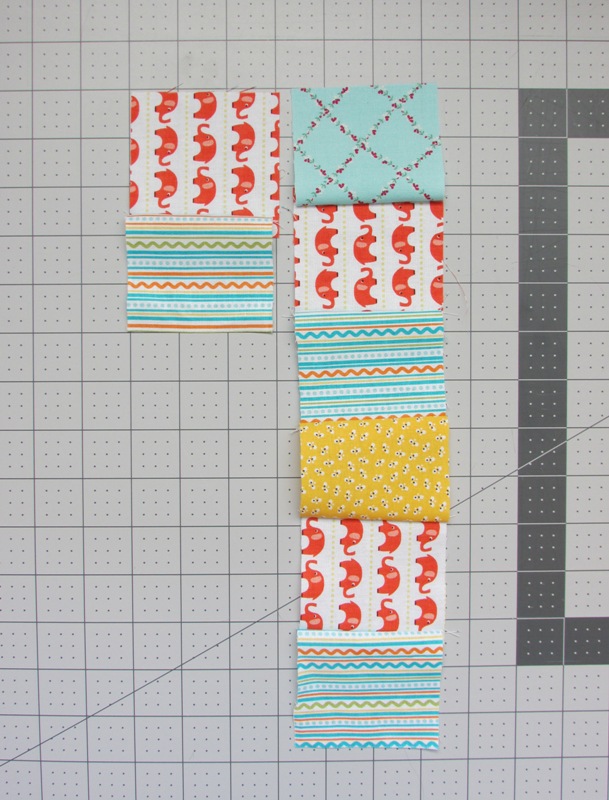


Step 3:
 |
| (Make sure your dogs shapes are mirrored! This is after I fixed our mistake.) |
Step 4:

Step 5:

Step 6:
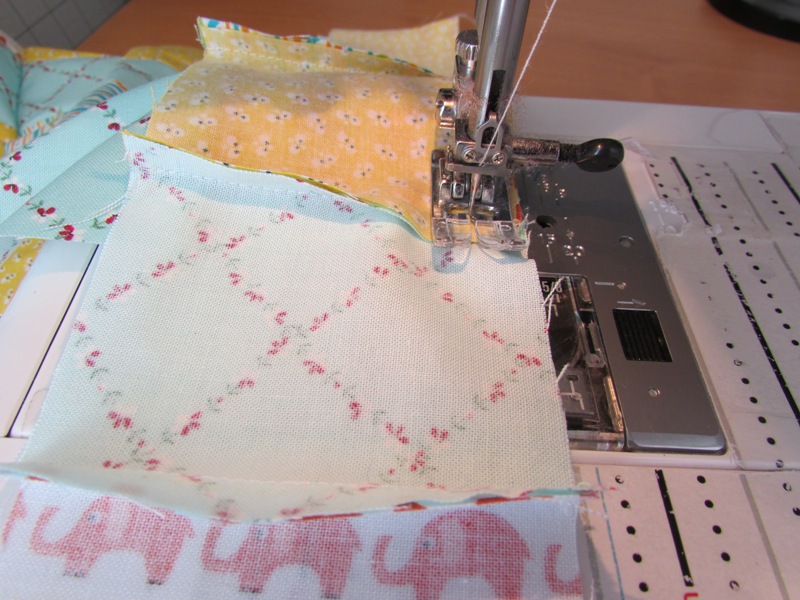 |
| (When you come to a corner of the dog, stop sewing at the nearest seam with the needle down. Then lift the presser foot, adjust the fabric to match the new edges together, then put the presser foot down, and continuesewing. See next photos too.) |


Step 7:
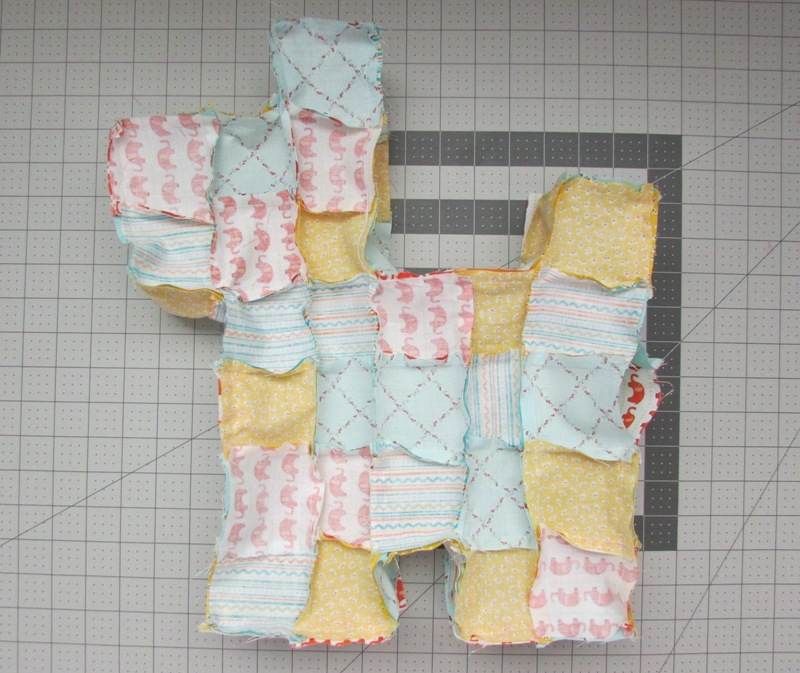 |
| (Make sure you leave a 3" opening. Also, I clipped the corners of the outer dog seams.) |
Step 8:

Step 9:

Step 10:
And that's it! You're done!

Ta-da!
Just think of all the fun color combinations you could make for your Patchwork Scotty Dog! When you have made one (or a bunch), please come share your photos with us in our CKC Patterns group on Facebook -- we would love to see!
We also want to give a HUGE thanks to Education.com for allowing us to be a part of this project. It was honestly super fun and my daughter learned several important shape concepts and sewing skills along the way. Be sure to go check out their other projects too and show them some love!
Let's Create! ~ Kristen