Did you see our new pattern for Brock's Letterman Jacket? It's one of my favorite patterns ever! It could be that I come from a big sports family, but I just can't get over this cuteness.
Amazing right?! The J is for "Josh" and his favorite color is blue. He could not be any more proud of this thing!
Your little one is going to love having their own letterman jacket too, whether you design it after a favorite sports team, a school, or even just his/her favorite color. You can't go wrong! And don't forget about the most important part -- the varsity letter. Today I'm going to teach you how to make the varsity letter to put on Brock's. It's super easy!
Supplies:
8" square of leather, faux leather, deco vinyl, or similar fabric. (Check the remnants bin!)
8" square of wool or similar thick fabric. (Solid colors work best.)
Fray check to seal the edges
Thread, sewing machine, etc.
Printed letter to use as template (see below)
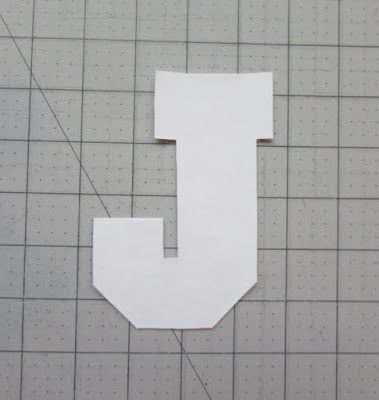
First of all, print and cut out the letter you want. I googled "letter J" and found one that looked like a fun team letter. There are a zillion different fonts out there for you to choose from. Resize the letter to the size you want -- I made this one 5" tall and it came out perfectly for my size 5 kiddo.
Lay the pattern piece on your leather (or similar) fabric and cut the letter out. It is best not to use pins with leather, so it may be easiest to trace the letter onto the leather and then cut it out. I just held it in place as I cut. If your chosen letter has all those tiny corners like mine, I recommend using scissors rather than a rotary cutter!
Now take your paper pattern piece and trim 1/4" from the edges all the way around. When you're done it should look like the photo above. You now have a slightly smaller letter. Throw away the part you trimmed; you only need the smaller letter now.
Lay the smaller letter on your wool (or similar) fabric. Pin the letter in place and cut it out.
Use Fray Check or a similar product to seal the edges so they won't fray. Or, if you want, you can zigzag or serge the edges with a matching color of thread. Keep in mind that it may change the size/shape of your letter a bit if you do so.
Stack your letters and make sure you like how they look. If you don't, go back and adjust accordingly.
Glue or clip your layers in place. You could technically use pins on the parts of the leather you can't see under the wool, but I chose to be careful and use clips instead. Whatever you choose, make sure your layers are totally secure. The leather can be slippery as you sew!
Using a leather needle and color of thread that matches, stitch the top letter onto the bottom letter by sewing 1/8" from the edge. You can lengthen your stitch a bit if you want; I set mine at a 3 stitch length. As you turn each corner, be sure to put the needle down before lifting the presser foot -- it creates really tidy corners and you go around your letter.
When you have the layers stitched together, check to make sure the borders all look good. Trim them if necessary, to even them up if your letters slid at all. (I gave mine a little trim in a couple places. Shh...)
That's it! Your letter is all ready to go!
Now you can pin it in place on your Brock's jacket, or anywhere else you decide you want a varsity letter!
Sew it in place by stitching directly on the previous stitching lines. Or, if you want, you could use a zigzag or satin stitch around the very outside of the leather layer. It's all up to you! I prefer the subtle topstitching.
Ta-da! I can't wait to see your creations using this varsity letter tutorial and Brock's Letterman Jacket pattern! Please share in our patterns group on Facebook when you're done.
Let's Create! ~ Kristen


