
I have a bunch of boys at my house. That puts me in the ideal position for designing boy patterns, doesn't it? I absolutely love it. The only problem though, is that my baby boys keep growing up!

This little guy, for example, is turning three years old tomorrow! How can that be?! And he is all about superheroes right now. So with his superhero birthday coming up I thought it was absolutely vital for him to get a shiny new mommy-made cape.

He is pleased!
And you can be too because today we are sharing the pattern with you! Our super cape is reversible, sturdy, fits up to adult size necks, and it has several ways to safely close it without being a strangulation hazard. (Ribbon ties scare me!) My little guy can put his cape on and off by himself, no phone booths needed!
To make your own super cape, here's what you will need:
To make your own super cape, here's what you will need:
Instructions:
First you will print the pattern pieces (link above) and tape them together. Cut out the cape piece.

Fold your fabric in half width-wise, and then again in half width-wise, so it looks like the photo above. This will give us two folds on the left side, one inside the other. Lay the pattern piece on the fold and pin in place. Cut around the curves. This will give us two cape pieces.
Note: If you want your cape to be different colors front and back, you can repeat with your second fabric color (1 yard) and it will give you two additional cape pieces. You can now make two reversible capes!

I chose to do red on one side and black on the other, for my boys' two favorite superheroes. I was planning to put a symbol on the red side until my older son pointed out that superman has a symbol on his chest, not on his cape. Good point. Let's continue...

Place your two cape layers on a flat surface with right sides facing. Pin in place all around the edges. Then sew along the pinned edges and curves, leaving a 4" opening at the bottom, as shown in yellow in the photo above.

Clip the curves close to the stitching and then turn the cape right side out, using a dowel or chopstick to get into the small straps. Iron until the cape is nice and crisp around all the edges. Pin the 4" opening shut.

Next we are going to top stitch all around the cape by sewing 1/8" from the edge. If you used two different colors of fabric like I did, you may want to use one color as your top thread and the other color as your bobbin thread. I used red on top and black in the bobbin. (Of course you could use all one color of thread if you want contrast stitching on the opposite side.)

Finally we will mark where we want our closures on the neck straps to be and then attach them. You can use buttons, velcro, magnetic closures, etc.

My favorite thing to use is Kam Snaps (see our tutorial here) because they are super quick and I love the look. Whatever closure you decide to use, please remember that for safety's sake it is good for the cape to "tear off" if necessary, in case it gets snagged while the child is wearing it. We don't want playtime to become a strangulation hazard!
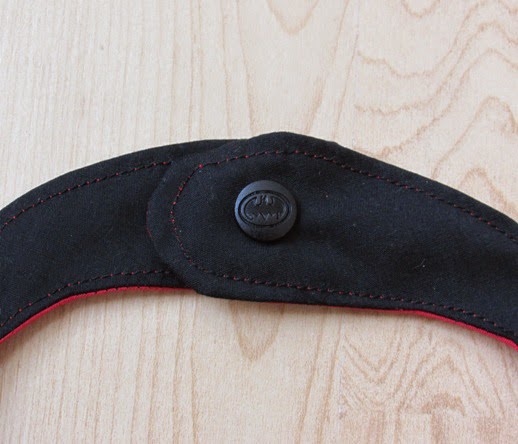
Look at this, I even had some of my cool Batman snaps left over to use on the black side of his cape!

Happy superhero boys make for happy mamas!
Now all that's left for us to do is try to keep up with them...
Now all that's left for us to do is try to keep up with them...

Let's Create! ~ Kristen