
I've been so excited for a week or so now to start a weekly blog called "Wardrobe Wednesday" where I feature an outfit from Miss A's closet that was made using a CKC pattern. And when I heard that the Molly Faux Apron Peasant Dress was getting an updated version this week with more sizes, I knew just the outfit to share and I was over the moon excited because I knew that I could share some fun ways to jazz up your Molly.
Personally Molly is one of my go to dresses, because I can whip up miss A one in an hour while she takes a nap. It really is the meaning behind "nap time sewing"
So let me share a photo or two of the basic Molly that you can create using the CKC pattern and then we will move on to my jazzed up version and the tutorials that go with it.


Is this pattern not the perfect dress for a year round dress? And look at the sweet detail of the faux apron and ruffles!

Alrighty now on to the Jazzed Up Molly I made Miss A. Its so fun and funky with a bit of whimsy.

Right? I know! Its amazing!! So lets go into detail on the things I changed up.
First off you will notice I added some embellishments to the bodice using ric rac, ribbon and decorative stitch on my sewing machine, using these simple things I was able to create a one of a kind trim.

Next you will realize I opted out of adding elastic to the sleeves. And went for pink scallop edging. As much as I adore the look of the Molly with the elastic Miss A can not stand it. :( and I was having a "I'm the best mom in the world" and "I'm such a laid back mom" kinda day and had no fight in me to make her deal. So I rolled with punches and did what makes her happy. But next time my dear, momma will win! Who am I kidding? she always wins and shes not even one!

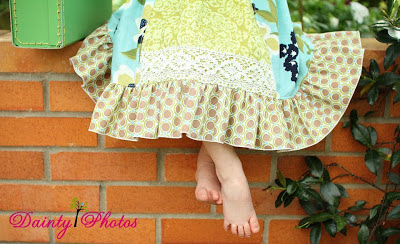
You will also note that I added some super easy ric rac scallops to the base of the bodice to match with sleeves and the scallops in the handmade trim on the bodice itself.

And I'm sure by now you've seen that I did the faux apron a tad bit different as well. I added a total of five built in ruffles a top of the "apron" part of the dress.

Okay so now on to the really fun and festive part of this blog..... The free tutorials on how to do this all yourself!!
Lets start at the top and work our way down.
After play around with ribbon combos to create a one of a kind trim I finally decided on one that i liked.
To start you will need to sew your ric rac to your base ribbon. Remember that the most important trick to sewing on ric rac is to neatly sew straight down the center. This is the same for weather you are planning to adhere the ric rac a top of something or you are planning to create a scallop using the trim.


After sewing the ric rac to both sides of my base ribbon I attached second accent ribbon atop of the base using a scalloped decorative stitch that comes standard on my sewing machine.

Your handmade one of a kind trim is finished and after centering it onto your bodice and top stitching down both sides you will continue to construct the bodice of your molly as directed.


Now that you are to the point in the pattern where you would be adding elastic to bottom of your sleeves, and adding the skirt to the bodice. lets take a moment to go though the extremely easy steps of creating a scallop edging.
To start off with I shortened my sleeves 1.5" in order to create more of a flair cap sleeve. After doing so I finished constructing the start of the bodice. To the point where I had what is pictured above.
I then using the same trick we spoke of earlier added the ric rac, this time to the right side of the fabric.

After you are finished adding the ric rac to the sleeves and base of the bodie you will go ahead and finish your sleeves. simply finish of the raw edge by running it though your serger. Then you will flip the bottom half of the ric rac into the inside of the sleeve and top stitch.


(finished edge and flipped under)

(top stitched)
Okay now onto what most would view as an overwhelming task.... The ruffles!! Im here to insure to you that this takes no time at all because I was able to use the directions from the Penelope's Princess Ruffle Dress pattern.
I did have to shorten the width and length of the ruffles a little, but it was super easy to do!

After attaching all the ruffles I was able to continue with the steps in the Molly's pattern right where I left off!
Now how simple was that?
Isn't it amazing what just a few little extra embellishments can do? I know Miss A has many more Molly's calling her name for the summer!!

Happy sewing y'all Miss A and I off to go play out back.
And because we are strong believers in giving credit where credit is due. Id Like to give a shout out to a sweet business friend of mine, who is the master mind behind that adorable flower in Ayla's hair.
Nicole over at Lillianna Marie Designs is one of the most talented women I know! So thanks Nicole for creating amazing quility hair goodies that Miss A will leave in!
Applique design for stackable scallops is available HERE from our friend Heather of Bobbin for Appliques!!!
Oh! And I almost forgot! Because Molly's Faux Apron Peasant Dress is a rerelease it's 50% off for the next 24 hours only! So go get your's today! With all these easy embellishment options you should be able to let your imagination take you away and create some amazing dresses with this pattern.