
Today we're going to talk about how to cut fabric using a rotary cutter. One of the things I love about PDF patterns from CKC is that many of the pattern pieces are cut out as rectangles from a cutting chart. This means less printer paper, less ink, and less pinning! The cutting process goes so much more quickly than traditional paper patterns. CKC patterns do sometimes have pieces to print, such as a sweetheart bodice or armhole curves, but most of the time we will get our pattern piece measurements right off the cutting chart, such as this one from our free Marilyn's dress pattern:

Some of our new fans ask how the cutting chart is to be used, and that's what I'm going to show you today! You can use scissors and a ruler to cut out the pieces on the chart (that's what I did for my first few) but it is much easier and more accurate if you use a rotary cutter, a cutting mat, and a long ruler. My mat is a 36"x 24" Fiskers self-healing mat (Amazon) and it is one of the best sewing purchases I have made! My rotary cutter is also Fiskers brand. Let's get started!

The first step in using a rotary cutter is to make sure that your fabric is smooth and folded evenly, especially if you are cutting through more than one layer. In the picture above I have the fabric folded in half with the fold on the left and the selvages on the right.
Next you will want to make sure the bottom edge of your fabric is completely straight. I usually cut off 1/4" to 1/2" to be sure. Once it is straight, line your fabric up with the bottom line and the far left line. If they aren't perfectly straight on all sides, adjust before you start cutting!
In the picture above you can see that my fabric is flat, the bottom edge is straight, and I have it lined up in the bottom left corner. That is where I will be measuring from so I'm all ready to go.
I recommend that you always cut your largest pieces first. In the Marilyn's chart above, that would be the dress pieces. I am not cutting out Marilyn's today though - I having something else I'm cutting this fabric for and you'll get to see when I'm done. So for today's project, I need to cut my largest piece to be 18" x 38". For CKC patterns we always list the length before the width. Your length is always measured up and down and the width is always measured from side to side.

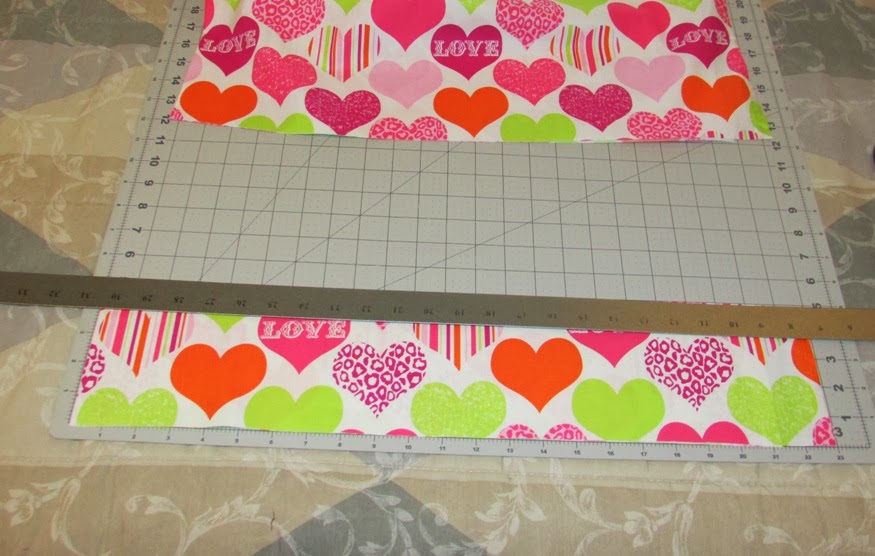
My piece needs to be 18" long, so with my fabric still in the bottom left corner, I measure up 18" on my mat and lay my ruler across the fabric, making sure that it lines up with the 18" mark on both sides. I hold the ruler firmly in place and cut right along the edge using my rotary cutter. If you haven't used one before, it's just like a pizza cutter and VERY sharp.

I now have a piece that is 18" long. Once I make the cut, I can slide the excess fabric out of the way.
I'm not done yet though, because now I need to make my piece 38" wide. You may remember that my mat is only 24" wide - and that is why it is useful to have our fabric folded in half! Instead of needing a mat that is wider than 38", I only need my mat to be 19" wide. Perfect.

I have not moved my fabric piece so it should still be lined up in the bottom left corner, but I always check to make sure it's still in the right place and that the fold is on the side I'm not cutting on. Now I'm ready to make my piece 38" wide. Half of that is 19", so in the picture above you can see that I lined up the right edge of my ruler with the 19" mark. (Lefties may want to line up the left side of the ruler.) Now I will use the rotary cutter to cut along that line, being sure to press enough to cut through both layers.

Now we have a piece that is 18" x 38" just like I need.
This is a pretty large pattern piece and we won't always need the fabric to be cut on a fold. But here's another situation where it is good to have the fabric folded over:

Now we're going to cut two pieces that are each 5"x 14.5". I have the fabric folded over again, and we will start out by cutting the 5" length. I lined up the ruler on both sides and I'm ready to cut.
Now I have one very wide piece folded in half that is 5" long. I want it to be two pieces that are 14.5" wide each. So I will flip the fabric around so that the two edges are on the LEFT and the fold is on the right:

I need to cut off the selvages and line up the fabric with the left line. Remember my fold is on the right now because I don't need it and will cut it off. I measure over the 14.5" and cut. I now have my two pieces stacked and ready to go!

Using a rotary cutter can really speed up the cutting process on multiple cuts. Moving onto our next set of pieces, you can see in the picture above that I made a cut at 6.5" long and then another cut at 13" long, without having to move the fabric. Now the ruler is lined up and ready to cut through both of them at the same time for their width.
Once you get comfortable with the rotary cutter, you can cut out an entire outfit in hardly any time at all! I can cut out all the pieces for Amanda's Triple Ruffle Skirt in less than five minutes. You can too, once you get the hang of it!

Like I mentioned at the beginning, sometimes our CKC patterns do have pieces that need printed out. The pattern will explain how to use those pieces, and they are often cut right out of the rectangles that you made using the chart. Above you can see that I placed an armhole curve in the corner of my rectangle. We do recommend cutting all curves with scissors. When you are all done cutting your straight lines and pattern pieces, you will be shown what your pile of pieces should look like before you begin sewing. Here is what my pile looks like:

So there we have it! If you have any further questions about using a rotary cutter, feel free to ask us in the CKC Pattern Group. And stay tuned for next week's Tips and Tricks blog when I show you what I'm making with the pieces we cut out! Can you guess what it is? I received these fun Michael Miller fabrics from one of our blog sponsors, Katie's Quilt Shop. Aren't they perfect for Valentine's Day? I can't wait to see how my project turns out!
Let's Create! ~ Kristen