Hi (waves), it's Julie here, I've introduced myself before on the blog but I'm back with a new title! Pattern Designer! I have joined up with the Create Kids Couture team, and very soon we will be releasing something new; dancewear/ gymnastic/ cheer/ figure skating/ activewear patterns! If you are a dance mom like me, you know how much all those jazzy spandex outfits can cost, so have a little fun learning to make your own at a fraction of the cost!
One of the techniques that I will frequently be using in the patterns is mimicking the look of a serger coverstitch. If you look at the hem of most manufactured knit garments, you will see a coverstitch like this t-shirt I pulled from my daughter's drawer. On the left side, you see the front view, two straight lines of stitching, and on the right side, you see the underside of the hem, it looks pretty much just like a regular overlock stitch from a serger. If you were to pull sideways on this hem, you would notice that these stitches allow some "give" so that the hem can stretch with the fabric.
You could just finish your hem or sleeves with a straight stitch, but if you want to make your finished product look more polished, why not try out using a twin needle?
Above shows the package of two twin needles I picked up at my local fabric store. In a perfect world, to sew with knits and spandex, I would have purchased a Stretch Twin Needle (either 2.5/75 or 4.0/75) but the fabric store near me has very little selection. These will work just fine.
Let's look at the writing on the package.
*They are a Universal Twin Needle meaning that they will fit on any sewing machine brand, and they have two needles mounted on a single shaft which means you can just take out your regular needle and pop one of these in it's place!
*The numbers 130/705 H just means the needle system used by home sewing machines (as opposed to commercial machines), The numbers below that are the ones we are most concerned with.
*The first number (either 2.0 or 4.0 in the needles I pictured above) references how far apart your two lines of stitching will be. So on the left, the stitching will be 2.0mm apart and on the right, 4.0mm apart. Either one will work, it just depends on the look you are going for.
*The second number (80 on the needles I pictured above) reflects the size of the tip of the needle. The scale goes from 60 (for very fine tip of the needle best used for light fabrics like chiffon) up to 120 (for a thicker and heavier tip of the needle best used for fabrics like thick upholstery fabric etc)
So now that we know what the words and numbers on the needle mean, let's figure out how to thread our machines with them! If you have a manual for your machine, my best advice to you would be to read up on how to use them on your machine. But in case you don't have a manual, I will show you how to do it on my machine.
This is my workhorse, my Janome Memory Craft 9700.
I start by making sure I have 3 spools of thread so that I can thread the twin needle. I need a regular bobbin, plus a regular spool of thread, plus another spool of thread in the same color (OR you can just wind another bobbin of the same color to use as the second spool of thread). I load up my bobbin as usual, then I swap the regular sewing needle out with the twin needle. The next bit is the tricky part. Put your spools of thread on a flat surface and flip them around until you have one spool of thread with the thread winding off as normal (coming out of the left hand side of the spool). The other spool need to have the thread wind off the opposite way (coming out of the right hand side of the spool. Look at the picture below to see what I mean.
Now you will load up the spool of thread that spins off from the left onto your thread holder as usual, but don't thread it through the machine yet. Place your other spool of thread on your second thread post with the thread still spinning off from the right (Mine 2nd thread post was an extra piece that I had to get out of the package and put on, but some just fold down). If you don't have a second thread post, just place the second spool on top of the first spool if you post is long enough.
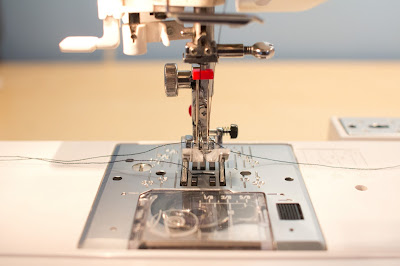
Grab both of the threads in your hand and thread them through your machine as if they were one thread. When you get to the bottom, if you have a hook on either side of your needle, then separate them, one on each hook, otherwise, just place one through the hook and one outside the hook. Finish by thread one through each needle. (On my machine at least, it doesn't seem to matter which thread goes in which needle)
My machine has a button you press to put my machine into "twin needle" mode but I can use the twin needle just as easily without pressing it. It is just there to ensure that I don't try to zig zag or embroider with a twin needle in! Just place your fabric under your presser foot and sew as usual. You can straightstitch and backstitch no problem!
Here is what the top side will look like:
And here is what the bottom side will look like (it'll be like a zigzag almost)
I hope this was helpful, and please if you have any questions feel free to email me at julie@createkidscouture.com


