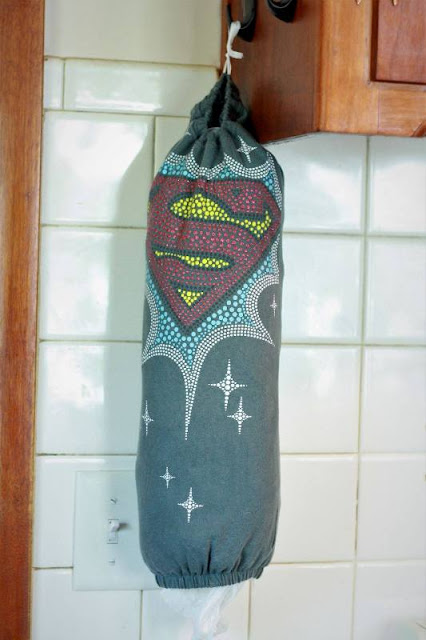
There are a bunch of back-to-school sales going on right now in stores, and I've noticed that not only are the graphic tees super fun this year, but they're also fantastic prices. So I thought this would be a great time to do another T-shirt upcycle pattern for you! This one is just as useful as it is cute:
It's a grocery sack dispenser! So fun, right?! Plus the whole project only takes like 15-20 minutes max to complete. That's my kind of upcycle!
You can use various sizes of T-shirts to make this. We used a children's size but you can try any of your favorite tees as well.
You will need:
T-shirt
Scissors
Sewing Machine
Thread
11" elastic (1/4" to 1/2" wide)
16" ribbon (1/4" to 1/2" wide)
Lay your T-shirt out on a flat surface.
Place a ruler on the shirt from top to bottom, 1" from the outside edge of the neck band at the shoulder. Cut straight down both sides, as shown above.
Note: The size of your shirt may vary so you can cut it more or less than shown, or even angle it down if it seems wider than you want. Just be sure not to cut into the neckband because you will use it for the casing!
Turn the shirt inside out and sew/serge both sides you just cut, connecting the front shirt to the back shirt at the sides.
With it still wrong side out, fold up the bottom edge 1" (or whatever your bottom hem is) and iron to set the fold, pinning as you go. Then sew along the upper edge all around the fold to create a casing. Be sure to leave an opening to insert elastic.
Using a safety pin, thread the elastic into the casing and push it around until it comes out the other side. Overlap the ends of the elastic by 1/2" and sew in place. Then sew the casing shut. It should look something like the photo above.
Turn it right side out. It should be looking pretty great!
You are going to use the existing neckband as the casing for the ribbon so it can be hung. On the center back of the neckband, on the right side of the shirt, fold the neckband in half to help cut a small vertical slit. See photo above.
Use a safety pin to insert the ribbon into the casing and around through to the other side. It should look like the photo above.
Tie the ends of the ribbon together at the length you want the loop to be. You can either tie a cute bow in the top, or you can tie a basic knot and then slide the knot so it's hidden inside the casing.
All that's left to do is hang it up in a convenient spot and fill it with those handy grocery sacks.
Here's another fun one we made. You can choose just the right shirt for that perfect spot in your house!
We hope you enjoyed this tutorial. We have hundreds of free tutorials here on our blog so be sure to take a look around and use our search box up in the corner to find what you're looking for.
Let's Create! ~ Kristen


