Our little ones can be rough on their stuffed animals! Sooner or later we may find ourselves with an injured stuffie and not know what to do with it. Most parents would make it mysteriously disappear or try to replace it -- but there's a good chance that it can be fixed with just a needle and thread! With today's blog post and a little TLC, you can help make your little one's stuffed animals (almost) as good as new!
Here is our latest patient. I wouldn't say that having Bart's leg broken is the greatest tragedy in the world. However, my son brought him home as a souvenir from Universal Studios and seems to think that Bart is a pretty important little dude. And so with tears Bart was lovingly placed by my sewing machine in hopes that I could fix him. And honestly... he was no problem at all!
I will walk you through how I repaired Bart here and you'll see how un-scary it actually is to sew these guys back together.
First of all, assess the situation! (This is my first aid training coming through.)
If you have a "pose-able" or structured stuffed animal like this guy, it may have wires inside. If it does, make sure they are bent into place to match the others, if possible. (On my guy, I made it match the other leg.)
Then if the other side of the fabric is hidden up inside, try to pull it outward the best you can, so it's where you can work with it. At first I thought I would be sewing his leg to his shorts, but it turns out that he has a yellow body up in there to attach the leg to! Obviously, though, a lot of stuffed animals won't be wearing clothes so it will be super easy to see what needs done.
After getting things sorted out up there, go ahead and stuff all the stuffing in the best you can so it looks right. If your child has played with the injured stuffed animal at all, you may need to add some stuffing to replace what may have fallen out. (Luckily that wasn't the case with Bart. My kids have learned to come to me ASAP.) Go ahead and line up the edges the best you can so make the sewing easier. I haven't had success trying to pin this kind of project at all, so I just hold it in place as I go.
Next you need to make sure you have a good thread color! I often use clear thread or even fishing line to fix stuffed animals so the stitches won't show -- but in this case I have the perfect yellow thread to match the existing thread. Even better! (Plus it will show up in the photos below.)
Cut off some thread -- I cut mine 30" just out of habit. You may want more or less. I like to have enough to do the project but not so much that it will get tangled. (Keep in mind you will be doubling it over.)
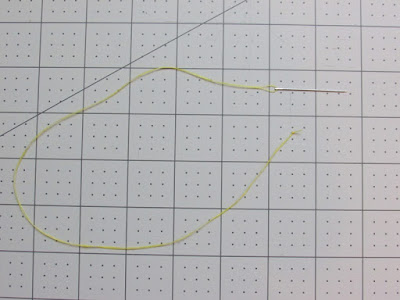
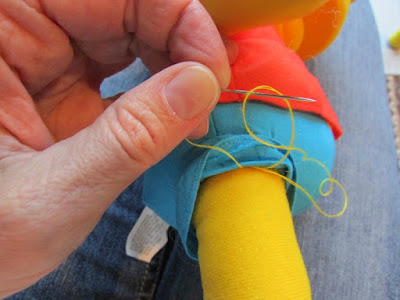
Next, slide one end of the thread through the hole of your hand-swing needle, as shown above.
Then pull on both ends of threads so they are even with each other and tie them in a double knot at the ends. Your thread will be doubled over, with the knots at the ends and the needle opposite of them, as shown above.
Starting just past one end of the tear, place the needle through the fabric from the inside out, where the seam allowance on the top begins. See photo above.
Pull the needle all the way through and pull the thread taut. Then repeat the previous step, this time just a little way over from the first stitch. If you can tell where the original holes/stitches were, then use those markings as a guide. Otherwise you will space your stitched about 1/8" to 1/4" apart, depending on the size of the stuffed animal and what it's fabric is made of. (Fraying or delicate fabric needs stitches that are close together; furry fabrics can usually be spaced a little farther apart.)
While holding the previous stitches tightly, continue stitching top to bottom at even intervals.
Important: As you stitch, make sure the fabric edges are folding inward under the stitches, rather than outward. They will be more sturdy and look better with no exposed edges. You can use the needle to tuck the edges inward if needed.
Repeat and repeat and repeat. You can do it!
Continue on with more even stitches...
(Really, this took only a few minutes from beginning to end. I just didn't want to skip any steps for you.)
Be sure to pull tightly in between each stitch. It's okay if they loosen a little while you're in the act of stitching - just be sure to tighten them back up again before you get too far down the line.
Note in the photo above that some of the original yellow threads are still there on the left side of the yellow fabric. I could have trimmed those away before I started, but I chose to leave them there on purpose so the leg would stay as stable as possible. If you trim them too early, the original stitching can unravel even more, making more work for you.
In the photo above, I got to where the original threads were somewhat in my way, so I pulled them tight and tied the original threads together tightly in a double knot. Then I trimmed them before continuing on with my stitches.
When you get to the end of the hole you're repairing, continue on with a couple more stitches to make sure the seam is totally closed up and sturdy. It's okay to sew over the original stitches at this point. Try to keep it all neat and tidy!
When you're done, it's VERY important to tie a good great awesome knot! The best way to do this is to run the needle through for one last teeny-tiny stitch, as shown above, but don't pull it through all the way yet...
After pulling the needle (but not thread) through, find the loop of thread and make your needle go back through the loop all the way, as shown above. Then as you pull the needle through that loop, it will automatically move the knot down to the very edge of the fabric. Pull it tight and then repeat with a second stitch-knot. (I don't think it's really called a stitch-knot. That's just what I call it.)
When you're done, you should have a double knot right next to the thread. DO NOT cut it quite yet though!!
With the thread knotted and still attached to the needle, run your needle through any random spot in the leg, as shown above. (If the fabric is delicate, do it in a hidden spot.)
Then pull the thread through at that random spot. Tug on it gently to help pull the excess thread and knot through to the inside of the animal. Now you're ready to cut the thread right at the fabric surface. (Of course be careful not to cut the fabric!
And there you go! Your stuffed animal is all fixed!
All that's left to do is return it to its loving owner and become the hero of the day.
Let's Create! ~ Kristen


