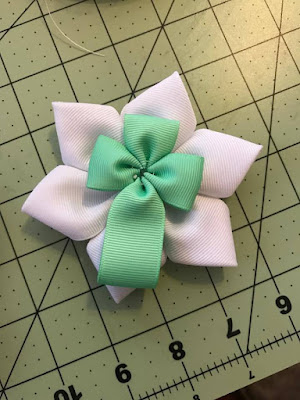
In our patterns group we can see you're all busy at work getting those Easter outfits sewn up. They're turning out so amazing! Well, today we have a special guest here to teach us how to make the perfect accessory to complete the look. Sheri Cata from Izzy's Bow-tique has showed us some bow tutorials here on the blog before, and this may be my favorite yet! She's always so creative and right on time for the upcoming holidays. This project is exactly that! Here's Sheri:
Hey everyone, I’m super happy to do another hair accessory tutorial for CKC. I like hair bows with size options so as usual I have done all the math for you guys on using 4 different sizes of ribbon.
Oh, and I have a great tip at the end of the tutorial for you guys as well! So lets get crafting!!!
First, we're going to need some basic supplies:
- glue gun and glue sticks
-scissors
- lighter or heat sealer of some sort
-needle and thread
-any type of ribbon except wired (it doesn’t work so well) in 7/8, 1 1/2, 2 1/4 or even a huge 3” wide ribbon works as well.
- embellishment for center of cross.
- clip or headband of choice
- felt circle
Ok, so now let's really get crafty!
1. First, we're going to cut our ribbon to the length specified by the size of ribbon you have chosen. Below I have a cheat sheet for you guys with all my lengths I have tried and tested.
7/8th” ribbon- 3 - 2” pieces and 1 - 4” piece
1 1/2” ribbon - 3 - 3” pieces and 1 - 5” piece
2 1/4” ribbon - 3 - 4” pieces and 1 - 6” piece
3” ribbon - 3 - 6” pieces and 1 8” piece
Here is a picture of all the sizes and how big they will be when finished.
2. You will need to heat seal the ribbon to make sure we have no fraying. If you skip this step, when sewing the pieces your thread will pull and unravel your bow and we don’t want that!
3. Now we're going to start with the longest piece which will end up the bottom of our cross. First you want to fold it in half with the fold on the bottom and the 2 ends at the top. You want to sew it exactly like the pic. Starting from the front go IN - OUT - IN - OUT. You will end up coming out on the front side as well. Now pull it a bit to scrunch it up.
4. Continue with the rest of the pieces till you have something similar to the pic below.
5. Now we're going to pull all 4 tight and adjust as needed. You may need to shape it a bit but it should basically fall into place.
6. Now we're going to stitch our ends together like I did in the pic. Make sure to double or even triple knot it so it doesn’t come undone.
7. Now we're going to attach whatever embellishments you want to it. Here I'm using a cute flower I had laying with my bow supplies. Hot glue that pretty thing in place and then were going to attach a felt circle to the back with hot glue.
BUT WAIT JUST A SECOND!!!!
I have a fun trick I told you guys I would share in the blog post today.
So you know that awesome stuff you can buy in the kitchen area at Wal-Mart? The non slip grip stuff? Its like $5 for a huge roll and you only need 1 inch of it for my trick that can be done on any bow you have even if its already finished.
So cut a 1” piece of that stuff and glue it to the inside of the bottom of your clip. TA-DA!!! Now you ladies who have girls with super fine hair that those clips just keep falling out of, have a quick and cheap way to make sure those clips stay put.
Please show off your own Beautiful Cross Hair Bows in the CKC page and in the comments, guys. Thanks so much for reading along.
~ ~ ~
A huge thank you to Sheri for sharing these bows with us! Don't forget to go show some love to her over on her page at Izzy's Bow-tique.
If you love the stacked green and white bow she made above, you can learn how to make the white flower part by clicking here!
If you love the stacked green and white bow she made above, you can learn how to make the white flower part by clicking here!
I can't wait to see the bows that you make! I love that she gave us multiple sizes and ways to use them. Just perfect for Easter, and beyond.
Let's Create! ~ Kristen


