Oh, how I love the 12 Days of Christmas! We start planning way early for these free projects and I've been so excited for this one to arrive. Sheri Cata is one of our testers who makes adorable gift-style hair bows out of ribbon and she has agreed to teach us her ways for our Day 2 free project!
Aren't they adorable?! My kids always like to stick the plastic gift bows on their heads as they open presents; so how perfect is it that these are made of sturdy ribbon, are attached to clips, and are ready to stay in your girl's hair all day long?! She can be as pretty as a present long before the gift-opening ever begins.
If you don't have the time or desire to make some of these bows yourself, you can grab some already made ones from Sheri at Izzy's Bowtique. (She does an amazing job!) Or, if you're here to learn like I am, let's get ready to have some fun! The large bows use 7/8" ribbon and the small bows use 3/8" ribbon.
Here's Sheri!
First, you need some fun supplies:
3/8" or 7/8" ribbon
Scissors
Needle
Thread
Hot glue and hot glue gun
Hair clip to add to the back
Lighter or some sort of heat to seal the ends of the ribbon
Now you're ready to cut!
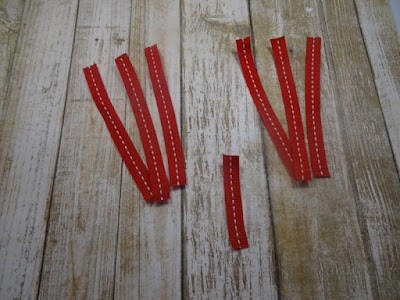
If you're using 3/8" ribbon, you will need six 4” pieces and one 2” piece, as shown above.
If you're using 7/8" ribbon, you will need three 8” pieces, three 7” pieces, and one 3” piece, as shown above.
Important: Now you need to heat seal the ends of your ribbon pieces so they won't unravel!
Next, we're going to lay our ribbon out in two stacks of 3, as shown above, with 1 piece left out for the middle.
With the 3/8" ribbon it doesn't matter which stack of 3 you use first, because the stacks are the same lengths. But for the 7/8" ribbon, you will need to start with your 8” pieces.
Now on to the fun!
Take those first 3 pieces and stack them up. Fold them in half so you can find the center (as shown above) and then poke your needle in the center. DO NOT PUSH IT ALL THE WAY THROUGH!
Now fan the pieces out evenly on your needle. Don't worry if they're not perfect because they will even themselves out as we go, for the most part.
Starting with the ribbon on the bottom of your stack, take the end and bring it to the center and flip it over so you create a point. Put the end on the needle.
Work your way around your little fan of ribbon doing the same with the other points, until it's all been twisted and slipped onto the needle.
(This is where heat sealing comes into play; make sure it's nice and sealed or it will unravel! Ask me how I know...)
Now take your needle and pull it through all the way, and thread it up and down a bit so you can tie it off. Okay, now you're done with your first set!
Do the same with the next set of pieces.
Now you should have a pile like this: Two separate bow sections and the one leftover piece we will use for the center.
Take your hot glue and dab it in the middle of the bottom section and lay the second one on top, shifting it so the points are off center of the bottom ones.
Then take your little center piece and form a circle using a dab of hot glue.
Place one last dab of glue in the center of your bow and place that circle loop in the center and TADA,
You have now made an adorable little gift-style hair bow out of ribbon!
We want to thank Sheri for teaching us how to make these adorable bows! Don't forget to go show her some love over in her shop, Izzy's BowTique!
We also can't wait to see the hair bows YOU making using this tutorial! Be sure to come share your photos in our patterns group. And stay tuned for another great free pattern tomorrow in our 12 Days of Christmas series.
Let's Create! ~ Kristen


