
NEW BLOG POST WITH UPDATED LINKS FOUND HERE.
It's time! Are you ready?! We can't wait for you to see all the amazing Halloween projects our team has been working on. Home decor, costume pieces, and all sorts of spooky stuff!
Our 13 Days of Halloween starts... NOW!

Eek! I'm so excited!
For our Day 1 project, we have an adorable piece that fits witches of ALL sizes! You will love how easy it is to make and how versatile it is, not just for costumes but also for those adorable Halloween dresses and pumpkin patch outfits.

Introducing our CKC Mini Felt Witch Hat! Aside from Leah's daughter being the cutest thing ever already, I think this mini witch hat puts her over the top!

And look how cute on a doll! Our doll's designer Sarah helped out with this one. Love!
Now just imagine an embellished mini witch hat on *your* own little cutie -- or even yourself. It's a must-make this season! Are you ready to get started? Here's Leah with the tutorial:
Mini Felt Witch Hat Tutorial
Materials Needed:
- 1 sheet of black felt
- Poly-fil
- Sewing machine or needle and thread
- Glue gun
- Elastic: Any size works, but FOE (fold-over elastic) works best
- Artificial flowers or other decorations (optional)
- Printed Template Pieces
First, download and print the template pieces. Then cut your witch hat pieces out of the black felt.
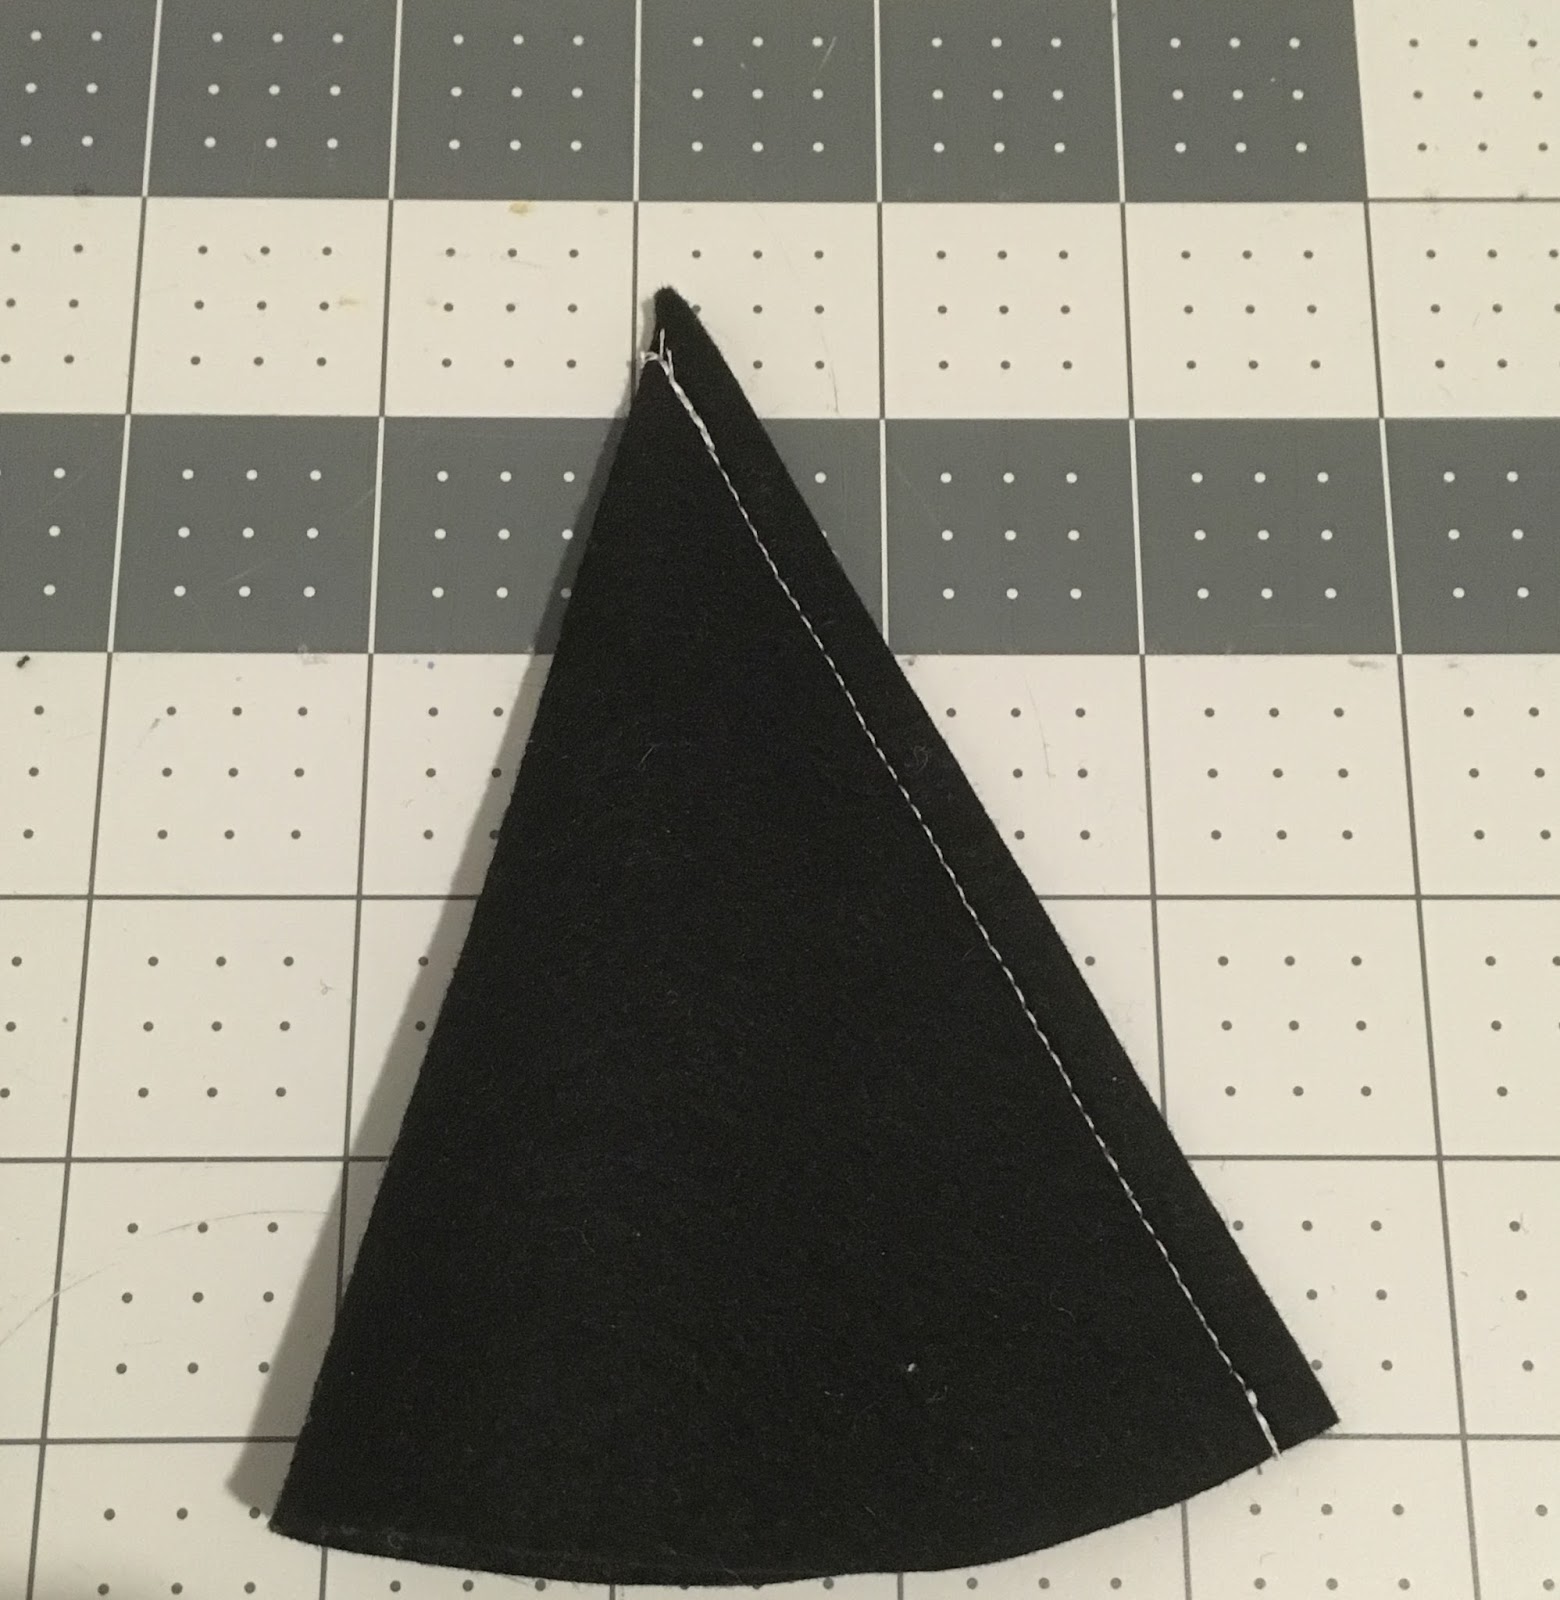
Take your cone piece and fold it in half. Sew ¼” along the long side.

Clip the very tip of the hat off. Be carful not to cut into your
stitching. Turn your cone piece right
side out.

Stuff the hat with Poly-fil.
Leave about the last ½” of the cone empty.

Now make ½” snips around the entire bottom of the cone.

Place some hot glue around the inner circle of the brim. (Then move quickly to the next step!)

Slide the cone piece carefully
through the brim. Push the cut pieces of
the cone into the hot glue.

Stuff the rest of the cone with Poly-fil.
Cut a piece of headband elastic in the size needed, using the
chart below.
|
Size of Model
|
Length of Elastic Needed
|
|
Doll
|
10”
|
|
0-6 Months
|
13”
|
|
6-12 Months
|
15”
|
|
12 mos. to 2 Years
|
16”
|
|
2 Years – Teen
|
17”
|
|
Teen – Adult
|
18”
|

Glue the elastic ends to the brim of the hat

Glue the closing circle piece onto the brim piece, enclosing
your stuffing.

Decorate! For my hat I wrapped some purple glitter ribbon around the hat and glued on some
artificial flowers. You could and felt
flowers or bows, feathers, buttons, or anything to decorate your newly made
witch hat.

Let's Create! ~ Kristen
