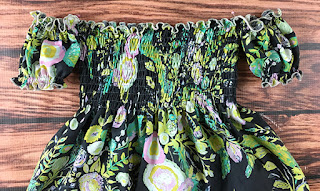
Here at CKC, we have been loving the cute off the shoulder looks that are so popular right now. We never did get around to releasing a pattern featuring the trend this summer, so we decided to show you two different techniques to turn patterns that you may currently already have into off the shoulder pieces.
The first technique I'm going to show you can be used with any pattern that uses a shirred cap sleeve. I used Faith's but Brooklyn's, Britney's, Ruby's, Kambria's, or any similar pattern can be used instead.
Step 1: The first thing we are going to do with our cap sleeve pieces is to fold them in half lengthwise with the right sides facing, pin in place, and sew as shown in red.
Step 2: Next, we will roll hem and shirr each sleeve just as we do in the pattern. The only difference now is that instead of it being the "sides" of the straps, it is now the top and bottom of the straps.
Step 3: Once we have our dress/top sewn and shirred as explained in the pattern, we will take the sleeves and pin them directly to the sides of the dress/top matching up the side seams with right sides facing.
Step 4: Finally, we are going to sew the sleeves in place by sewing down the seams and over the shirring about .5"-1" as shown in red. Make sure you go over the spot a couple times so that it is really secure.
That's it! Easy as can be! Now you have a gorgeous off the shoulder dress using a pattern you already have.
The next technique I'm going to show you can be used with any peasant top or dress. I used Meredith's Dress for this sample and just left off the front ruffle. I also decided to use knit fabric for a more free flowing look. Knit can be used in either dress as long as you are using a pattern without lots of ruffles or layers because that can weigh the knit down.
Step 1: Sew the bodice together as described in the pattern. No measurements need to change. Fold the neckline back 1/4" and then fold back an additional 3", iron and pin to set.
Step 2: Sew 1/8" up from the bottom fold leaving a 1.5" opening that we can thread elastic through.
Step 3: Sew 1.5" down from the TOP of casing we just made. This will create that ruffle effect when we add the elastic to the casing below this.
Step 4: Either measure your child's shoulder girth or use the chart above for your elastic measurement. Thread the elastic through the casing we created making sure that it doesn't twist while doing so. When we reach the end, sew the two elastic ends together again making sure that it is not twisted. Sew the 1.5" opening close.
That's it! You can now continue with the dress as explained in the pattern you chose to use!
I hope you enjoyed these two techniques for creating an off the shoulder dress without having to splurge on a new pattern!
Happy Sewing!
Shannon


