
I'm sure by now you have seen our new pattern for Stephen's Comfy Robe that just released. The pattern is not just for the boys either. It's cute and cuddly for everyone! Just take a look at this little bath beauty:

Isn't she precious?! I just want to scoop her up. The model's mama is Tamara Rykowski, one of our pattern testers. After getting my baby fix for a few minutes I noticed the adorable matching shower cap/bath bonnet she made to match, and realized that I've never made one before! But now I must! Tamara was so generous to offer her tutorial for us on the blog today. (Yippee!) She took pictures to show how, and at the end of the tutorial she even has another totally adorable photo shoot of her baby wearing the new shower cap/bath bonnet. Who can resist such cuteness?

Let's get started with Tamara's tutorial! Here she is:
First of all, for shower cap fabric I use Waterproof PUL fabric but any fabric would work if you are making the cap for cute pics rather than real use!
having half the plate on the paper and half off the paper.

Step Two: Measure three additional inches out all the way around the plate and mark with fabric
marker so you can make your circle larger.


Step Three: Cut out your half circle. Place the straight edge on the fold of your fabric.

Cut the fabric following the pattern piece's curve. You will now have a circle cut out.

Step Four: Roll hem all the way around your circle.

Step Five: Next you are going to shirr the edge of the cap all the way around. To do this you will need to wind elastic thread onto your bobbin. Set your tension as you normally do to shirr. Use your presser foot as a guide and set your foot just inside the rolled hem. Shirr all the way around and don’t forget to backstitch at the beginning and the end.
(If you need extra help shirring, we have a video tutorial here!)


Step Six: Use your presser foot width to shirr a second row next to the first. Again, don’t forget to
backstitch at the beginning and the end.


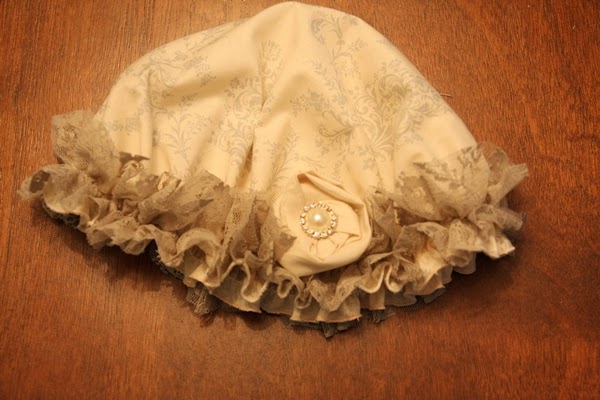
Step Eight: (Optional) Add embellishments as you wish! I chose to add a bow to one and a lace ruffle and rolled flower to the other, for completely different looks:


You have completed your shower cap/bath bonnet in eight simple steps!

Isn't she fabulous?! And such an adorable baby-in-a-tub with the cutest little bath bonnet ever. A huge thank you to Tamara for putting this together for us!
Now it's your turn! We can't wait to see the caps/bonnets you make for your little ones so please share your photos in our patterns group.
Let's Create! ~ Kristen