
Today we have a fun no-sew project that you and your kids are going to love! It's perfect for kiddos to make at parties and sleepovers, or they even make the perfect end of the school year I'm-going-to-miss-you-over-the-summer gifts!
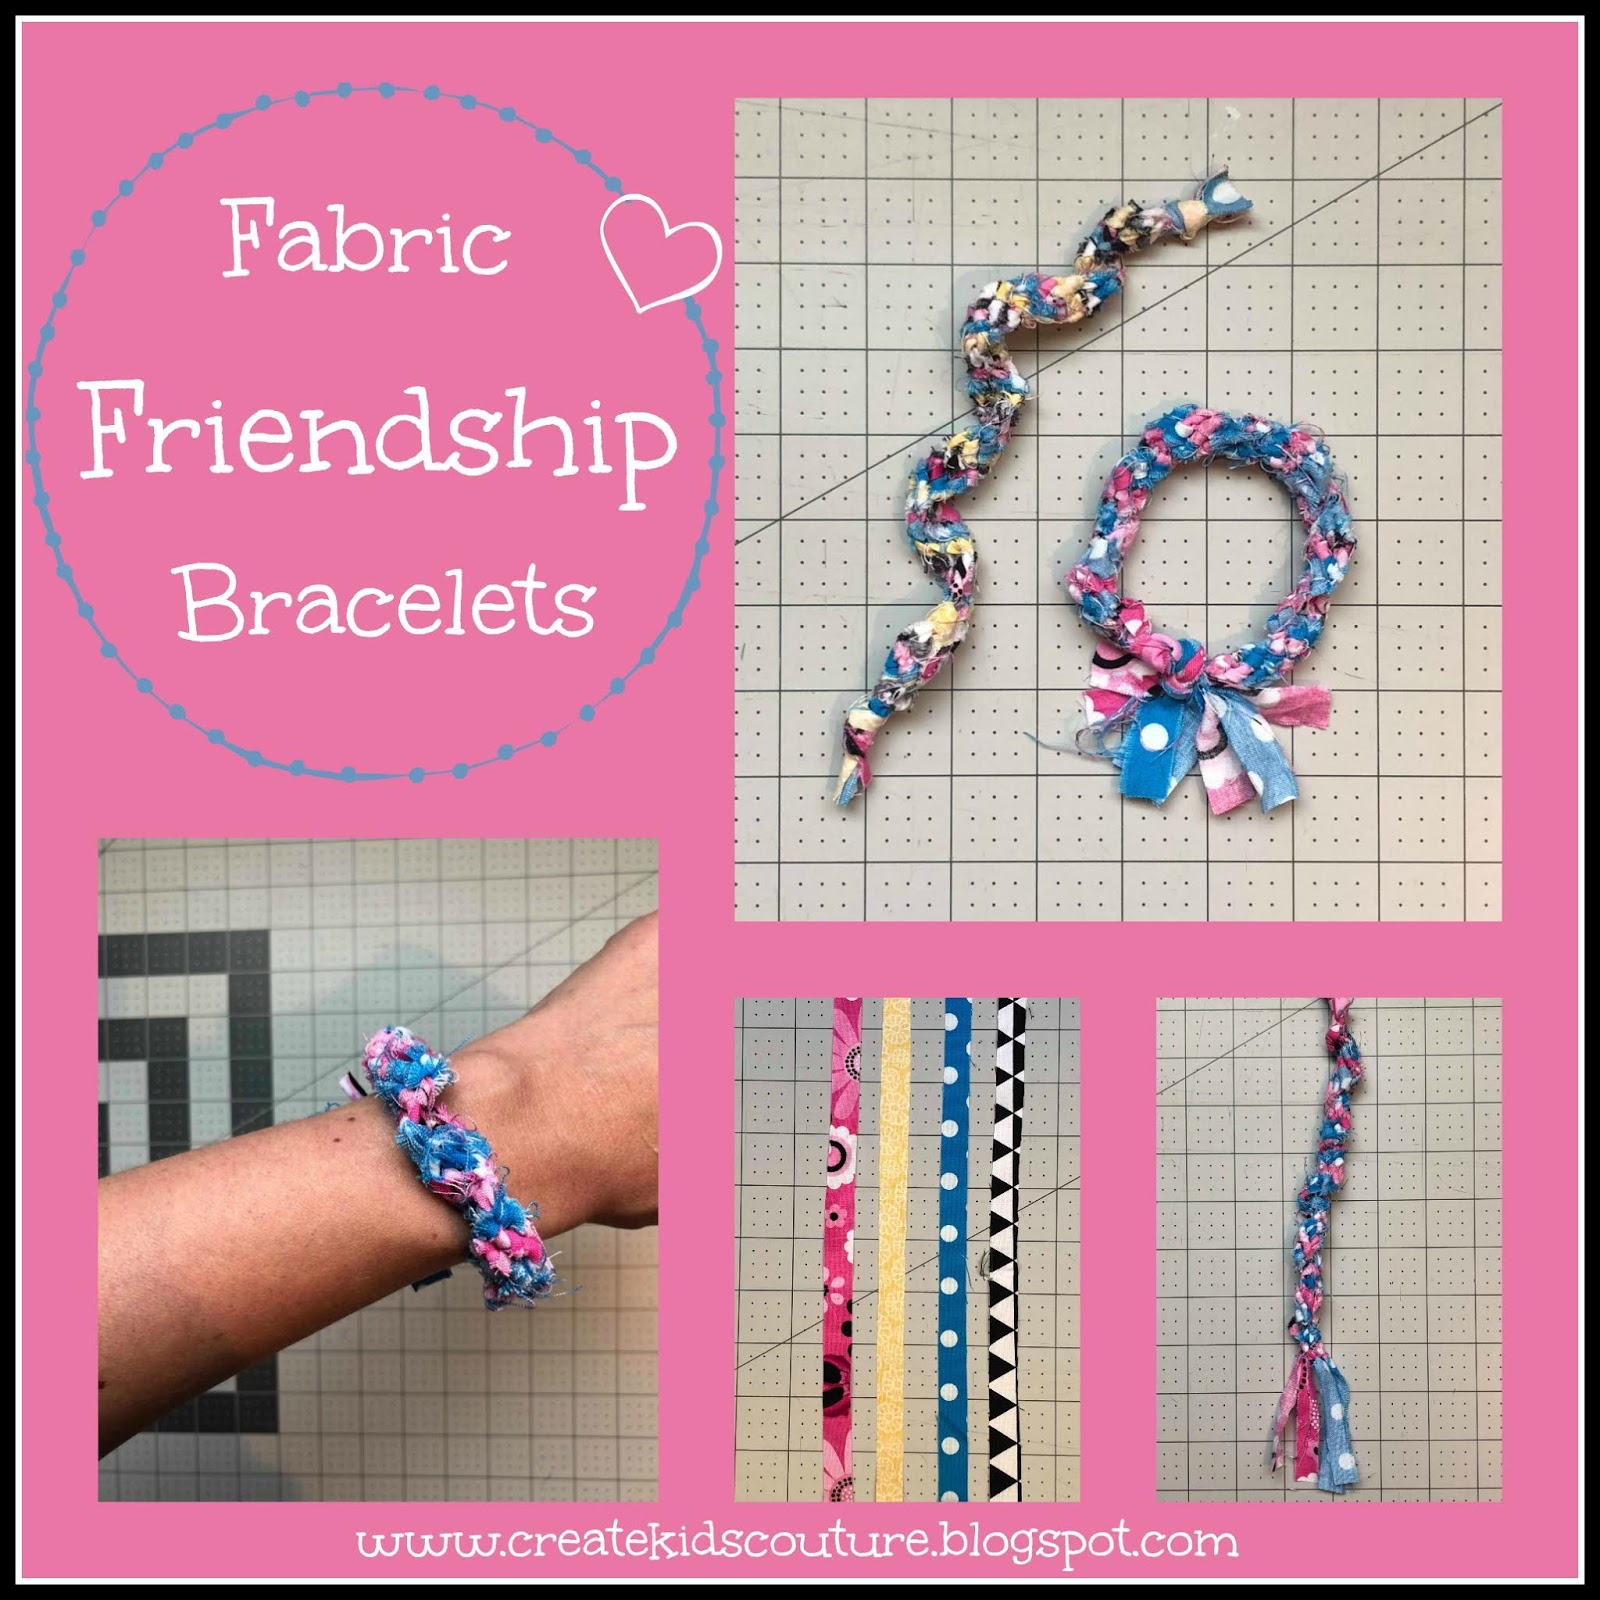
Aren't these fun?! I was inspired from my own kiddo days, when we used to make friendship bracelets using embroidery floss. I made a little twist on the same technique, giving these bracelets a scrappy fabric look to them-- much more trendy for today's kids!

Using today's tutorial, you can make either a tie-on bracelet with cute ties at the end, OR you can use jewelry hardware to fasten. The bracelet actually ends up stretchy from the knots, so if you like the tie-on look you won't have to untie it every time you wear it. It slips on and off easily.
However, if you like the finished look of bracelet hardware, that is definitely an option too:


If you want to use hardware for your bracelet, here is the easiest way to do it. Amazon has these jewelry clamps that you put on each end, and then use the lobster clasps to fasten and take the bracelet on and off. There are lots of other ways to attach too, so if you have a favorite go for it!
Either the tie-on way or the hardware way is perfectly fine. The steps are pretty much the same for both. Alright, let's get started!

First, cut four strips of fabric that are each 1/2" wide and 44" long (or your width of fabric).
You can use four different colors, or all one color, or two of each. If you use printed fabrics, just be aware that you won't see much of the pictures on it - you will mostly just see the colors on the final bracelet.


Next, take all four pieces and tie a knot securing all of them at one end:
* If you are making the hardware version, tie the knot about 1/2" from the end, as shown in the first photo above.
*If you are making the tie-on version, leave yourself 3-4" of tail ends before tying the knot, as shown in the second photo above.
The photos above also show two different color patterns you could do. It doesn't really matter what order you put the pieces in, but when I use two colors I usually group them together, as shown in the second photo. This makes more distinct stripes on the final bracelet.
For the rest of the steps I will use the four color bracelet, but everything is done exactly the same from now on!

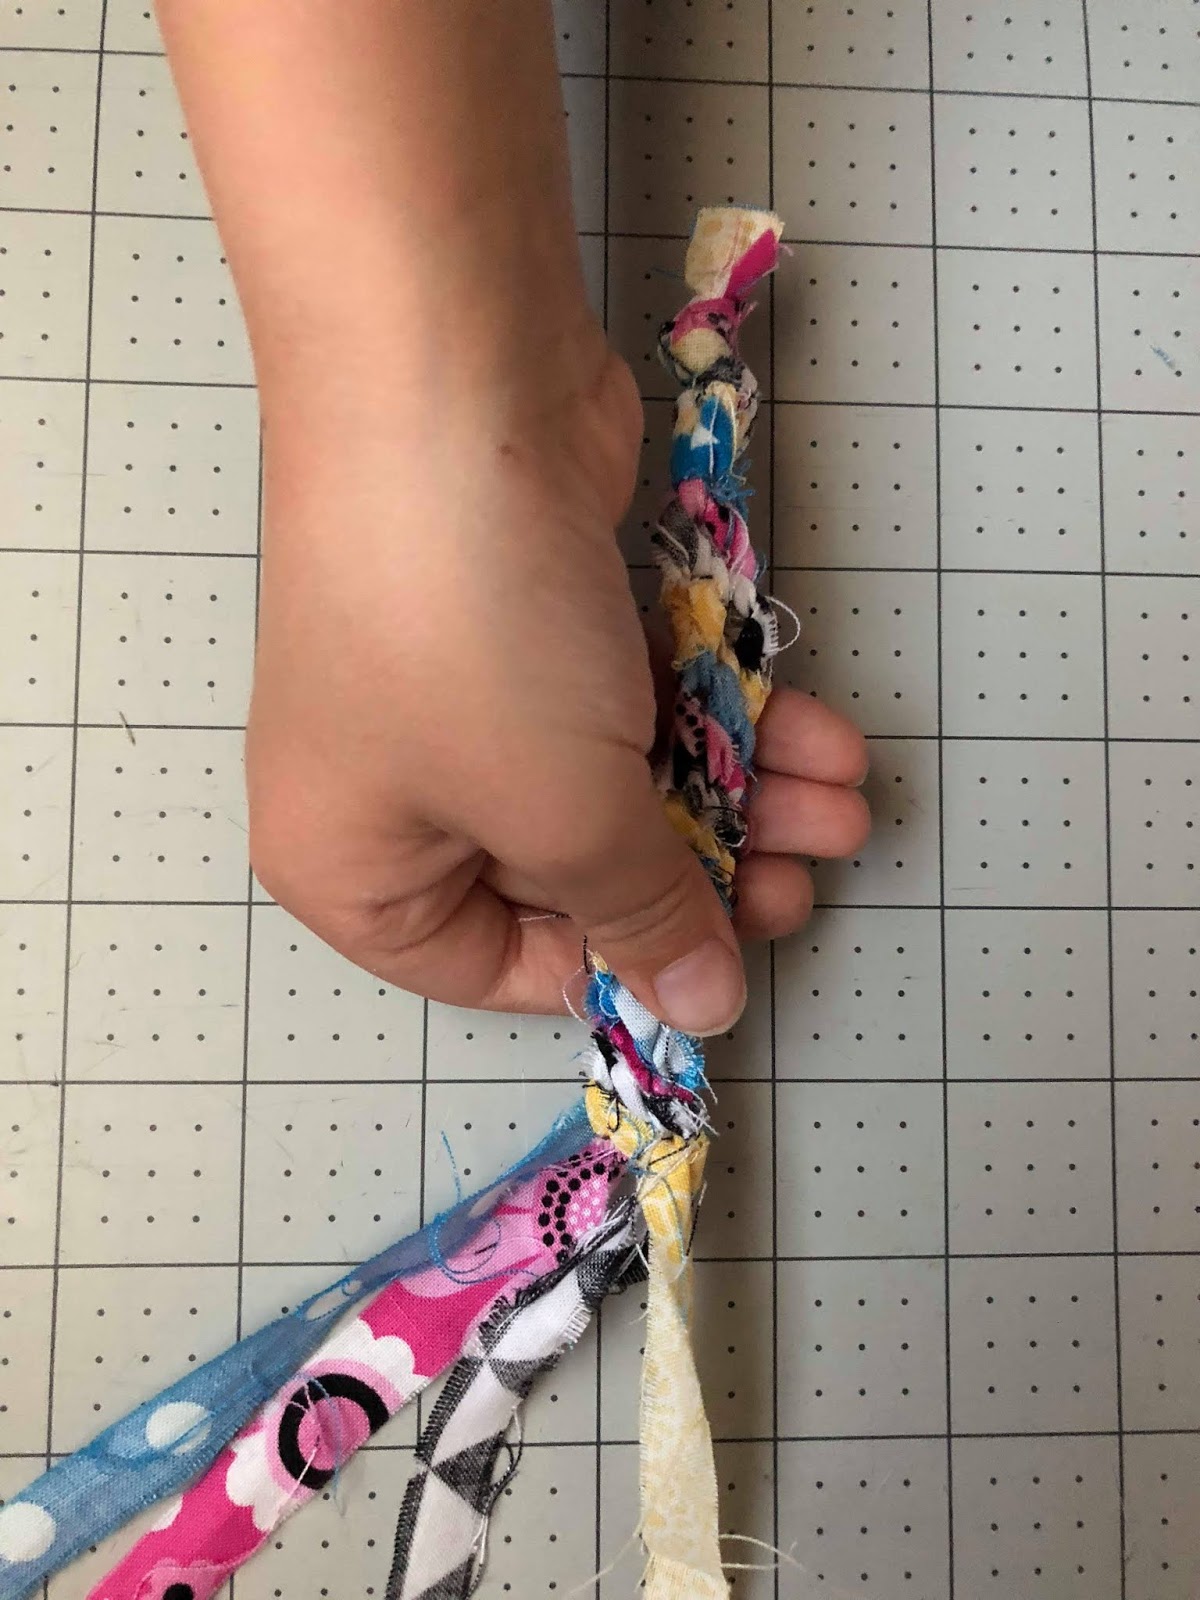
Now you want to find a friend to hold the large knot for awhile. (My 6-year-old son was the perfect helper for this.) Spread out your four strips and notice what order they are in.
To construct the bracelet, you start with the strip on the far left. In my photo, it's the black/white one.

Take the first strip and fold it over the second strip.

Tie the first strip in a knot around the second strip, as shown above.

Pull the knot fairly tight, toward the right.
In the photo above, you can see the black/white strip is tied around the yellow strip, with its tail going to the right.

Then take the same black/white piece and tie it around the next strip over - in this case it is the blue strip. Pull that knot nice and tight, again going toward the right.

Then use the same black/white strip to tie a knot around the pink strip. Pull it tightly to the right.

At this point you have tied the black/white strip around the yellow, then the blue, then the pink. You are done using the black/white strip for now.
It's time to use the far left strip again! This time it is the yellow one. You're going to repeat what you did above, tying the first strip around the 2nd, 3rd, and 4th strips.

When you're done tying the yellow to each strip in order, your yellow strip should now be on the far right.

Now you're ready to repeat again using the strip on the far left - this time it is the blue one.
The photo above shows what it looks like after you tie the blue strip around the pink, black, and yellow.

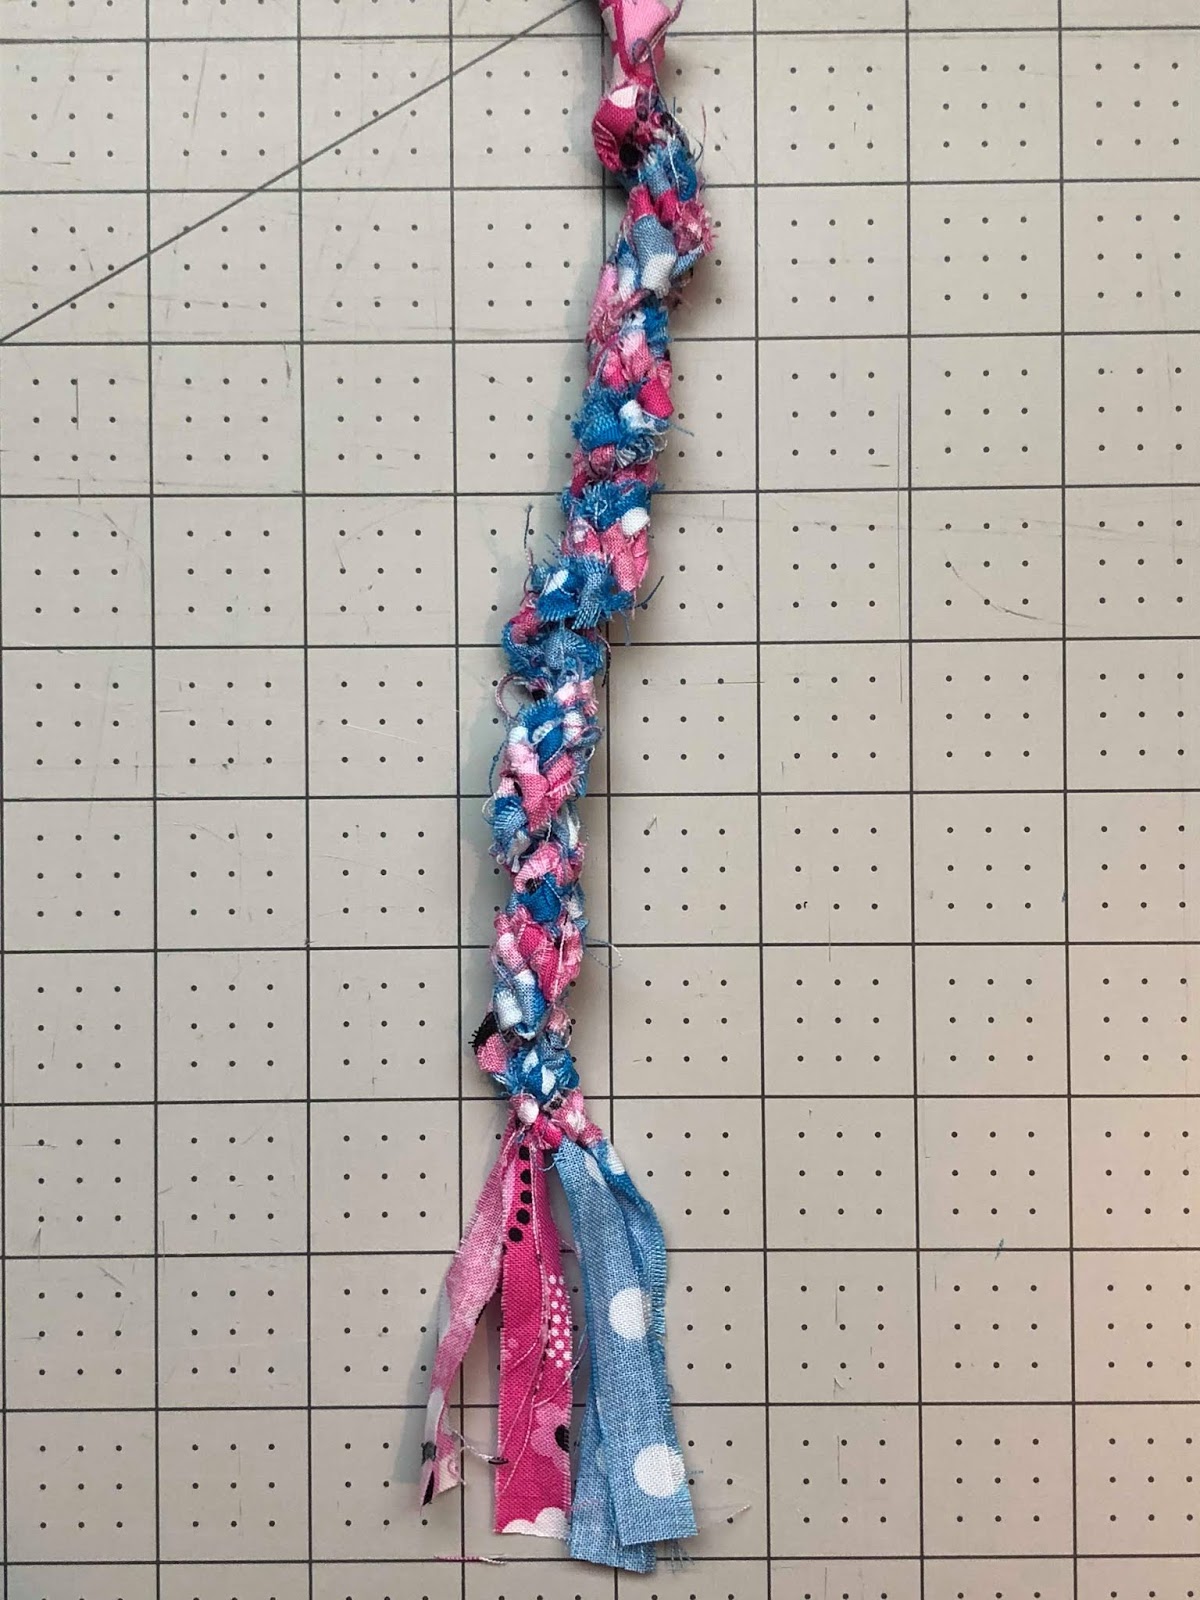
Repeat these steps over and over again, using the far left strip to tie across the other strips until it ends up on the right.
As you add new rows, you will notice the pattern become more visible -- each of the strips will make a row of its color. If you used two colors consecutively, the bracelet stripes are even more noticeable.
Continue knotting across in the same pattern. As you get farther down the bracelet, it is easiest if your helper holds close to where you're working, as shown above.

If your helper gets bored after a few minutes like mine did, you can also hold the ends between your knees. It's hard to do this at the beginning of the bracelet, but it's pretty easy after you get a couple inches along.

Continue knotting until your bracelet is as long as you want it. Note that the bracelet does twist slightly as you go. The looser your knots, the more it will twist. You can try to keep it flat as you go by knotting tightly and adjusting, or you can leave it as a twisted corkscrew effect. I actually really like the twisted look, so it's up to you. The photo above shows the 4-color bracelet fairly flat. The photo below shows the 2-color bracelet with it twisted.
When your bracelet is the length you want it (check your model's wrist), you can stop knotting and trim the ends to match what you did at the beginning - either 1/2" or 3-4" depending whether you're using hardware or leaving ends to tie. You also have the option to tie another large knot at the end so it matches the beginning knot, or you can actually remove the knot you made at the beginning. Now that your bracelet is all knotted, it doesn't really need the large knot!

As I mentioned earlier, you will find that the bracelet is actually pretty stretchy from all those knots that can be pulled. (The fabric doesn't stretch but the knots do.)
This photo also shows what the 2-color bracelet looks like when pulled out flat. Take that into consideration when you decide how long you want your bracelet. (Will it be pulled straight or will it be left in a corkscrew?)

If you made the tie-end bracelet, go ahead and tie the ends in a knot right now. The bracelet doesn't need to be on your model when you tie it.
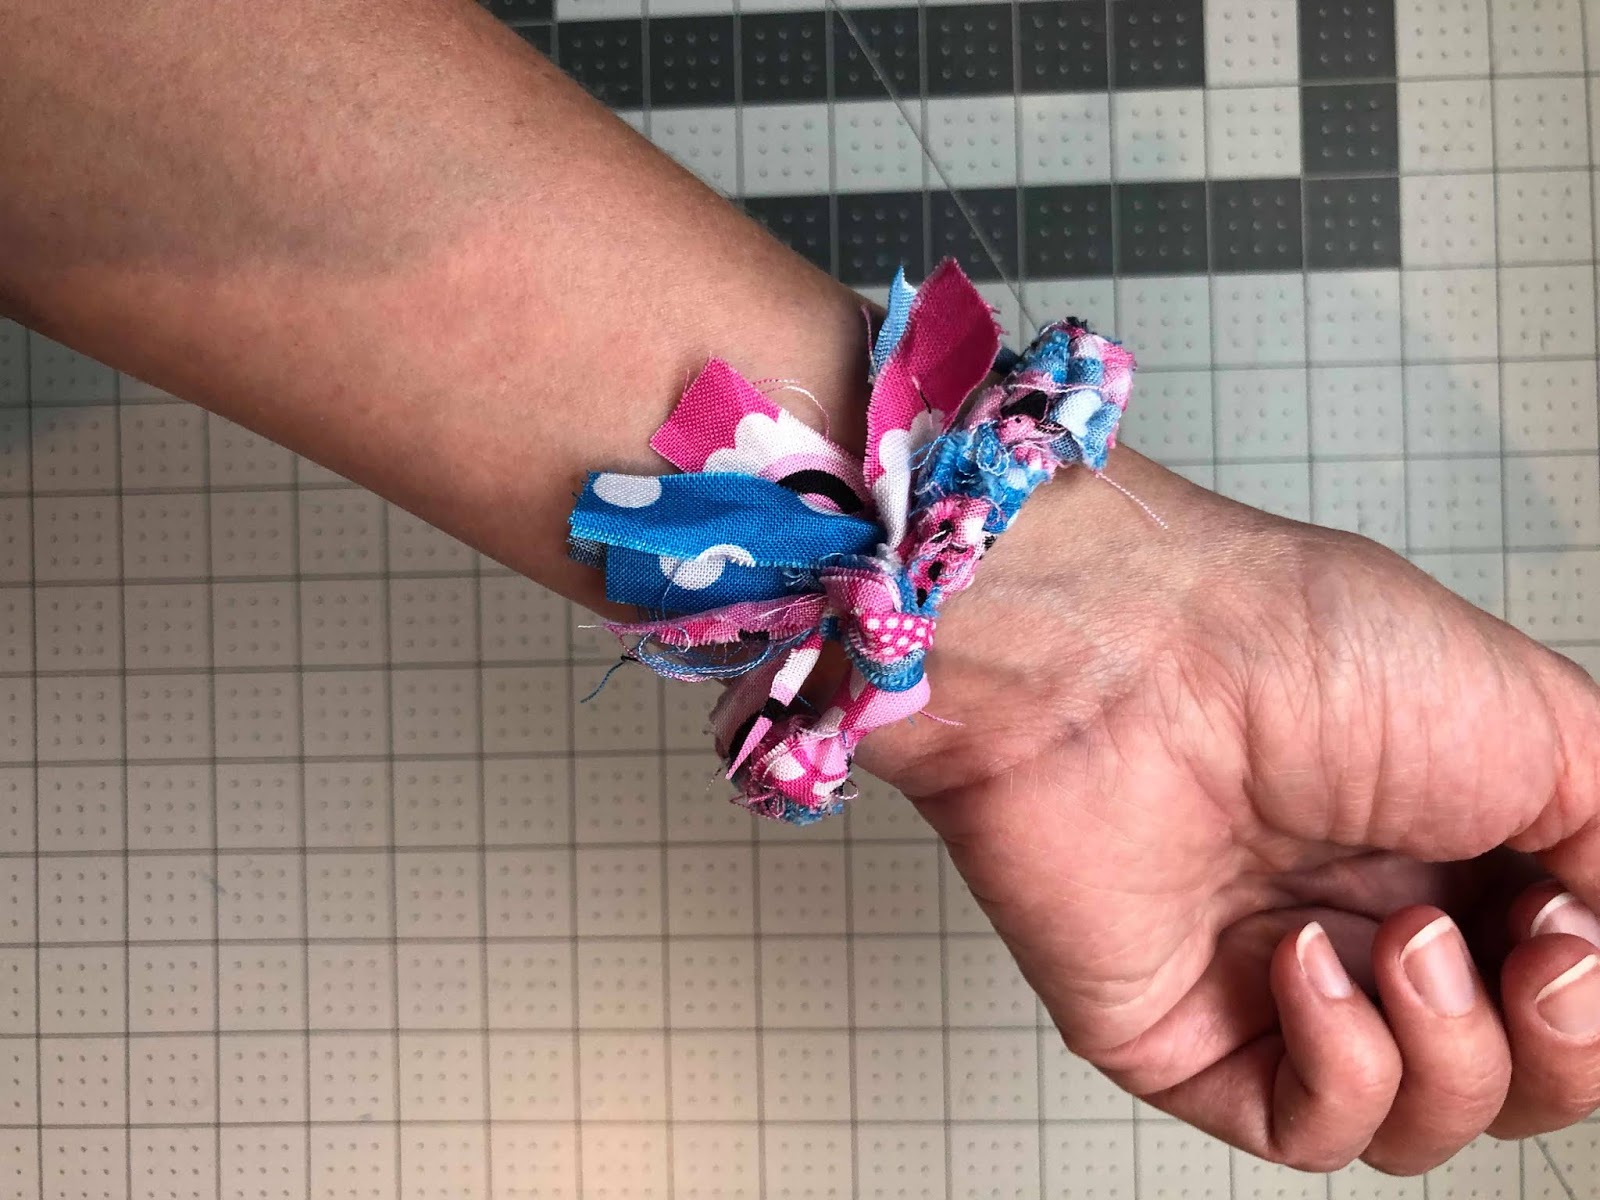
Then slip the bracelet on! Super cute! I have pretty large hands and pretty small wrists, so I can't imagine anyone's bracelet not stretching enough to slide over their hand. But if you knotted super tight and find that's the case, you can just tie and untie each time you wear it.
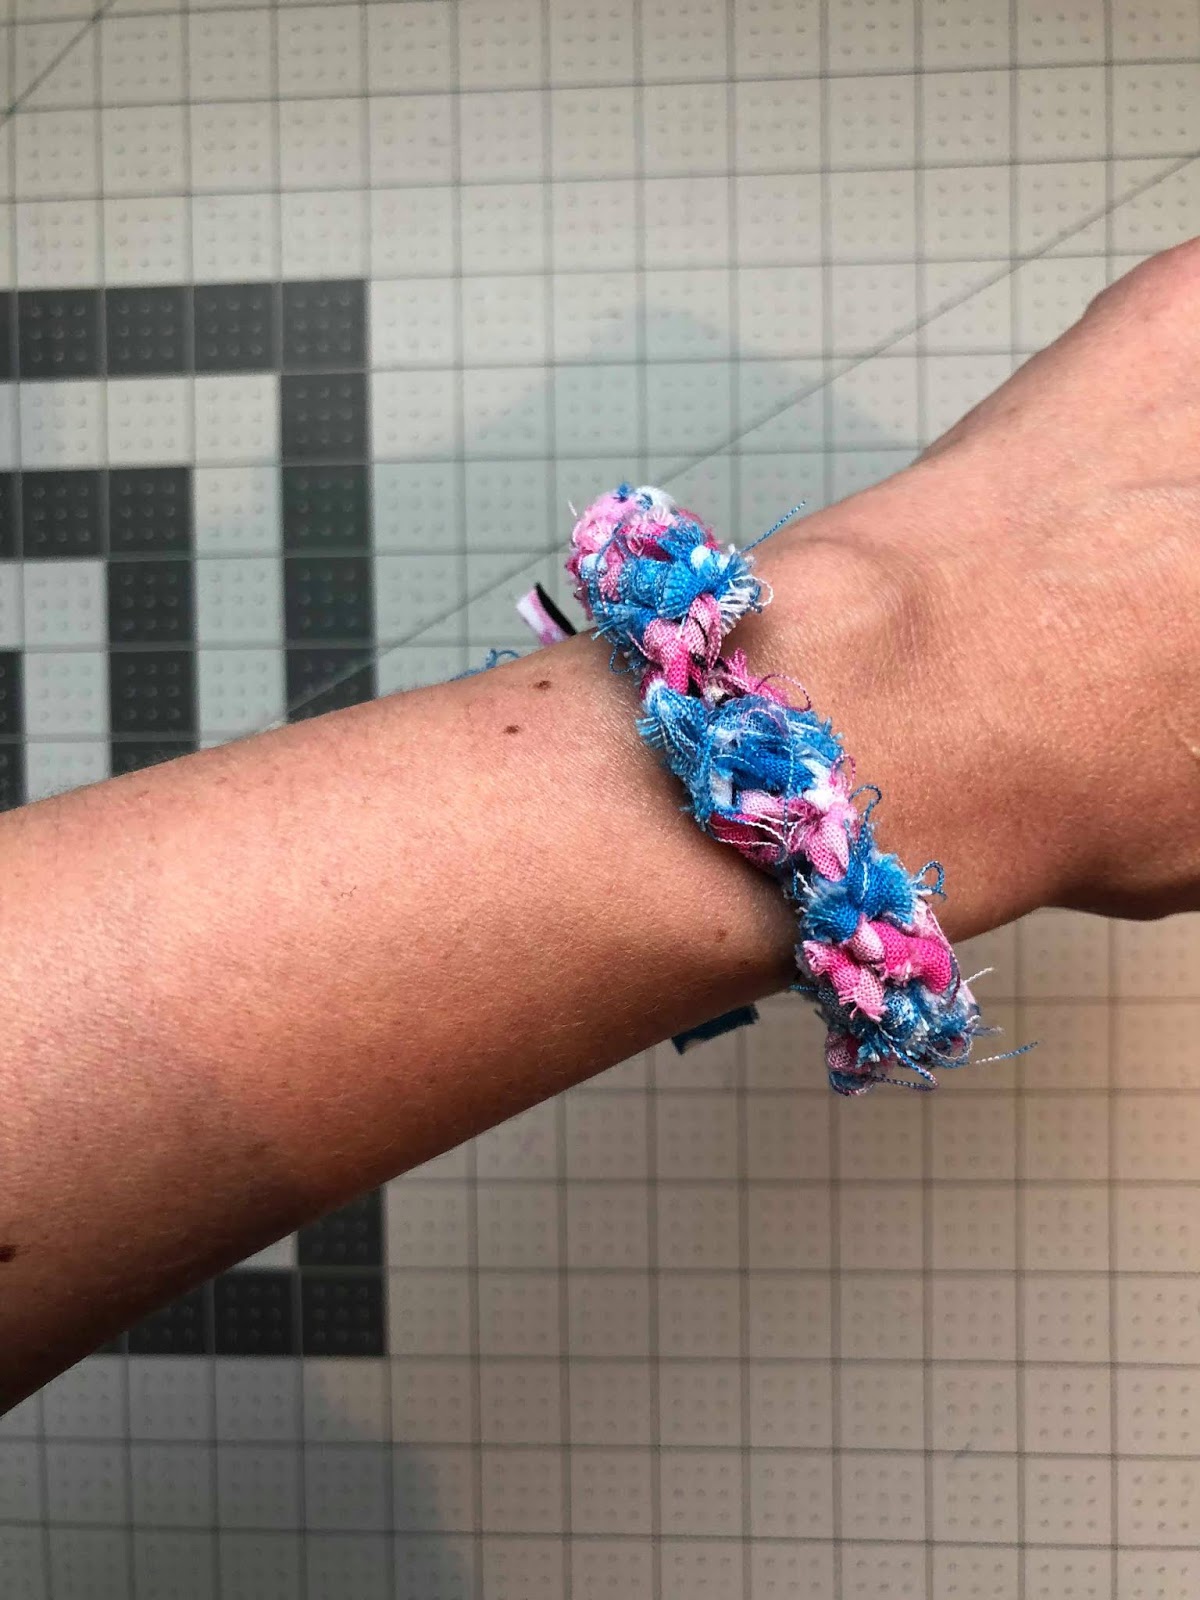
I love the bulky corkscrew look! Remember yours can be pulled straight if you want it slimmer though.
If you are making the hardware bracelet, it's time to attach the clamps and clasps! There are lots of kinds that would work, even magnetic closures. Depending on the kind you use, you may or may not want to remove the large end knot(s) before attaching.

And there you have it! That's all it takes to make a friendship bracelet! Grab some friends and have a fun time making them for each other. It could take anywhere from fifteen minutes to an hour, depending how fast you knot.
When you're done making your own unique bracelets, please come share your photos in our patterns group on Facebook. We can't wait to see what you make!
Let's Create! ~ Kristen
Wow what a blog post really I like this post & I would like to recommend clothinglabels4u.com for best Clothing Labels Manufacturers, Suppliers & Dealers.
ReplyDeleteClothing Labels
Iron on Patches for Clothes
I recently found your blog and have already been reading along. I believed I would leave my first comment. I don't understand what to state except that I've enjoyed reading. Nice blog. I will keep visiting this blog very often.cadeau de naissance
ReplyDeleteGreat Post!
ReplyDeleteI like this post and this is very interesting.We are good hang tag manufacturers
I suggest you to visit for best hang tags.