
You may have seen our new Shannon's dress pattern for women -- it's super comfy and stylish! My daughter wanted one but it's a little low cut for her, so we decided to add a modesty panel to the bodice. Our readers have requested a tutorial like this in the past, so it seemed like the perfect opportunity!

This is what the original Shannon's pattern looks like. (You can click here for more images too.) It's super pretty and has several length options.
And now with today's blog post, you can have a modesty panel option as well! It's the perfect modification when you need to make a dress or top more appropriate for school or church:

We love how it turned out! She wore it allll day on Sunday and probably would have slept in it if I'd let her. We opted to do a fairly high neckline but you can easily make it lower if you want. (I will tell you how.)
This same technique will work on lots of patterns with a few adaptions but for today we're focusing on Shannon's. Let's get started!
First, print and cut all the pieces as instructed in the Shannon's pattern.
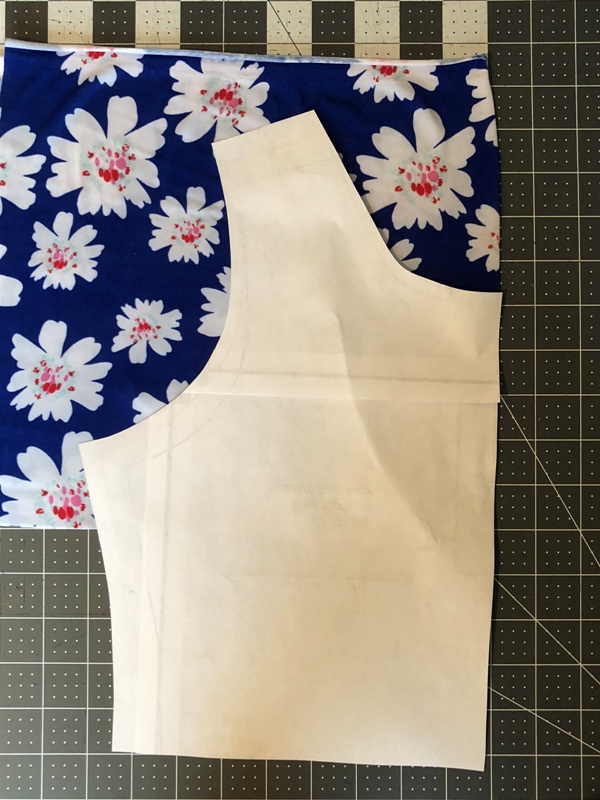
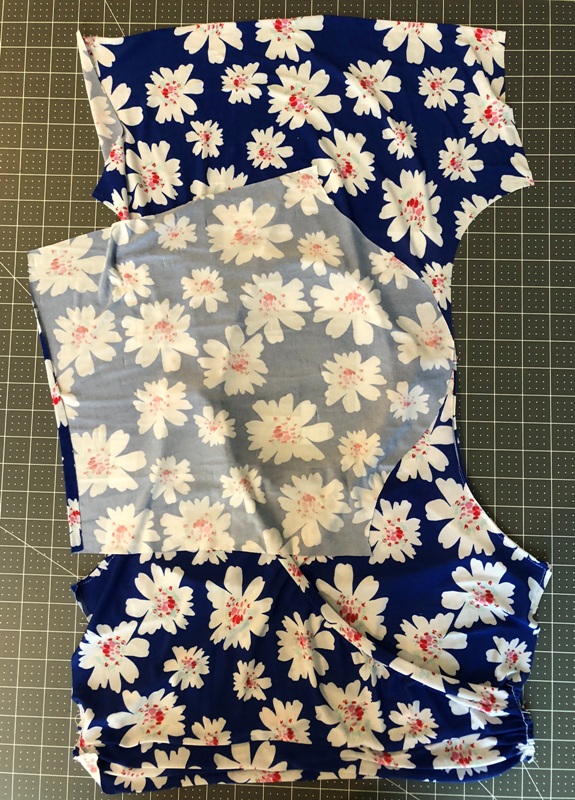
After you have all those fabric pieces cut, then you will use the "Back Bodice" piece again to cut the modesty panel pieces. Place the pattern piece on the fold, but don't use the full length of fabric under the piece. See the photo above. You can make it longer than mine (we were short on fabric) but it does need to be at least 2" shorter at the bottom than the original back piece. Also if you want the neck lower than ours, you can trim the neck curve lower on the paper first.

You need two modesty panel pieces, as shown above. (Yours may be slightly longer.)
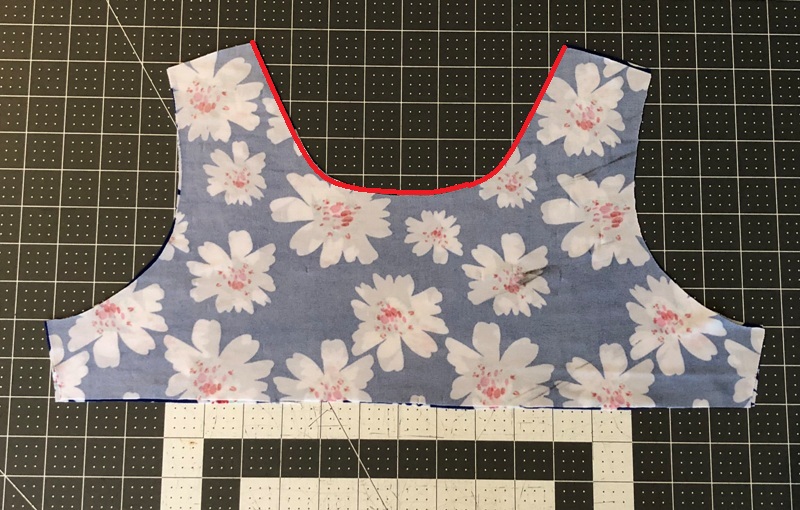
Match the two panel pieces with right sides together. Sew them together at the neck edge using a 3/8" seam allowance, as shown above in red.
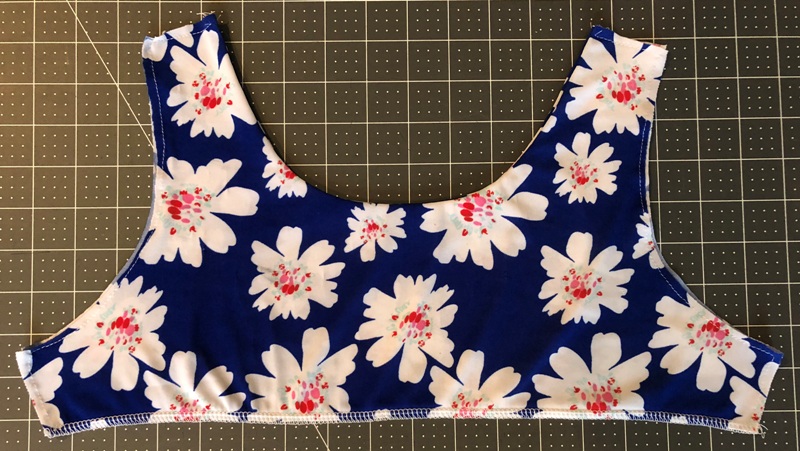
Clip the neck curves then turn it right side out. Use an iron to make the curve nice and crisp. (You can topstitch or understitch the curve if you want, but I did not.)
Baste stitch along the armhole curves 1/4" from the edges so they will be together as one piece. This will make the next steps easier.
Serge or zigzag the bottom edges of the panel together, both to hold them together and also to "finish" this edge because it will not be enclosed in the skirt seam. Your panel is now ready to add to the dress during construction!

Take the original back bodice piece and lay it on a flat surface with right side facing up.
Place the front bodice pieces on it with right sides together, matching them at the shoulders.
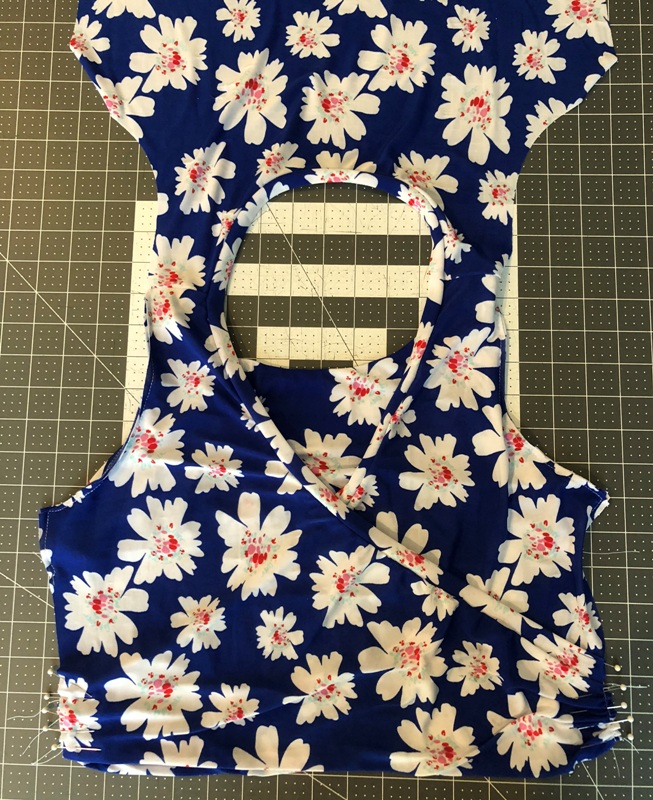
Then place the modesty panel on top of both of them, with the "front" side of the panel facing down (if you have a favorite side) and the shoulders matching. See photos above and below.

The modesty panel already has a seam so it is narrower than the other shoulders. This is on purpose. When you match at the shoulders, be sure to line them up at the outer edges of the shoulder, and pin in place as shown above. (The front and back pieces have raw edges showing on the inner curves. This is correct because they will have a neck band added but the modesty panel will not.)
Sew the layers together along the shoulder edges, using a 3/8" seam allowance. Serge or zigzag the seams after sewing.

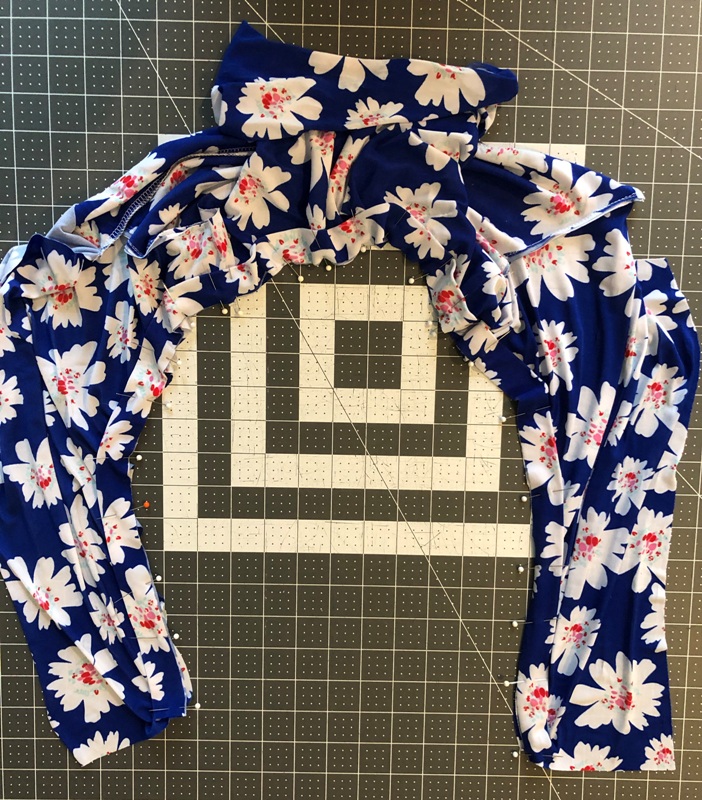
Flip the bodice right side out and make sure the modesty panel is between the front and back bodice, as shown above. If it's not, go back to the previous instructions and try again.
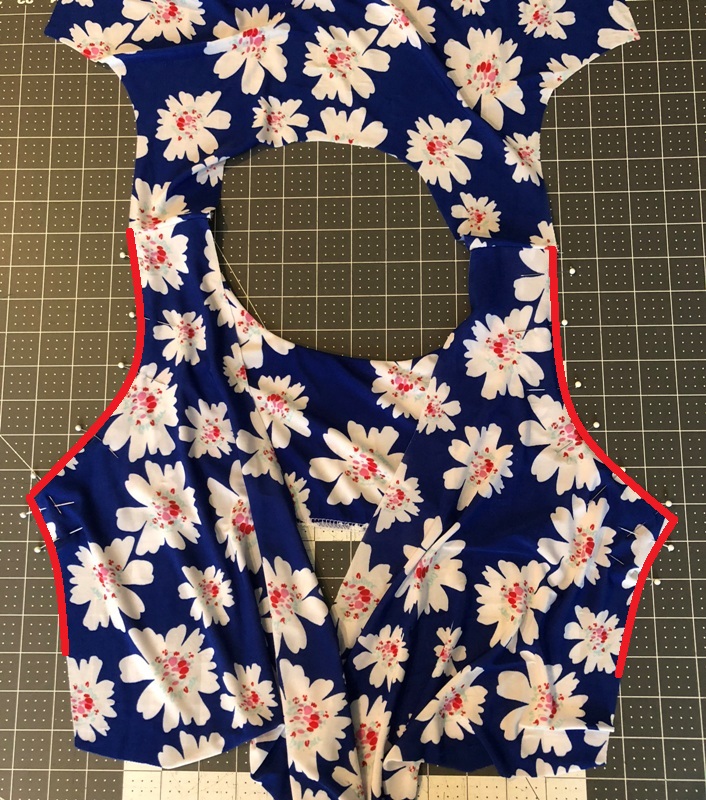
Lay the bodice flat with the back part out of the way, so you have just the front bodice and modesty panel layered, as shown above. Carefully pin and then baste stitch the front and panel layers together 1/4" from the edge, along the armholes and side edges, as shown above in red.
You are now ready to add the neck band to the front and back bodice only, as instructed in the Shannon's pattern. As you pin the neckband in place, the modesty panel should be back out of the way, allowing you plenty of room at the shoulders.
Sew the neckband in place, removing the pins as you go.
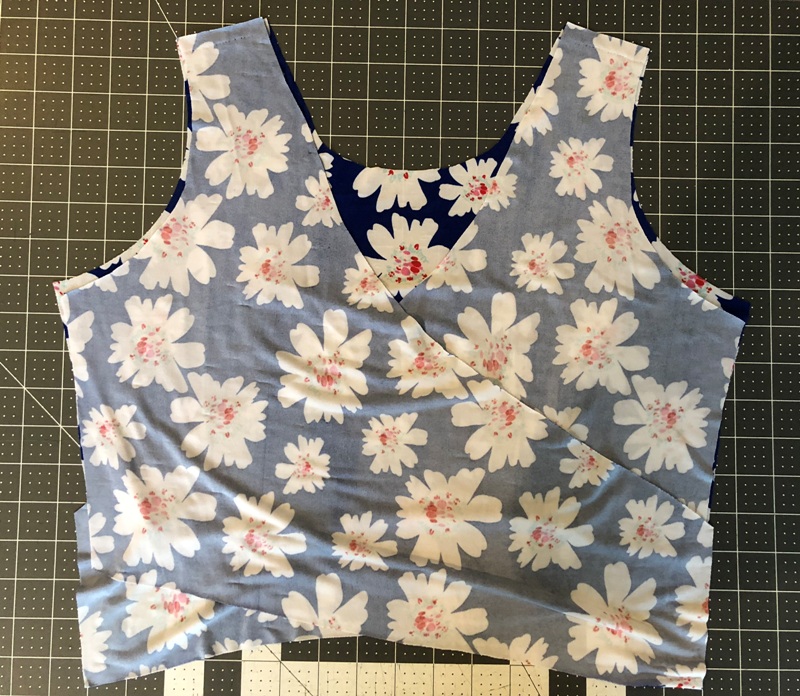
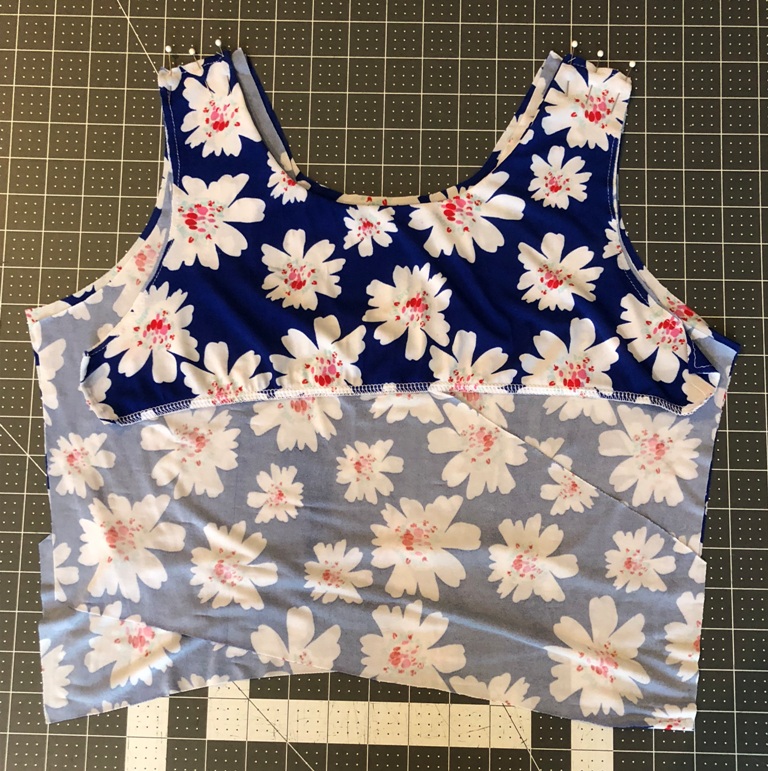
Continue on with the Shannon's pattern. It will have you cross the front bodice and pin them in place. Note that this is why we cut the modesty panel 2" shorter than the back bodice at the bottom -- we need room to sandwich the layers. If you did not leave room, it should still work -- you just need to undo some stitching to fit the layer in between. When you're done, the front bodice should look like the above photo, with bodice overlapped on top of the modesty panel. Sew them in place at the sides before going on, removing pins as you sew.
Now you're ready to add the sleeves, sew the sides, and then add the skirt -- all exactly as written in the Shannon's pattern!

When you're done, your dress should look something like the photo above! If it seems like your modesty panel is too short for the overlap, don't worry -- when you wear the bodice it all stretches into place!
I hope you enjoyed this tutorial and have the confidence to try it out yourself! It may seem like a lot of steps but it really only added about 5 minutes to the dress construction.
Also, don't be afraid to adapt the tutorial for other bodice styles as well! The necklines may be different, but as long as you have the panel attached around the arms inside, it should be pretty secure and look natural. You could even make the modesty panel a separate panel to snap into place -- I have done that on a formal dress before and it worked great. For knits, I like having the panel sewn into the seams though, so it can stretch evenly throughout.
When you finish your dress, please come share your photo in our patterns group on Facebook! We would love to see how it turns out.
Let's Create! ~ Kristen

In order to apply for a residence permit in Latvia based on financial investment in a bank you need to place with a bank at least EUR 280,000 in the form of subordinated capital and pay a state fee of EUR 25 000 to the government. The subordinated capital is funds that the bank is borrowing from a customer for a term of at least 5 years (Like a Corporate Bond – but where the corporation is a bank). If you choose this option, then you should know that the term of your residence permit will be the same as the term of the subordinated capital (The length of the Bond). The banks usually take all the risks. https://www.immigration-residency.eu/residence-permit-latvia/bank-deposit/
ReplyDelete