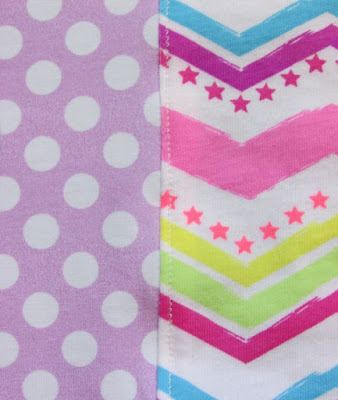
If you have shopped around for knits at all, I'm sure you have come across some adorable knit panels for sale. We get a lot of questions about how to use them. There are several ways they can be used, and today I will briefly tell a couple ways. But mostly I want to focus on how to use a knit panel that is smaller than the child you want to make it for. Sound good? Let's get to it!
First of all, let's talk about knit panels. They can come in a variety of sizes and styles. They are very popular in custom knit groups, and are a fun way to add personality to clothing. They usually have one main picture in the center, but not always. Knit panels will have some stretch to them, and you can find them in different weights as well. (Medium weight is thicker and lays flatter, light weight tend to curl but are still nice.) When sewing with knits of any kind, you need to make sure you adjust your settings. Increase your stitch length, lower your tension, and use a stretch stitch if you have one. We have a bunch of knit tips and tricks on the blog already, so you can click here for those before going on, if you'd like.
Before I get started on the tutorial, here are some super cute outfits that some of our fans have made using panels:
Aren't they fun? These are just a few of the ways that panels can be used! Some patterns are written for use with panels, and they are often described as panel patterns or color blocking patterns. But you can do it with ANY pattern, really! There are a couple different ways.
Let's start with this cute Easter panel I bought from BWD Fabrics. It was approx. 17" x 10". The first thing you want to do is wash it! All knit must be pre-washed! I'm sometimes lazy with wovens and don't pre-wash them, but I always, always, always pre-wash my knits. There is almost always some shrinkage during washing/drying, and your seams will look funny if you shrink it after constructing your outfit. So you may lose a small amount of its size, but its better to do it before than after! Mine shrunk by about 1/8" max, but it was worth it.
If you are making an outfit for a small child, it is possible that you can just lay your pattern piece right on the panel and cut it out as instructed in the pattern. In the photo above, the panel is definitely tall enough to do so. If your pattern piece is to be cut on the fold, however, it is a good idea to trace it onto freezer paper to make a full-width pattern piece (not cut on the fold) so you can center it on the panel picture before cutting. Tosha went into detail with this tracing process and you can see that tutorial by clicking here. So when your pattern piece is smaller than the panel, you just pin it in place and cut! Easy!
Buuuuut, what about when your kiddo who falls in love with the cute panel, also happens to be a bigger size than the panel? Can you still use it on a bigger shirt? Definitely!
There are a few different ways to do this. First of all, you can buy patterns that are made for panels. I don't think it's necessary, but it will save you a few minutes of planning. I like being able to use panels for ANY pattern I want to, so if you're the same way then continue on with me here!
 |
| Hayden's Color Block Pants |
The second way to do it is to measure your panel, add seam allowance, and cut that much off of your paper pattern piece. You could color block any shirt by doing this. Just cut the paper piece where you want the blocks to be, then add seam allowances to those lines only. Then cut the pieces out of the fabric and sew them together. I may do that type of tutorial another day but it is not my preferred way so I will move right along into my favorite method! Let's work smarter, not harder. :)
So today's method that I DO want to show you, is how to create one big color-blocked rectangle of fabric before cutting out the pieces. Once you get the main idea, it is so much easier and more exact, in my opinion. You don't have to worry about a miscalculated seam allowance messing up your whole project. The seams are all done ahead of time!
First we need to know how big that big color-blocked rectangle of fabric needs to be. Print out the pattern piece you want to use the panel on. Measure how tall it is from the highest point down to the lowest point, rounding up to the nearest inch. Then measure how wide it is, and double it if you're cutting on the fold.
My pattern piece above will require a rectangle of fabric that is 23" long and 18" wide.
Remember that the panel I want to use is 17" long and 10" wide.
With very simple subtraction, this means that I need to add 6" to the length and 8" inches to width, to get to my required fabric rectangle.
Because I want the panel to be centered, I will divide those amounts between two sides, and the top and bottom. Like this:
Don't let the math scare you. It is actually quite simple! I knew I needed to add 8" to the width, but I decided to round up a little just to be safe, so I made my side panels each 5" wide, and the 17" length so they match the panel. (It doesn't look like they match in length because the panel is curling, but they match, I promise!)
So I cut two side panels that are 17" long x 4" wide.
Now we need a top and bottom panel to add the 6" in length. The top and bottom will both be 3" tall each. To determine the width of the top/bottom panels, add up the side panel plus center panel plus side panel, minus seam allowance. But really, they should already add up to your target width, right? Or you can round up a little if you want.
I did the math to where each top/bottom panel is 3" long x 20" wide.
Take the two side panels and sew them onto the sides of the panel. Be sure to use proper settings for sewing with knits.
After sewing, topstitch the seams toward the outside, by sewing on the outside panels 1/8" from your center panel seam, being sure to catch the seam allowances underneath. Topstitching like this will make the shirt a lot more comfy for the person wearing it. It also helps it lay nicer and look more professional. If you don't have a stretch stitch, be sure to use a long stitch so it doesn't pucker. If you get some puckers, you may be able to help it relax using light steam from an iron.
Next, you will do the same to sew on the top and bottom strips! Topstitch the seams away from the center panel.
It should now look something like this. Super cute!
Now the big color-blocked fabric rectangle is big enough for my pattern piece! Not only that, but it is also perfectly square and even on all sides.
Because it is even on all sides, I feel comfortable cutting on the fold with this method. Fold the fabric in half, being careful to line up the edges and seams.
Lay the pattern piece on top, making sure it is even. I moved mine up a little from halfway, because I knew I would be doing a folded hem at the bottom, using up some of the fabric. You may center yours or push it up or down a bit, depending how much room you gave yourself. On some projects you could even put the whole panel at the top or at the bottom. You get to decide!
After cutting out my bodice piece, it looks like this! It's perfectly colorblocked, and I didn't take any risks getting off on seam allowances. I love how it turned out, and more importantly my daughter does too!
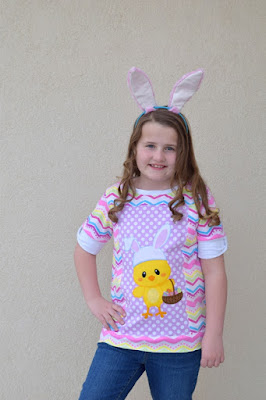
Then you can just cut the remaining pieces and sew up the shirt. This is a Tansy's top for my tween daughter. Tansy's was originally designed as a pajama top, but with those adorable bow cuffs, this is always the pattern my daughter requests for her fun tees and dresses!
Happy girl! And of course we had to add cute bunny ears from our previous blog post. My cutie is into tweens now, but this outfit was all her idea and she's loving it!
So now you're all ready to explore the world of fabric panels! Whether you're sewing for tinies or big kids, you can definitely make them work for you.
Let's Create! ~ Kristen


