Today our friend Autumn from Peanut's Boutique is stopping by to share a lovely tutorial that teaches us how to make a Cathedral Window Quilted Keepsake Ornament. And because she's just so sweet, Autumn is giving away the Santa ornament that she made for this tutorial. Make sure you enter the giveaway at the bottom of the page!
Supplies:
1 Fat Quarter
2 small scraps
Matching thread
Handful of Fiberfill
Coordinating ribbon
Step 1
Lay out your supplies
Step 2
Cut your fat quarter into (2) two 9” x 9” Squares
Step 3Fold in half, right sides together and sew along the now short ends. Repeat for the 2nd 9” x 9” square.
Step 4
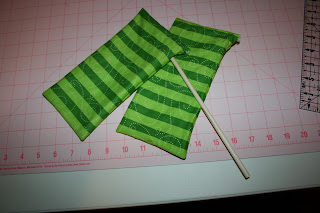
Turn both 4.5” x 9” rectangles right side out, push out corners w/ a dowel or chopstick.
Step 5
Grab the middle of your two raw edges and pull the rectangle, making a square. Repeat for the other piece. Press each square, turning under the exposed raw edge.
Step 6
Sew down the middle seam, sewing the turned edge shut. Don’t worry, the seam will not show in the finished project. Repeat for the other piece.

Step 7
Bring two opposite points together in the middle and tack them together. Repeat for the other two. Then repeat for the other piece.

You should now have two 4” x 4” squares that look like this:

Step 8
Lay your squares out with the stitched seam running horizontally.
Flip one square over.
Place the other square on top of it.
Rotate the tube so that your seams you just stitched are in the middle.
Step 9
Cut a 6” piece of ribbon. Slip stitch one open side closed, being sure to stitch the looped ribbon at one point of the square. I have found that it is easier to sew the ribbon into one of the sides now, rather than later when the stuffing is in the ornament.
Step 10
Stuff the ornament. Slip stitch the side shut. You should now have a little pillow ornament.
Step 11
Take your 2 pieces of scrap fabric and cut two (2) 3” x 3” squares. These can be any piece of scrap of very specific prints (as I have chosen).
Place a 3” square in the center of your pillow. You may have to trim your squares slightly to fit as you want it to be slightly smaller than the square you are placing it on.
Step 12
Starting at one corner, slightly fold over both edges of the square and stitch together for 3-4 stitches.
Continue on the edge, folding over the square and stitching down until you get to the next point, where you will again fold both sides together and form a point.
Continue until you have stitched down all 4 sides, making a cathedral window. Repeat for the other side. Hang on your tree, or give to teachers, co-workers, or friends. Happy Holidays!
Enter to win this Santa ornament! Open to US residents only.
a Rafflecopter giveaway


