
Today we're going to talk about the best way to tape your pattern pieces together! If your pattern only uses one piece, then there will be nothing to tape together. But if there are multiple pages, it is very important to overlap and tape them as we intended. So let's take a look!
First, you will need to print out the pieces. They come at the end of our CKC patterns. It is important for the piece(s) to be printed perfectly to scale, so we recommend that you read this blog post on printing pattern pieces, if you have not done so already.
Once you have your pieces printed properly, you are ready to tape!

Any time your pattern piece is larger than one page, you will need to tape the pages together. Each page is labeled with one or more letters, depending on the pattern size and how many sheets are needed. Our example has five pages.
The pages have overlap lines that are labeled in alphabetical order. The letters at the bottom of one page will correspond to the letters at the top of the next page, as shown in the photo above.
To connect the pages, you will overlap the corresponding lines so they are right on top of each other, with the letter notches matching exactly.

With the lines of the first two pages overlapping, simply tape the pages in place. Notice that you will only see the overlap line of one page because the other is directly underneath.
Repeat with the remaining pages, taping them in place with labeled lines overlapping.
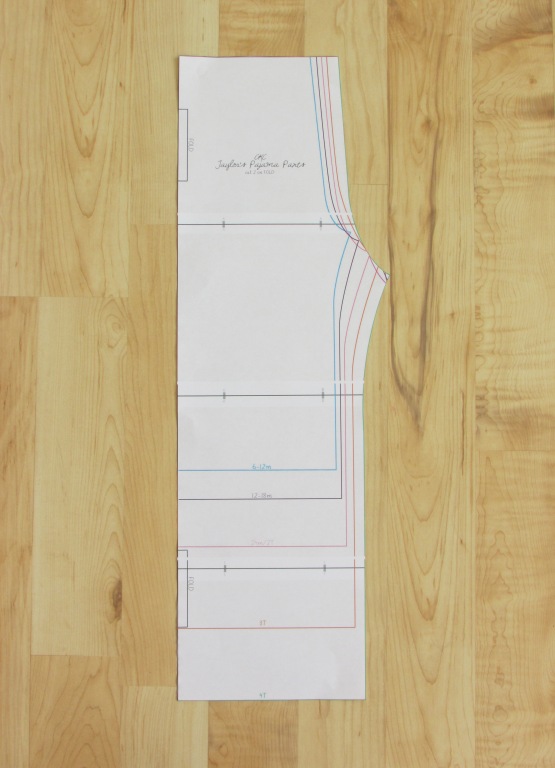
Now that your pages are taped together, simply cut out the pattern pieces for your size. In our example, we cut the pieces down to a size 4T.
Now that your pattern piece is complete, you are ready to pin it to your fabric and cut out according to the specific cutting instructions in the pattern you are making.
If your specific pattern also includes a cutting chart for rectangle pieces, you will cut those out using a rotary cutter. To conserve ink and paper, any time there is a square or rectangular shape that is needed for your outfit, we use a cutting chart to tell you those dimensions so you can cut without having to print the pieces. You will find the chart in your pattern under the cutting instructions. Simply use a rotary cutter and mat to quickly cut those rectangles. This saves a LOT of time too! If you'd like, you can find our step-by-step photo instructions for using a rotary cutter here: http://www.createkidscouture.blogspot.com/2014/01/using-rotary-cutter.html
Or, if you don't own a rotary cutter, you can use a measuring mat and pencil! You can even make your own measuring mat using this tutorial on our blog: http://www.createkidscouture.blogspot.com/2015/03/diy-measuring-mat-for-cutting.html
That should be all it takes for you to print and tape the pieces you need. Now you're ready to sew!
Let's Create! ~ Kristen