
Buttons.
We all have them. They've been around forever, or close to it. It seems like my kids learn how to fasten their own shirt buttons before they even learn to brush their teeth. I think you're getting my point - buttons are a staple and they're here to stay. So why do many of us avoid them in our sewing projects whenever possible?
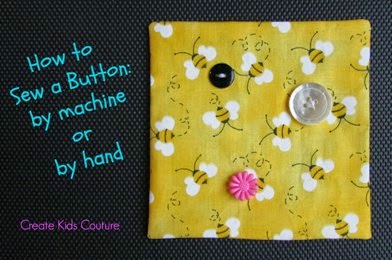
To be honest, I think we're over-thinking it. Buttons are SO easy to sew on. A couple weeks ago we showed you how to make buttonholes and now today we're going to show you how to sew the actual buttons on, by hand or by machine!
That's right! We'll start with the sewing machine. Did you even know that this could be done? It can, and you don't have to have a special foot for it. Most machines do sell a button foot but I learned to do it with my regular foot and it's a breeze. The advantages to doing buttons by machine is that it is much quicker and makes stitches that are even and secure. And did I mention that it is much quicker? (Yes, I know. It's worth repeating.) I can sew 7 buttons on a shirt faster than it takes to do just a couple by hand. Let's get started:

The first and most important thing we need to do is lower the "feed dogs". They are those little jagged tracks that push the fabric away as we sew. When we're sewing a button on we need the fabric and button to stay in place rather than moving. To lower the feed dogs on your machine, look around or check the manual if necessary. My switch has always been on the very back of the machine behind the sewing arm and looks like this:

In the picture above my feed dogs are up.

By moving that switch over to the left, it lowers the feed dogs on my machine.

Look how the feed dogs are lowered now. We can still see them but they are down below where they won't pull on our fabric. Okay, that step just saved us money on a button foot! Now we're ready for the button.

We will put the fabric in place with the button on top where we want it. Center the button under the foot so you can see the two holes side by side.
Set your stitch to zigzag. Slowly lower the needle down by hand until it is close to the button. If the needle will go through one of the holes, go ahead and put it down. But if the needle is off even a small amount, we need to adjust the width of our zagzag until the needle is pointing straight into the hole. Once it is ready, lower it by hand and continue by hand until the needle comes back up.

Continue moving the needle by hand and it should automatically shift over to the other side now. Lower the needle down to the other hole and again make sure that it is lined up. Adjust if necessary.

When the needle is lined up, lower it down by hand and then back up. Our zigzag stitch should now be the perfect width for our button. (If I have a lot of buttons exactly the same, I write down my settings at this point so I can skip right to it from now on.) To be on the safe side at this point, I usually do two full stitches on the button by hand. Once I am certain that the needle will not hit the button, I go ahead and use the machine to quickly make a bunch of stitches back and forth.

And then we're done! It really is that simple! After the first few practices, it becomes natural and you'll fly through all your buttons from now on.

We can use our machine to do 4-hole buttons as well. We simply do two of them as described above and then turn it carefully and do the next two. Easy!
Now there may come a time when you can't use your machine to sew on buttons. Maybe you need to sew through only a couple layers so a machine won't work, or maybe you are out of the house and need to mend a friend's button. (Because yours would not have fallen off!) Sewing a button by hand is still a good skill to have. I'm sure there are a dozen different ways to sew a button on and I'm going to show you the way I do it securely on my kids' clothes. You may have a better way but I've never had one come undone. (I wish I could say the same for store-bought clothes.)

Also, what about those elusive buttons - the shank kind like this pink flower one? Those cannot be sewn on by machine, at least not one that I've ever seen. They need to be sewn on by hand. So today I will use this shank button as my example, and the process is the same for the other buttons as well. Here we go:

First we mark a dot on the right side of the fabric where we want our button to be. Thread the needle, pull it through so the ends are even, and tie them in a knot. Then starting on the wrong side of the fabric, we will bring the needle up through on one side of our dot, as shown in the picture above.

Pull the thread until it is taut and then we are going to go back down through the fabric on the dot.

Now we are on the wrong side of the fabric and you can see the little knot above. Now we are going to make a tiny stitch on the wrong side of the fabric, close to the knot.

Pull the thread most of the way through until we have a loop left. Pull the needle through that loop.

As we continue pulling on the needle, the loop shrinks down and makes a knot right on the fabric. Now you can see why my method is so secure! It only takes an extra few seconds and makes a huge difference.

On the wrong side of the fabric, we will now push the needle up through to the right side.

On the right side of the fabric, we are ready to put the needle through the button, as shown above. Pull the needle all the way through and up, and let the button fall to the fabric.

Now put the needle through the marked dot again, taking it through to the wrong side of the fabric. It is okay if the button has come loose like the picture above.

As we pull the thread to the other side, it secures the button right by the fabric. We can adjust it a bit on this first stitch if it's not right where we want it.

Now bring the needle back up through, angling it a bit to the side so it can get past the flower. Then put the needle through the shank just like we did before.

Again at an angle, we put the needle back down and under. Repeat this process of up and through and down, and up and through and down, several times until the button is very secure.

When we have enough stitches, on the wrong side of the fabric we will again make a tiny stitch in the center, pull the thread to make a loop, and then take the needle through the loop. This will pull the knot right down to the fabric. I do this twice on kids' buttons.

The wrong side of the fabric will now look like this - a tidy little buttonhole!

And there we have it! Now you know how to sew a button on by machine and by hand! If it seems overwhelming at all I suggest you try it out today, right now, without over-thinking it. In no time at all you'll see what you've been missing out on! Several of our adorable CKC patterns use buttons and you won't have to run from them any longer.
Let's Create! ~ Kristen
From a Natural Button Manufacturer, it is quite easy to find buttons different shapes and patters.
ReplyDelete