
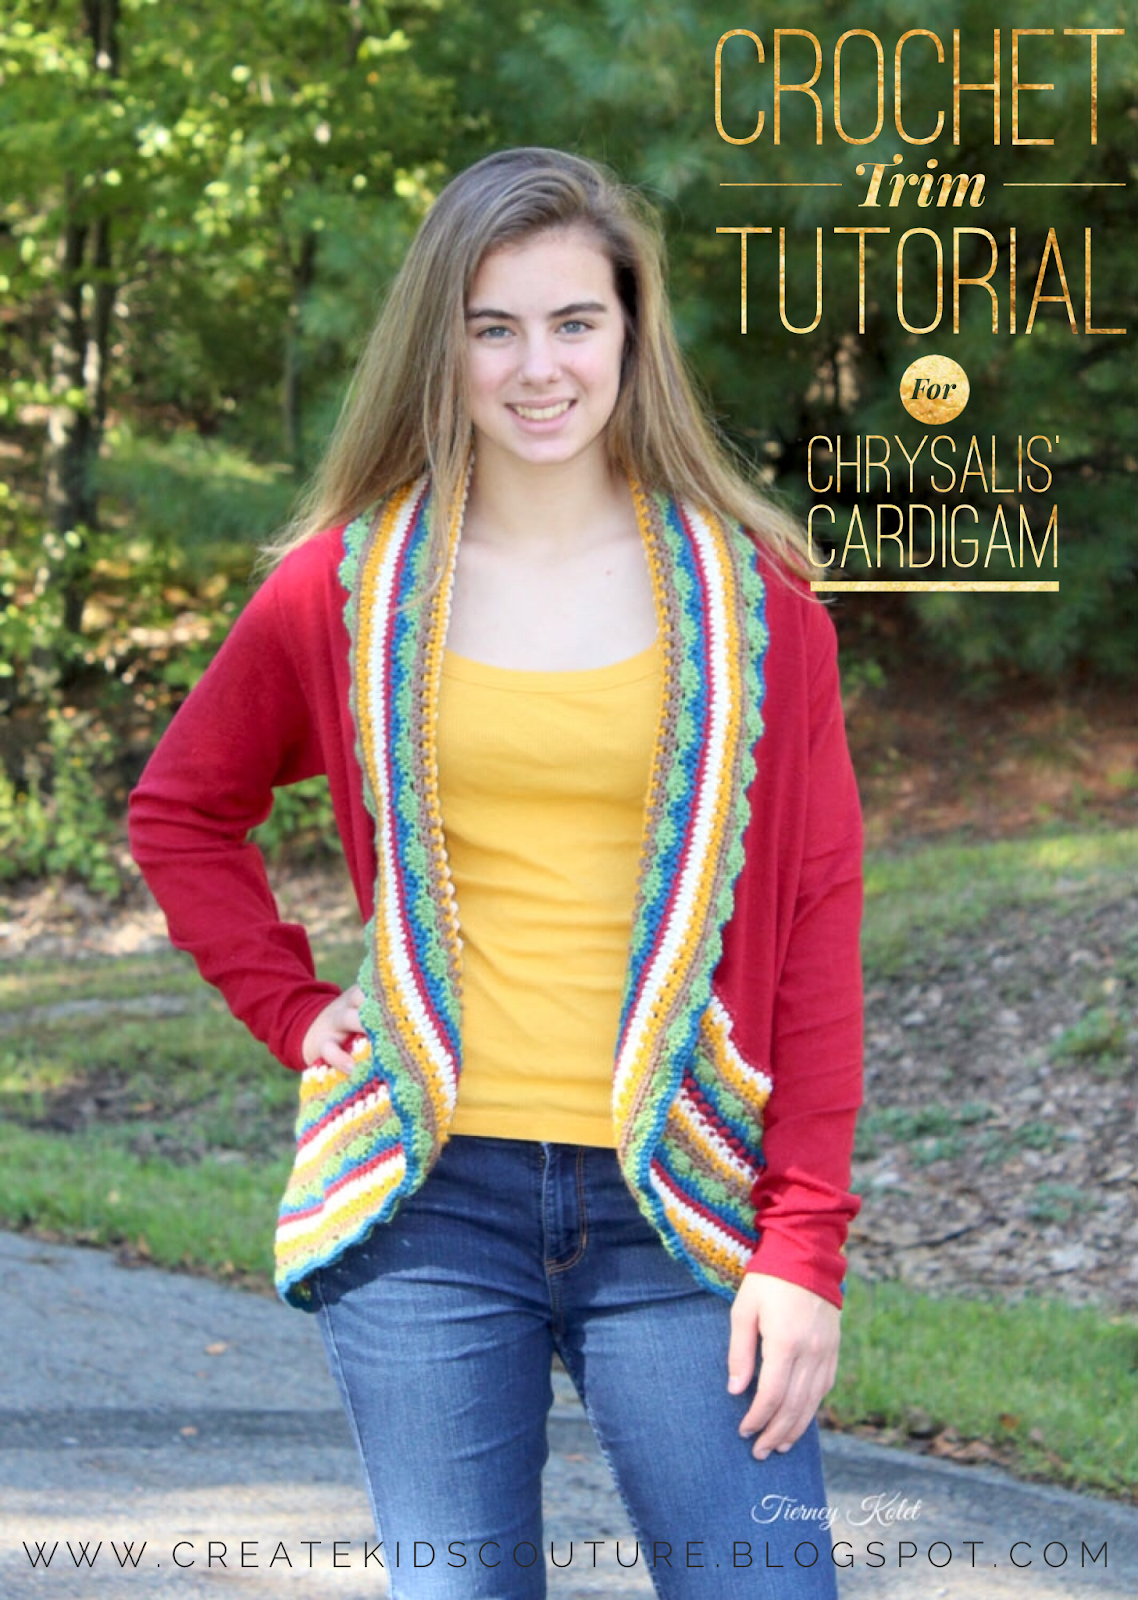
When I saw Tierney's amazing crochet trim, I knew you would love it too! We are so thankful she took the time to give us an amazing tutorial to add a custom crochet trim to Chrysalis' Cardigan! I personally cannot wait to give this a try! So I will hand it over to Tierney and let's get started!
Hi! I don’t design or write patterns but I made this simple step tutorial
incase anyone wanted to try adding this trim to a cardigan. Hope this helps!
You will need:
- CKC Chrysalis’ pattern CLICK HERE to buy.
- Fabric for the body (I have used sweater knit and rayon)
- 4/5 ply worsted weight yarn (as many or as few colors as you would like)
- 8/1.50mm hook (very small used to work the first round into the fabric)
- G/6 4.25mm hook
Cutting the pattern pieces:
I took 8” off the length of the pattern piece to get the length I wanted for my finished cardigan. I knew I
wanted a wide band so I took a bit off (mine was 6.5” wide). You can do less or
more depending on the length you would like.


After
cutting out all of the pieces, you should have a pile similar to this.

Step 1: Sew up all
your pieces
I
found it easier to hem up the sleeve at this point. Less weight and easier to
do without the bulk of the yarn.

Step 2: Crocheting the first round
You
will need the 8/1.50mm hook (very
small used to work the first round into the fabric). This round will take
patients as you have to pop the hook threw the fabric with the yarn. I promise
it gets easier after this round.
I used white yarn so you can see how
the first round worked into the fabric but I switched it to the rust color
after the picture.

When starting the
round leave a long tail to weave into the yarn when finished and chain 1(you
will chain up at the beginning of every round). Then single chain around the
entire cardigan and slip stitch into the first chain (you will slip stitch into the end of every
round). I spaced out my SC (single chains) about every .25”.
When you are done it should look
similar to this.

Step 2: Choose another
color for round 2 and change to G hook
Single
chain around the entire cardigan and slip stitch to end the round.

Step 3: Continue chaining around the
cardigan until you reached you desire width for a band.
Depending on you
skill level you can keep chaining around the cardigan or change up the
stitches.


Going
from inside out I have listed the type of stitches I used:
Red-
Single chain, White- single chain, Yellow- criss cross, Brown- half double,
Green- shell, Blue I evened the stitches by starting at the end of a shell (double,
half double, single, single and double) repeat this through out the round, Red-
double, White- criss cross, Yellow- half double, Brown- double, Green- Shell,
Blue filler (see hilighted part above), Red- single, White- Double, Yellow-
criss cross, Brown- half double, Green- shell and Blue- single.
If
you are unsure how to do any of these stitches Youtube has some helpful videos.
Here are CKC's Beginner Crochet Tutorial Videos on YouTube.
Thank you so much Tierney!
We would love to see and celebrate what you make. Please share your beauties with us in our
Facebook Group or on Instagram @CKCPatterns.
SEW Inspired ~ Emily
No comments:
Post a Comment