
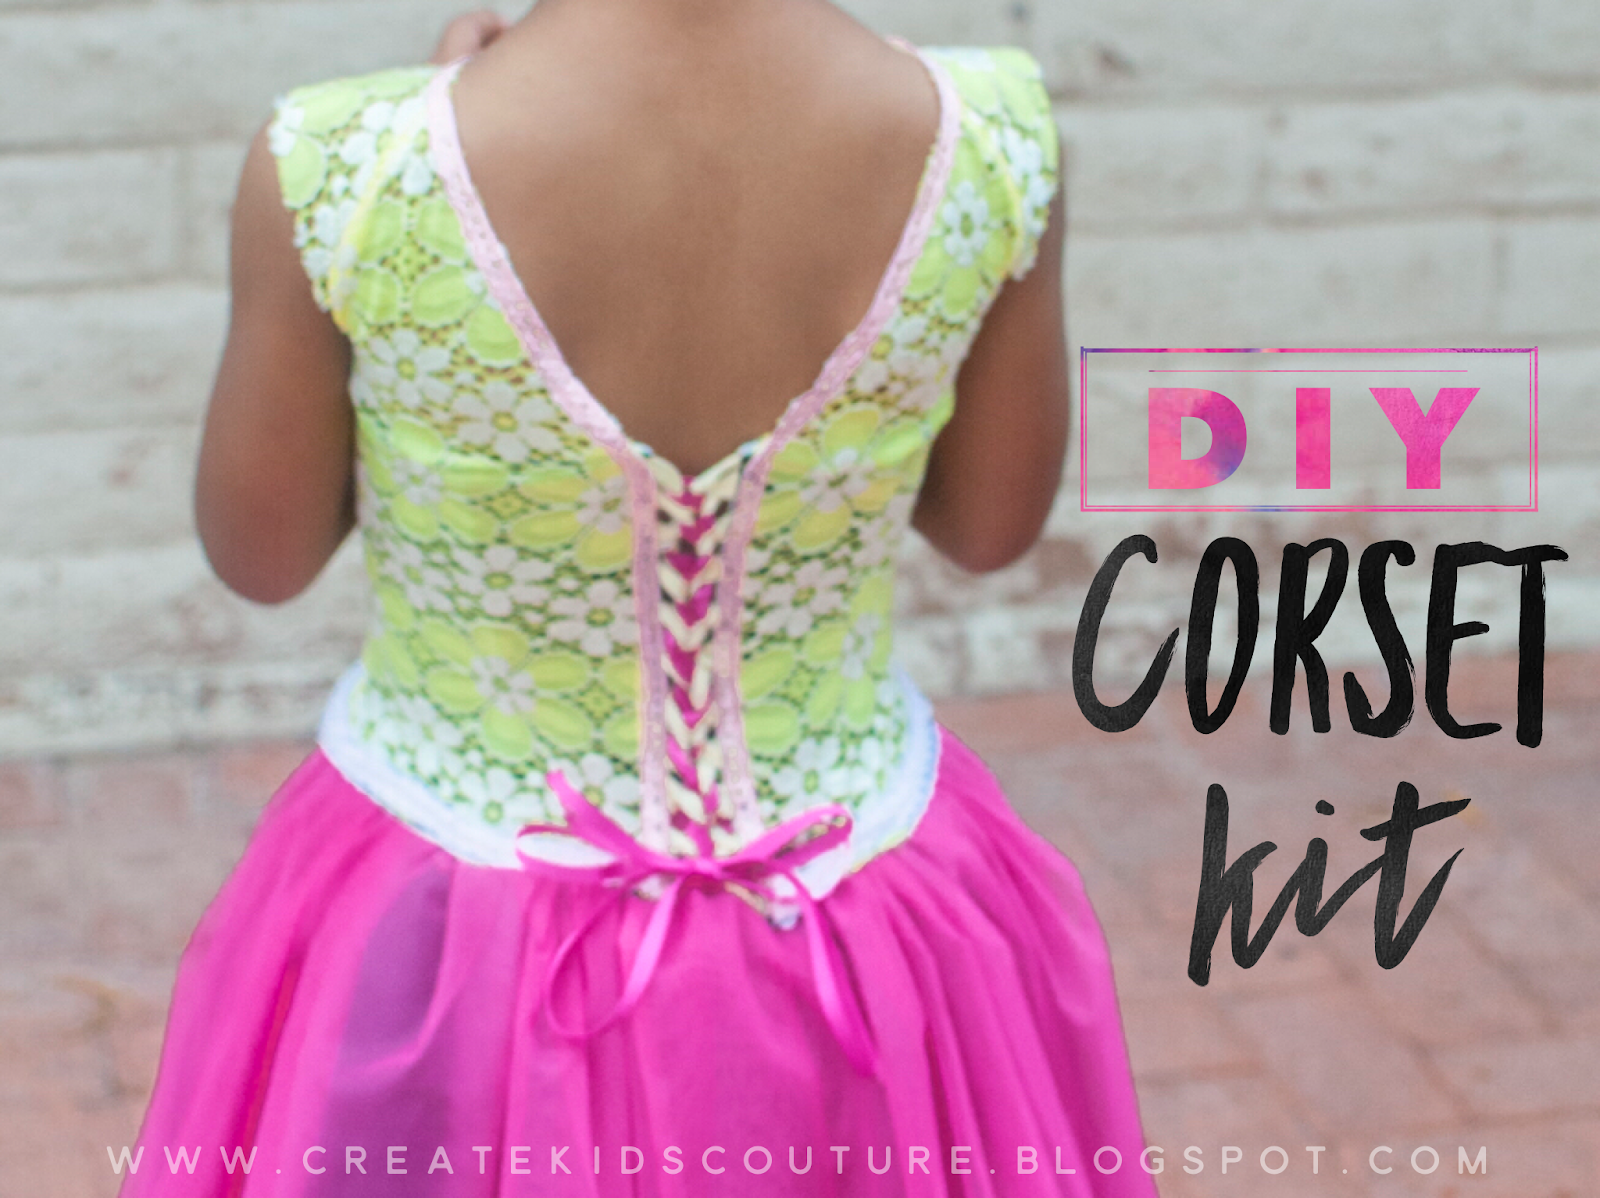
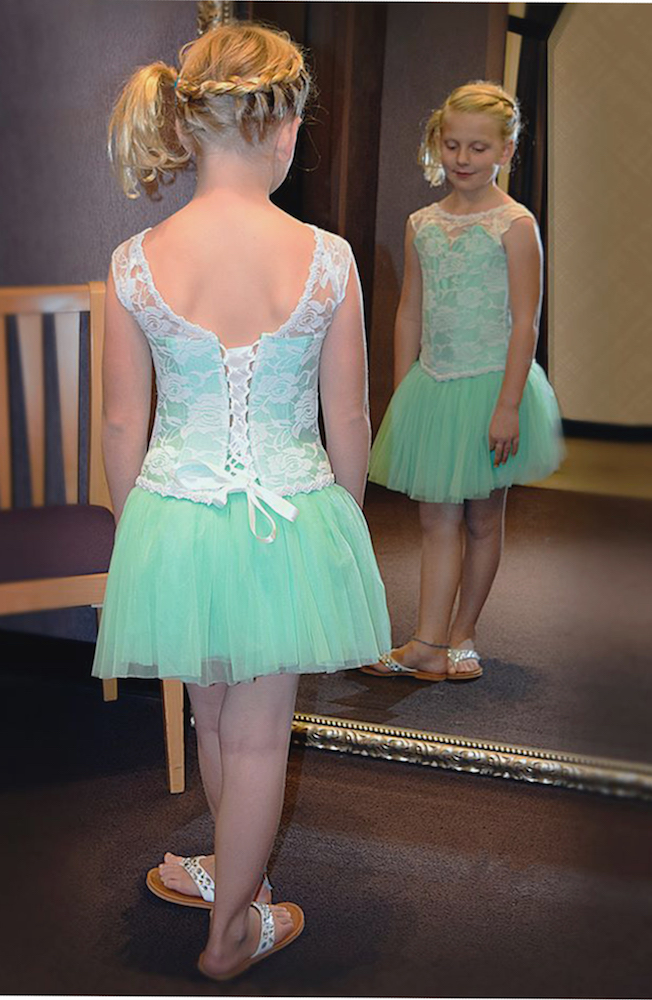
There are many times making your own corset kit comes in handy. Need a corset? Need a perfect match to your fabric? Then making your own corset kit might be the answer for you. This tutorial for a corset kit was originally featured in our pageant wear pattern Katherine. However, you can use it in place of any corset to add a perfect match to many of our other patterns such as Gracelynn, and Lilac. By removing the center back panel, you can also add it to Odette.
Let's get started!
Let's get started!

Supplies
- Cording (or a round shoe lace)
- This will not stay in the finished corset, so color doesn't matter. The size of the cording will determine the finished size of your loops. I prefer to use 3/16" cording. You may go a little bigger to make it a little easier to turn. You will want the cording to be 4.5 times the length of your corset.
- 3/8" or 1/2" boning without casing (Flexicurve Polyester Boning recommended)
- Cut your boning to be 2 times the finished length you want the corset plus 4". So if you want the corset 10", cut the boning 24" long.
- 5/8 Yard of fabric for lace up or to cover cording
- Zipper Foot
- Sewing Machine
- Pins
- Scissors or rotary cutter and cutting mat
We will start by making continuous bias tape using the directions below. If you are visual learner and would like to watch one of our Youtube tutorials using the same method, check out the video below and catch back up in Step 9.
Construction:

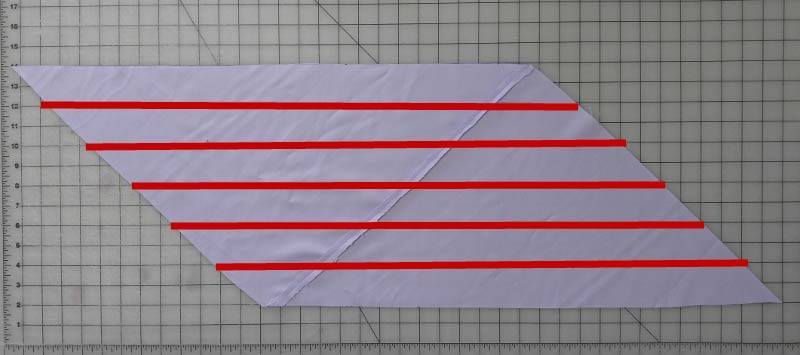
Step 1: First we will need to create a 2” bias stripe with which we will be working with. It is very important that this is cut on a bias so the corset loops and tie will lay flat and smooth. To do this take your square and draw a line dividing the square into two triangles as shown. Mark the top and bottom of the square with an X. Cut the square in half along this line.

Step 2: Now place your triangles right sides together, matching the X’s as shown. Shift your triangles so that 1/4” is not overlapped on both sides. Pin in place and using a 1/4” seam allowance, sew as shown in the picture above.
Step 3:
Press the seam open as shown.
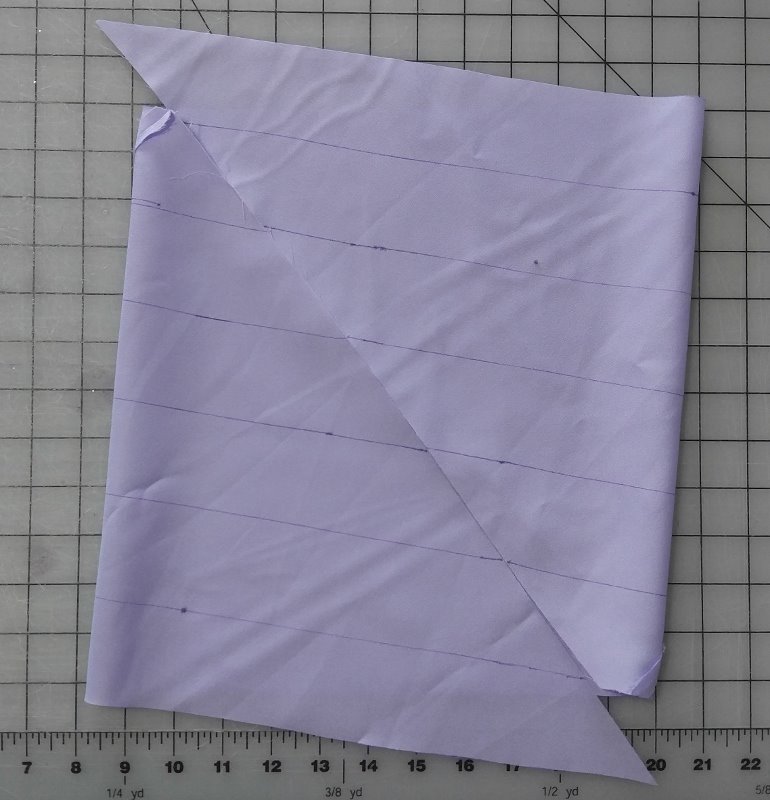
You now have a parallelogram! You can trim off the tiny 1/4” extra on each side
so the ends with the seam allowance are straight. On the wrong side of the
fabric, use a fabric marking tool of choice to create horizontal lines that are
parallel with the top and bottom of your fabric, 2” apart.

Step 4: Fold your
parallelogram, right sides together so you can see where the lines you just
drew match up.
Step 5: Now shift your lines
by pulling the corners in opposite directions so that your lines on the left
side are now lined up with the line that was previously above it on the right
side. This will create your spiral as we cut the bias lines.

Step 6: Pin the fabric, right
sides together, where these lines will cross 1/4” down. The lines will look
like they are going opposite directions
on either side of the seam allowance. The lines meet exactly where my pin
enters the fabric. Check both sides to
make sure they are intersecting at 1/4”. Using a 1/4” seam
allowance, sew your loop of fabric together.

Step 7:
Press the seam open as
shown. You can now see that your lines are all matching in the loops.
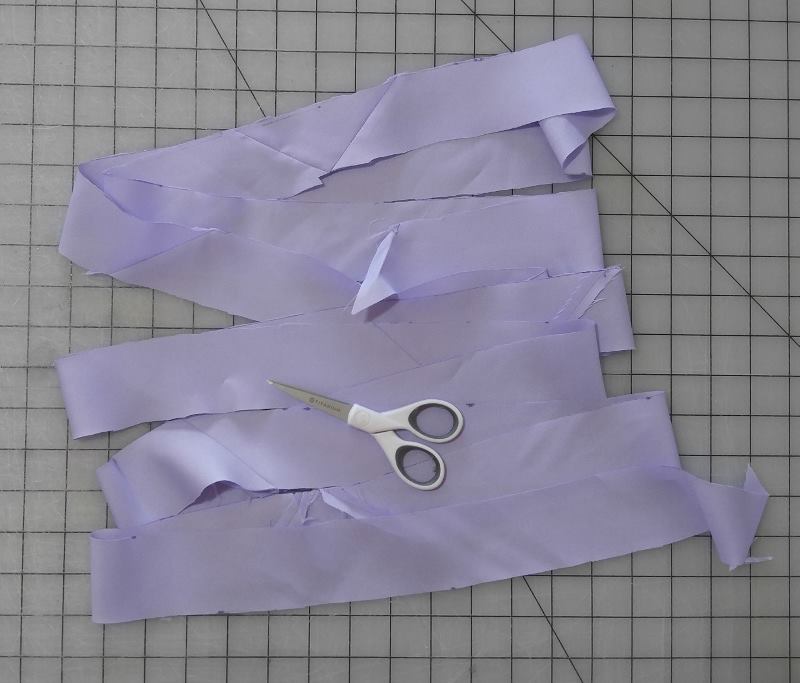
Step 8: Start at either end
of your loop and cut your fabric along the line, creating a long strip of fabric.
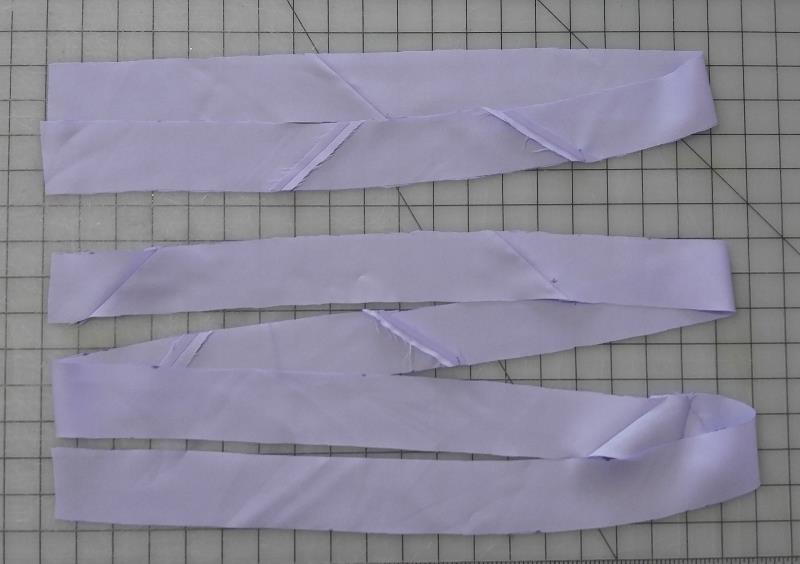
Step 9: Next you will need to cut your bias strip down to the sizes you
will need. Trim off the triangle points so you have a rectangle. Cut one strip
to be 4 times the length you want your finished corset. This will be for your
loops. Cut a second strip to be 8 times the length you want your corset. This
will be for the lace up.

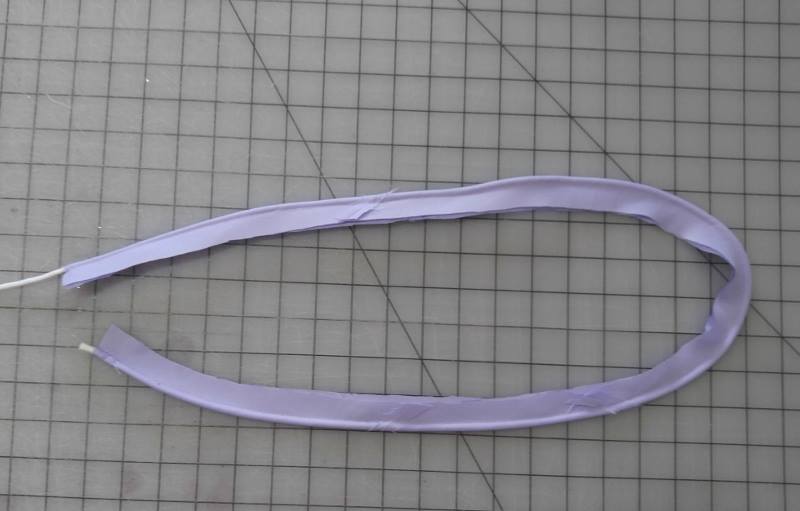
Step 10: Take the bias strip for the loops and fold it around your cording
so that right sides are together and the cording is in the inside. Stitch back
and forth across the top several times to secure the cording. Stitch again
1/4" below the first row of stitching.

Step 11: Using your zipper foot, stitch down the length of the cording so
it is encased in the bias tape. Stitch as close to the cording as you can, but
be very careful you do not catch the cording in your stitching.
Step 12: Trim your seam allowance down to be about 2 times the width of
the cording as shown.

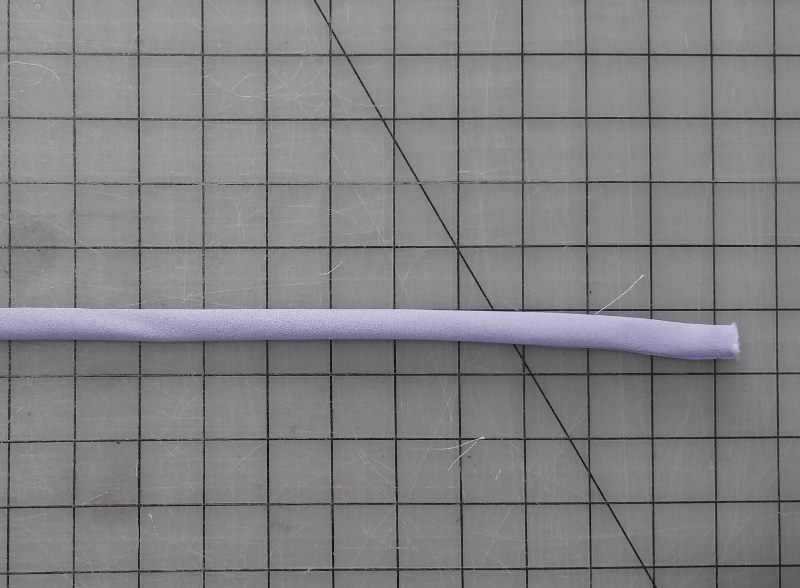
Step 13: The end of the cording should be sticking out of the end of your
bias strip. Pulling on it you should be able to turn your bias strip right side
out. This will give you a tiny tube to make loops on your corset. Cut off the
end where to cording was attached. Set aside.

Step 14: Next we will make the lace up for the corset. Fold the bias strip
in half right sides together and sew down the long side with a 1/4” seam
allowance.
Step 15: Turn the lace up right side out and press. You may find it easier
to turn by using a safety pin to help you.

Step 16: Trim the ends of the lace
up to be at an angle. Tuck in 1/2” on each end. Stitch in place as shown. Your
lace up is now done.

Step 17: Take your boning and mark the placement for the loops. Make a
mark 1" from the top. Then make a mark every 3/4" below that down the
entire boning.

Step 18: Take your loop fabric. Pin it to the boning just above your first
mark. Pin it again to the boning just below the second mark. The loop should
extend only 1/4" past the edge of the boning. If you are finding it
difficult to pin your loops. Use tape to hold them in place.

Step 19: Sew back and forth across the loop on each end. Trim off the
excess loop. Then take the remaining loop length and pin it just above the loop on
the boning. Then pin the other end just below the next mark. Make sure to keep
the loops even by only extending them 1/4” from the boning.
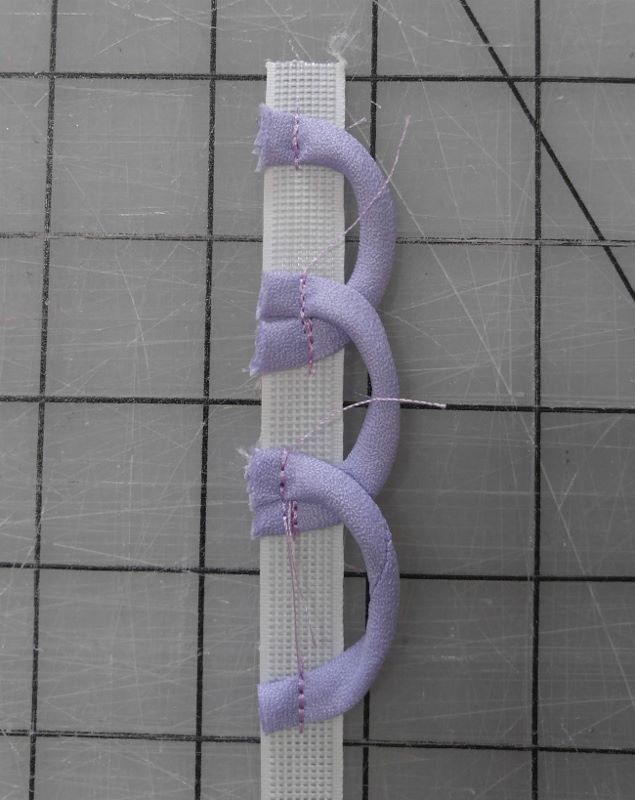
Step 20: Sew the loop in place again by stitching back and forth across
the loop several times. Trim off the excess loop strip.
Repeat step 19-20 until you have sewn loops down the entire
length of your boning. Discard the excess loop strip.
Thank you so much to Brooklyn for this fabulous tutorial! We would love to see and celebrate what you make. Please share your beauties with us in our Facebook Group or on Instagram @CKCPatterns.
SEW Inspired ~ Emily
No comments:
Post a Comment