
It's the 7th Day of Christmas at CKC! Can you believe we're already halfway through?! Today's free pattern comes from one of our pattern designers, Stephanie B. Here's she is:

Hey! Stephanie Baker here to show you how I made this cute tree skirt. Both of my kiddos get their very own mini trees in their rooms for Christmas. Their elves Tin Tin and Grumpy bring them a new ornament every year, and I let them pick out one new ornament typically around Thanksgiving. Their mini trees are starting to get full, so this year I suggested they pick out a tree skirt! Then I realized I could make that tree skirt myself easily! So, here it goes:
Materials:
1/2 yard of fleece
1/2 yard of flannel for the lining
2 - 1” squares of sew-on Velcro
Optional: Trim (Lace, rick rack, pom poms, etc.)
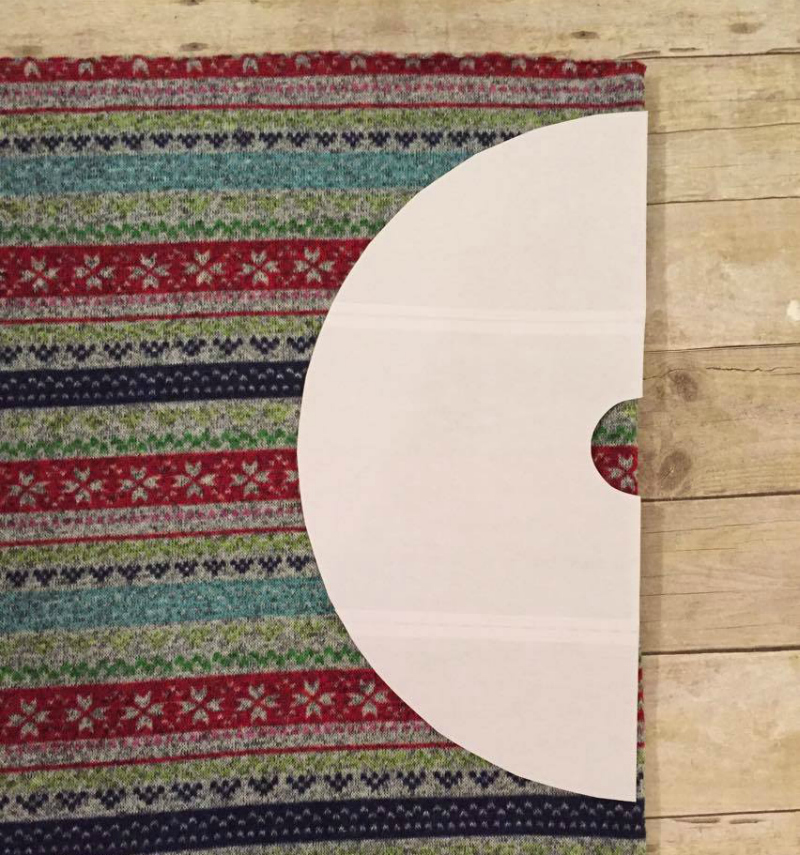
Take your fabric and fold it in half, with the selvage edges aligned. Lay the pattern piece along the folded edge and cut.

You will cut ONE of the folded edges, creating a ‘C’ shape.
Repeat with your lining fabric. When done, we should have two pieces.

Here’s all of our pieces laid out.

Lay the fleece piece on a flat surface with RIGHT side up. Pin your trim to the outside edge of the circle with the WRONG side of the trim facing up, starting at one straight edge and ending at the other. (You may SKIP this step if you prefer a simple skirt without trim.)
Next you will measure down 1” on the left straight edge and pin a LOOP SIDE Velcro piece in place. Next measure up 1” from the bottom of the same edge and again, pin a LOOP SIDE Velcro piece in place. See photo above.

Take your lining piece and with right side facing the right side of your fleece, pin the two pieces together. Your Velcro and trim will now be sandwiched between the fleece and lining. Sew along all the edges, as indicated in red. Be sure to leave a 1 ½” opening on the right hand straight edge.

Clip your curves and corners, I used my pinking shears for this step. Here’s some tips on clipping curves: https://createkidscouture.blogspot.com/search?q=clipping+curves

Turn the piece right side out, using the 1 ½” opening we left in the side. You can use a dowel to push the corners and edges out.

Flip the skirt over so the lining side is facing up. Along the edge with the opening, you will pin the opening closed. Next, take the HOOK SIDE of the Velcro. You are going to pin this to the edge with the opening with hook side up, aligning it with the LOOP SIDE on the opposite edge. Now, top stitch 1/8” from the edge closing the opening and securing the Velcro in place. You can topstitch the entire skirt if you prefer, I prefer it without to give it a fuller look.

That's it, we're done! Thank you to Stephanie for this fun tutorial!
And now it's YOUR turn! Let us know if you have any questions, and as always please come share your finished photos with us in our patterns group on FB -- we can't wait to see what you make.
Let's Create! ~ Kristen
No comments:
Post a Comment