

It's Day 12 and we're getting close to the end! But don't worry yet; we have an awesome costume tutorial for you today! This one comes to use from Stephanie, and it's the perfect finishing touch for so many different characters.
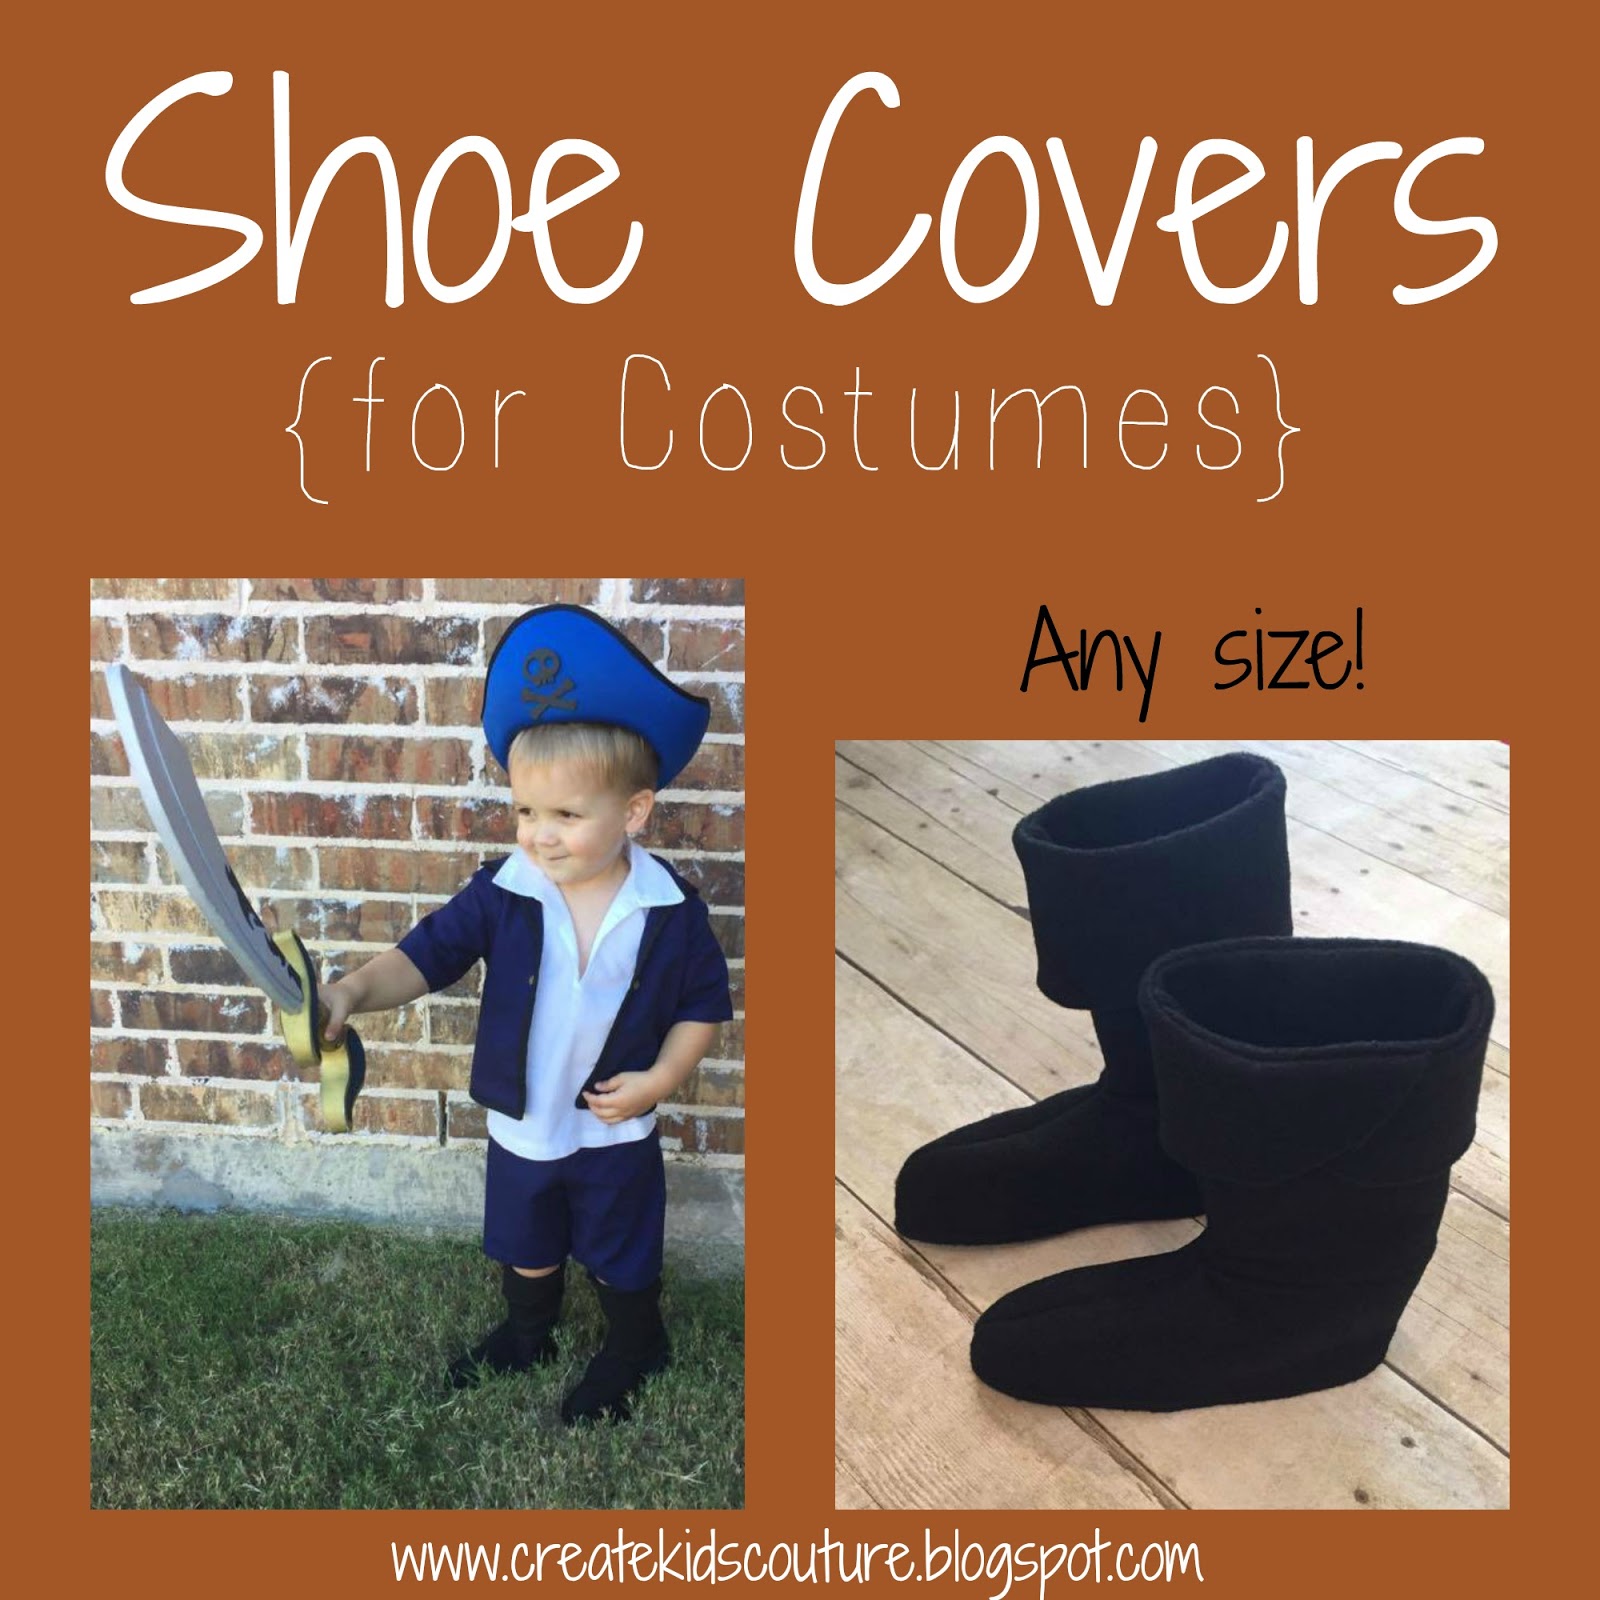
Aren't they perfect?! This little pirate is totally adorable and his "boots" are super snazzy. With our free tutorial, you can make these shoe covers for any costume and in any size! It's easy to customize them. The shoe covers are made of felt and they simply slide on over the shoes, where they're held in place with elastic on the bottoms. They're just like the cool boots that come with storebought costumes, except even better because you're going to make them! Here's Stephanie to get us started:
Materials
Needed:
- ½ - 1 yard of Felt
- Scissors or Rotary Cutter
- Cutting Mat if using Rotary
Cutter
- Ruler
- Pins
- Sewing Machine and/or Serger
- 3/4” Elastic
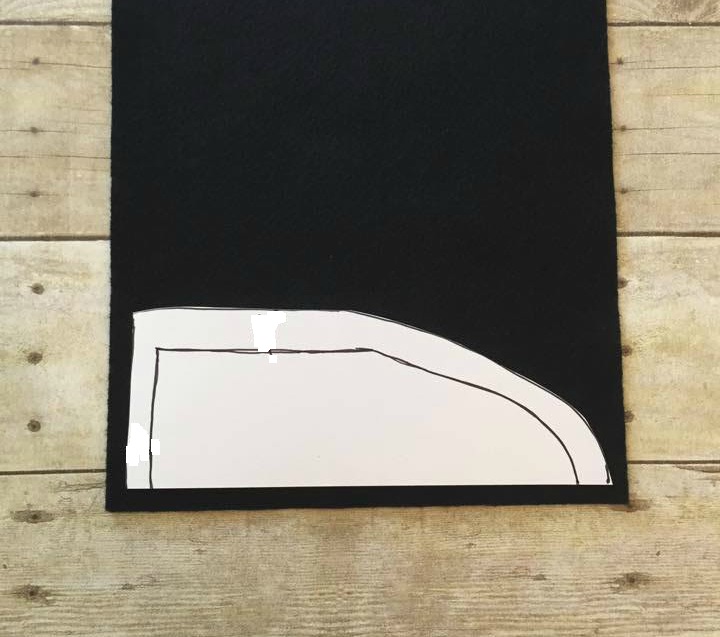
For my example, I’ll be using a toddler’s size 7 shoe. First things first, we will create our own pattern pieces. Take your child’s shoe and lay it on its side on top of a piece of paper. Now, trace the outline of the shoe.

Then trace the shoe line 1” away from the back of the shoe, and 1 ½” away from the top of the shoe. This is going to allow for seam allowances and a little give to get the shoe in the shoe cover.

Cut on the line we just traced, to create our pattern piece. Now pin this to our fabric and cut out the pieces. We will need a TOTAL of 8 mirrored pieces (4 for each cover).
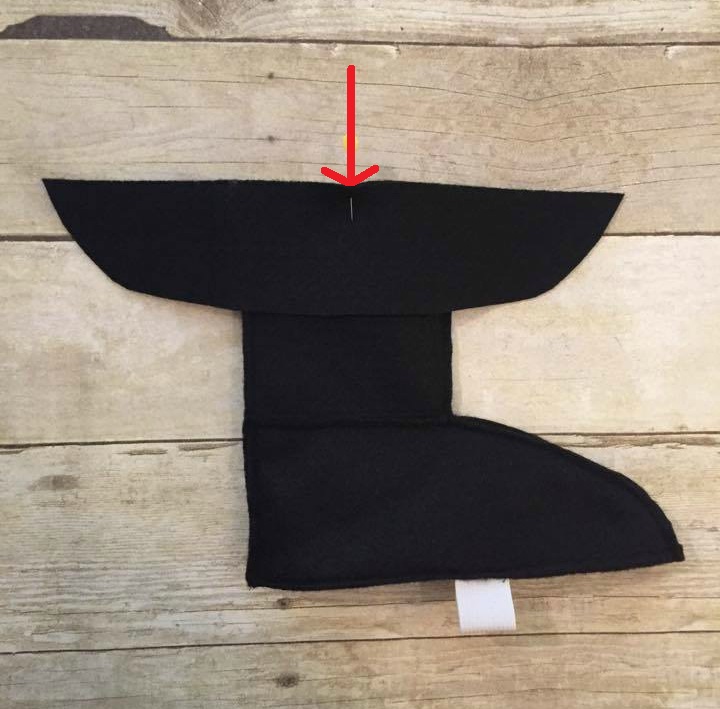
Next, measure across the straight top of our pattern piece, as shown in indicated in red in the photo. This one is 4 3/8” long.

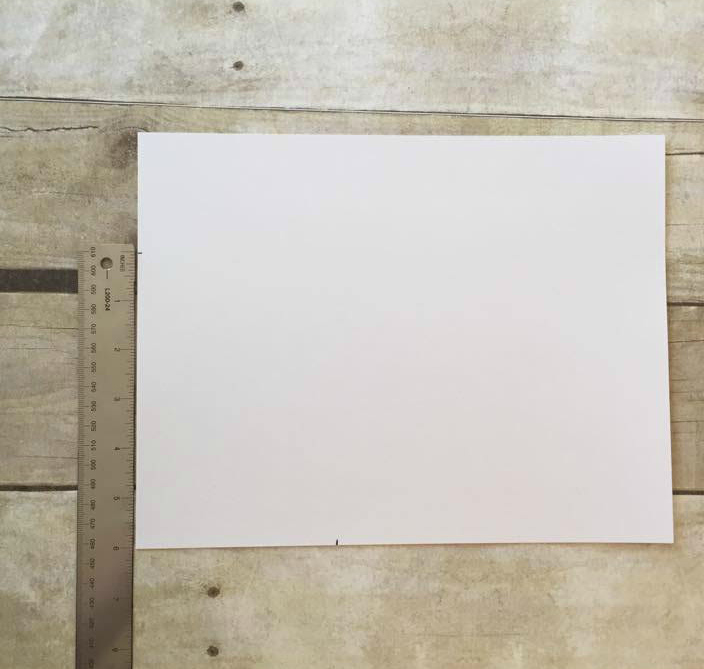
We are going to make a pattern piece for the top of the boot cover now. Take a piece of pattern and measure over (horizontal) from the left corner the measurement we just took, which was 4 3/8”. Then add another 1” to that and mark that spot. Then measure up the height you would like for the boots, I choose 6” for mine.
Now connect the lines and angle the line down to the 4 3/8” measurement, as pictured. Now we will cut out our pattern piece. Again, pin this to our fabric and we will cut out a TOTAL of 4 mirrored pieces (2 for each cover).

Next, we need to cut 2 pieces of 3/4” elastic to hold the covers in place. To do this, measure the WIDEST part of the shoes, and add 1” to that measurement. For example, mine measured 2 3/4”, so I cut two pieces of elastic 3 3/4” long.

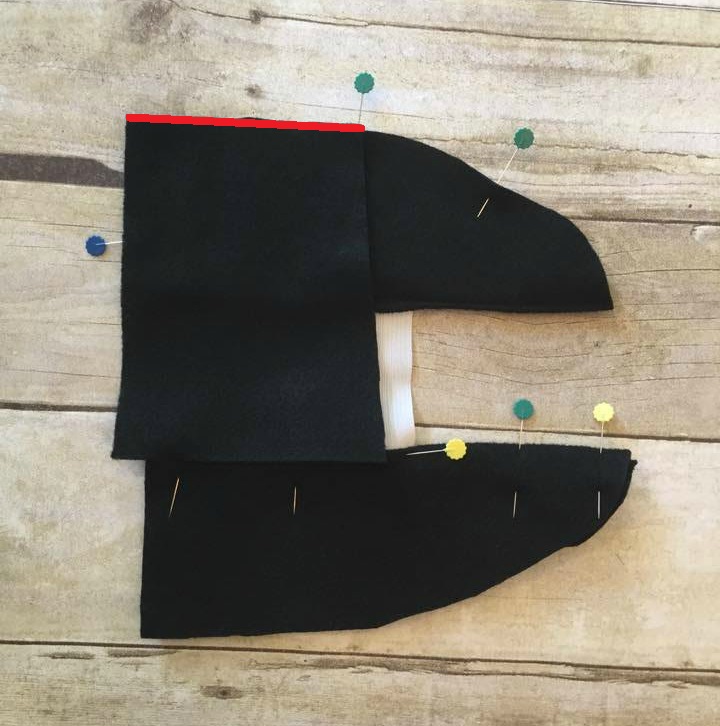
Now we will begin to sew! I used a 1/4” seam allowance for this project. Take two of the bottom pieces and pin together along the bottom straight edge, with right sides together. Sew along the bottom edge, leaving a 1” gap at the center, as indicated in red. Repeat with the remaining pieces. We should now have a total of 4 pieces.

Flip the piece right side out and pin the pieces together to create a nice crease where we just sewed. We will now insert the raw edge of the elastic 1/2” into the gap we left. Pin elastic in place. Repeat with a second bottom piece, and pin the elastic in place as pictured. Top stitch 1/8” from the straight edge, we just pinned. Be sure to back stitch over the space we inserted the elastic to stabilize it. Repeat with the remaining two bottom pieces.

Next, we will attach the top pieces to the bottoms. Take the short edge of the top piece and pin to the bottom piece along the straight edge on the top, with right sides together. The straight side should align with the back edge of the bottom piece, as pictured. Sew the two pieces together and repeat with the remaining 3 top pieces.
Turn the top piece up, so it’s flat, repeat with opposite side. Pin both pieces together with right sides together, and sew along the red lines, as shown in the photo. Repeat with second cover piece.

This completes the shoe covers, you can now turn the covers right side out. If you’d like a more finished look you can turn the top edge in 1/4” and topstitch around the opening.
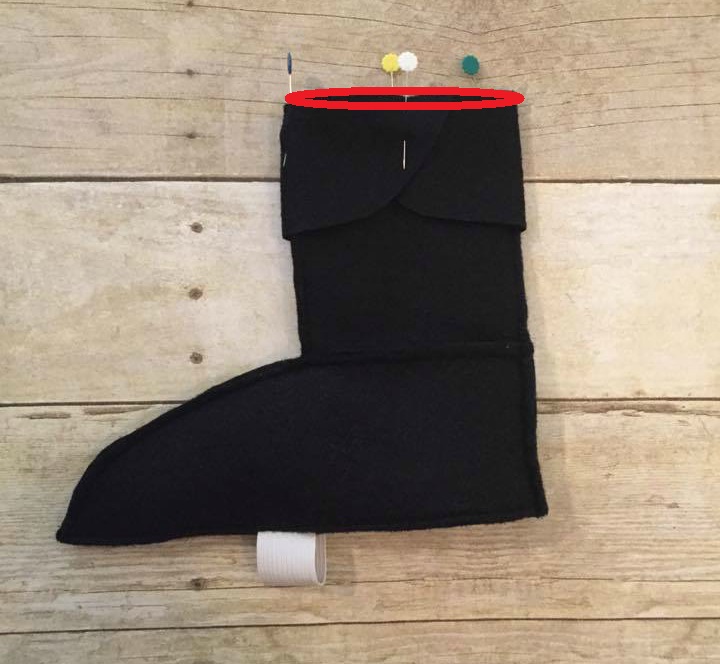
If you would like to add a cuff like mine, all you need to is measure the circumference of the top of the cover, and cut a cuff that is 2” longer than that measurement. I chose to make my cuff 2” wide for a nice pirate look. I also curved the edges, but that’s just personal preference. With the cover still WRONG side out, find the center of one side and pin the center of the cuff to the center top edge, as shown in the photo.
Then wrap the cuff around the top of the boot, overlapping the ends on the opposite side of the top piece. Sew long the top of the cover, and then turn the cover right side out and flip the cuff down, hiding the seam. Repeat with the second cover piece.
Pair those covers with all those fabulous CKC costumes! This is my little guy in his Captain Jake costume (it’s HOT here is Texas), I used CKC Merrick’s shirt, a modified Charles’ jacket, and a modified Jakob’s shorts to achieve this look!

Ah, I love him so much! Thank you, Stephanie!
This tutorial is so versatile and I love that I can use it for my kiddos in all sizes. My 13-year-old was trying to fit into my boots the other day to go along with his costume. I think he's going to freak when he finds out I can make some shoe covers in his size! And then my 7-year-old mummy will probably catch on and need some too...
Now it's your turn! Have fun sewing and don't forget to come show us when you're done.
Let's Create! ~ Kristen
i tried making these many years ago for my grand children and i can say they did not turn out this good so here is another attempt at it ...thank you ..
ReplyDeleteWith these size charts you can convert babies' and children's shoe sizes between the US, UK and European size systems. Find adult kids shoe size conversion here.
ReplyDeleteI think costumes are important part of kids growing up!
ReplyDeleteVery Awesome and Help full Article. It really helps me. thanks for sharing this. Find out more about: refurbished running shoes
ReplyDeleteCheck out the newest addition to the range of kids shoes. Shop now online through our latest collection of shoes for kids like avengers shoes, frozen shoes, mickey mouse shoes, spider man shoes, elsa shoes etc. To know more about kids shoes, visit shopDisney India.
ReplyDeletehttps://shopdisney.in/
Hi,
ReplyDeleteThere are numerous uses for a shoe cover laminating machine. Here are a few indications you can use in the office or at your residence.
Laminating Personal or Business Documents
The extensively common chore for various people is to laminate their documents. This can contain personal contact information, instruction handbooks, or even their itinerary.
Laminating Photos or Identification
Numerous people like to laminate small pictures of their households or close friends. Laminate your small snapshot and keep it in your wallet or handbag and it will endure the test of time. It is also common for work areas to laminate photo identification.
Laminating Maps
If you’re traveling, why not laminate your maps too? When you scheme your trip, mark all the points of interest you expect to visit, and then laminate the map! A very susceptible and effective way of preventing smudges or stains. You can moreover laminate maps for fire escape routes in your office building.
If you are looking for a shoe cover Laminating machine then look no forward than Merino International which has the finest one’s for you!
Click here: shoe cover Laminating machine
Love your pants and shoes. Great outfit! I need for my husband some new Flight Jackets styling ideas. Can you please share if possible ?? Thank you so much for all
ReplyDeleteWhat a fantastic blog post! As a parent who loves creating DIY costumes for my little ones, stumbling upon this creative idea of "Shoe Covers for Costumes" has been an absolute delight. The author's ingenuity and craftiness shine through in this wonderful tutorial.
ReplyDeletezeus network promo code