
If you have a little girl who has been chasing Pokemon, there's a good chance she is going to LOVE the free pattern we have for you today!

This pattern comes to us from our good friend Sheri Cata, who created this design. Isn't it nice of her to share her secrets with us? My daughter saw this photo over my shoulder and can't wait for me to make one for her! But if you don't happen to be feeling crafty today, or if you want your clip to have that super cool bottle cap center, you can buy already-made Poke-ball clips from Sheri for a special deal here on Rump Shakers for a limited time. Sheri's shop is Izzy's Beautiful Bows. She sells other cute stuff too of course!
The Poke-ball clip can be made with regular buttons as the center too. Here's what that will look like:

Super cute! What I love about Sheri's free tutorial today is that 1) it is a Poke-ball, of course 2) it uses fabric scraps 3) she did all the calculating for us, and 4) it is easy to follow and you end up with a unique but trendy hair piece! Are you ready? Here's Sheri:
Ok, so first you need supplies!
-hot glue gun
-5 white 2 ½ “ x 2 ½” squares (more or less depending on how full you want it)
-5 red 2 ½ “ x 2 ½” squares
-2 black 2 ½” x 2 ½” squares
-center piece: either a bottle cap image all made up or grab 2 buttons one black largish one and a white one that is a bit smaller
- 1” felt circle

Ok, so now lets get started!
First, you want to start with the red squares. We're going to take a square and fold it in half with the corners close to each other. Not exact though; we want them to spike off a bit.

Then we're going to fold it again from right to left, not completely overlapping it. Take some hot glue and make sure the side you just folded is secured to the other side.

Ok, now we're going to start placing the pieces as we go. To start, just add a dot of hot glue on the back, down on the point of the piece you just made and glue it slightly close to the edge with most of the “petal” off the felt. Repeat the above steps for the rest of the petals as you go!
Important: When placing the second petal align it just off the first petal (see pics below). This creates a look like there are more pieces than there actually are, and a fuller flower.


Now after you placed the first 5 red petals do one black petal.

Then go on to the white petals…….then do the last black piece.
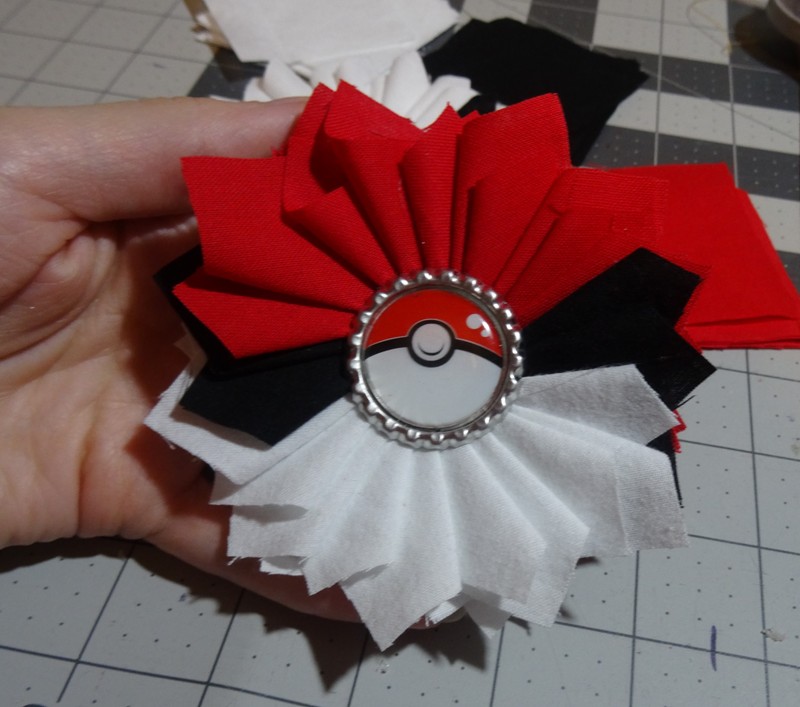
When you get to the end you will want to slightly lift up the first red petal and place it on the black one to keep the spiral flower effect going. Super easy. (Don't mind my messy gluing.)

Then add your center piece. To do this just glue your black button on first in the center, make sure its big enough to cover the messy glue points and the hole there. Then add your white button on top!!!!

Or add your bottle cap image.
After that add your clip or add it to a headband any way you would like. Here I just put another piece of felt over the bottom of the clip and glued that piece in place. Super easy and adorable results! Heck, I even wear one lol!!!

Yay, have fun!!!!!!
--------------------------------------------------
Thank you so much to Sheri for this Poke-ball clip tutorial! It looks like a blast to make and we appreciate her taking the time to give us photos of each step. Again, if you want to check out some of Sheri's bows and show her some love, you can do so here.
Now we want to see the ones you make! Please share in our patterns group on FB when you're done so we can all ooh and aah over them.
Let's Create! ~ Kristen
Wow, cool post. I'd like to write like this too - taking time and real hard work to make a great article... but I put things off too much and never seem to get started. Thanks though. flower hair accessories
ReplyDelete