
Just a little over a week until Father's Day! So far we have shared some really great free patterns with you for gift ideas. If you're running short on time now and still want an awesome gift for that outdoorsy man in your life (or at least one who eats s'mores), you're going to love today's free pattern!
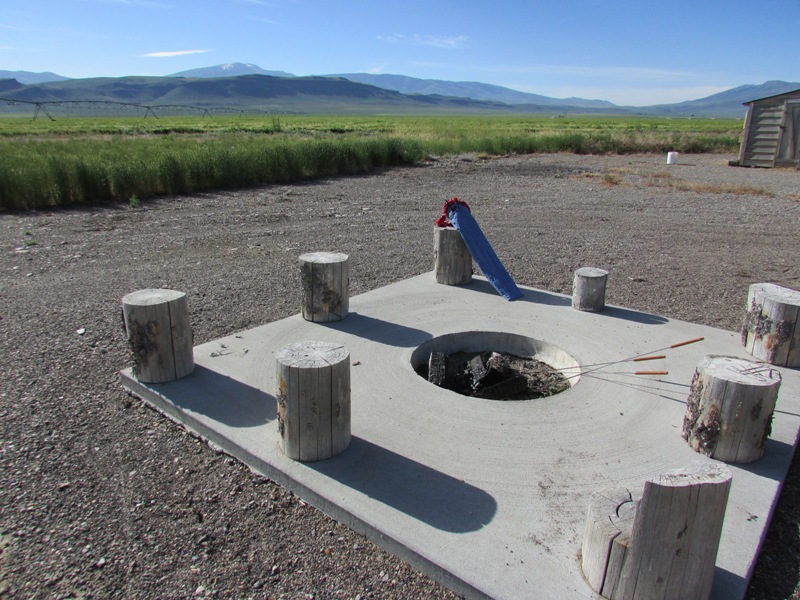
Welcome to my paradise! This is where our family likes to wind down on summer evenings after a hard days' work/play. Hot dogs and s'mores by the campfire can't be beat. And what's that you see in the corner of the fire pit area up there?
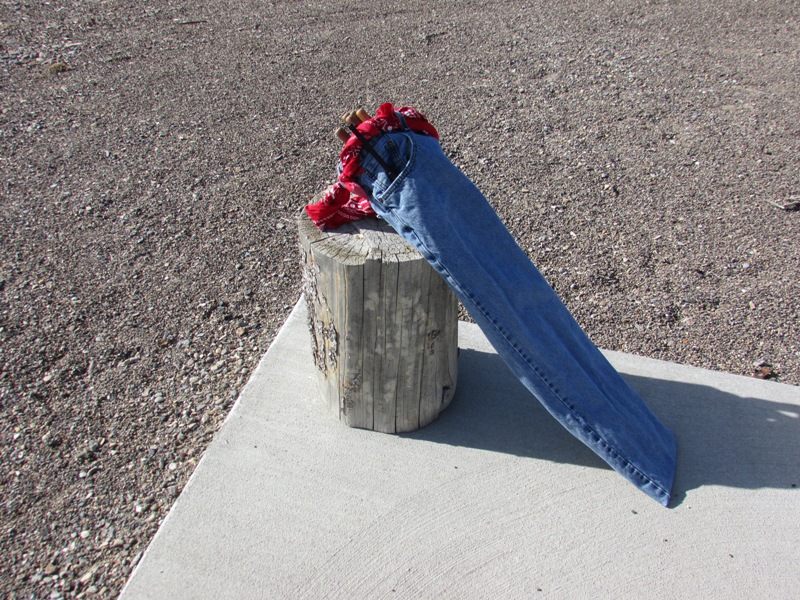
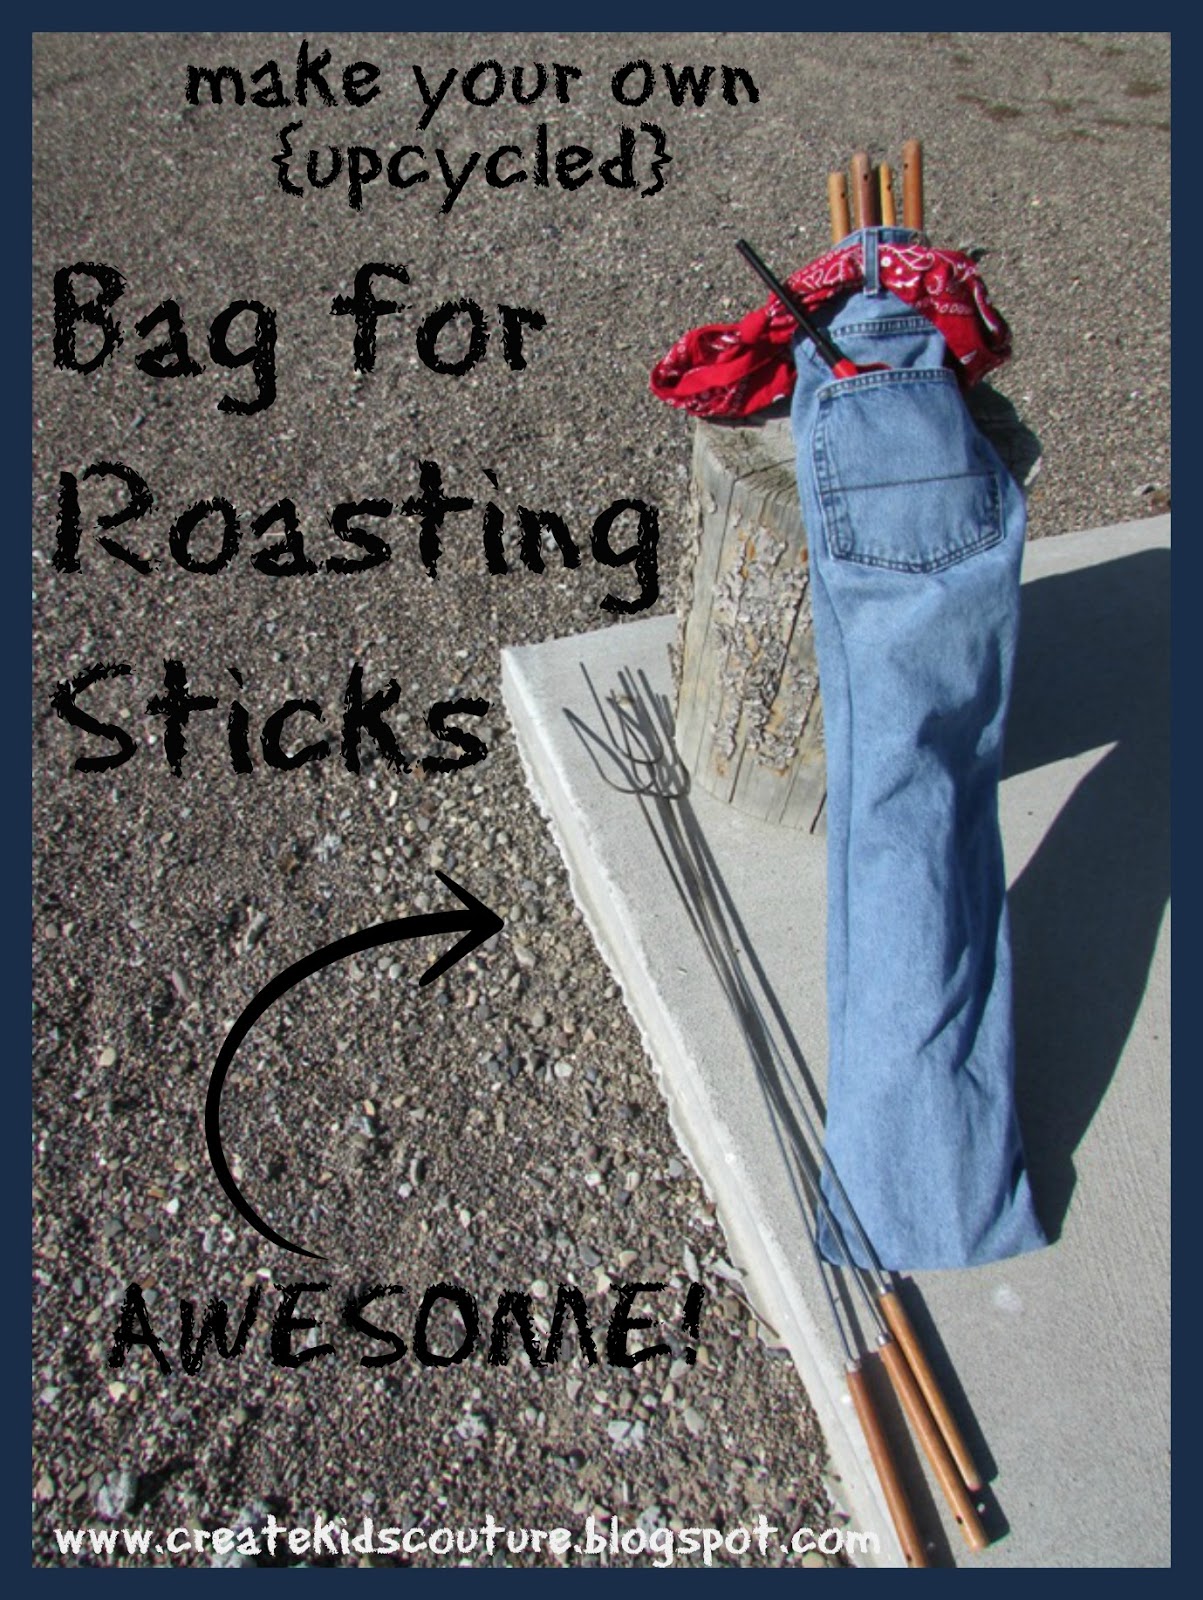
Just our handy dandy Camping Bag for Roasting Sticks, which YOU are going to learn how to make today!
Fun, right?!
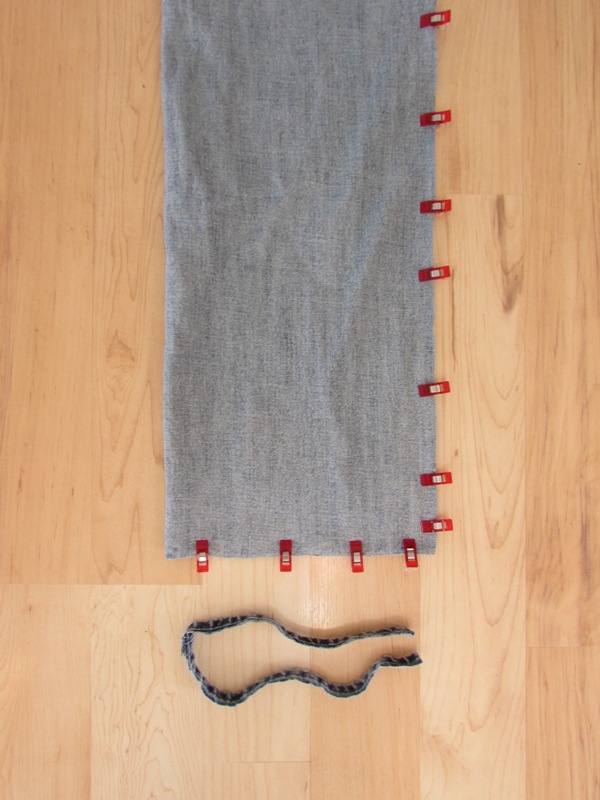
All you need is an old pair of men's jeans, two red bandannas (or 1/2 yard fabric), and a denim needle for your sewing machine! If you don't already have some, you will probably want to buy some roasting sticks too -- I bought these at Walmart for Father's Day forever ago. And because they are kept safe and sound in the awesome bag, they have lasted a loooong time.
The bandanna straps make it easy to hang up on a nail in the garage or closet, and easy to carry around. The kids always fight over who gets to bring it out. And my favorite part -- the pockets! You can keep all your fire-starting goodies right there with the roasting sticks. (Assuming that your kids are old enough to understand fire safety. If not, keep those locked away!)
Let's get started!
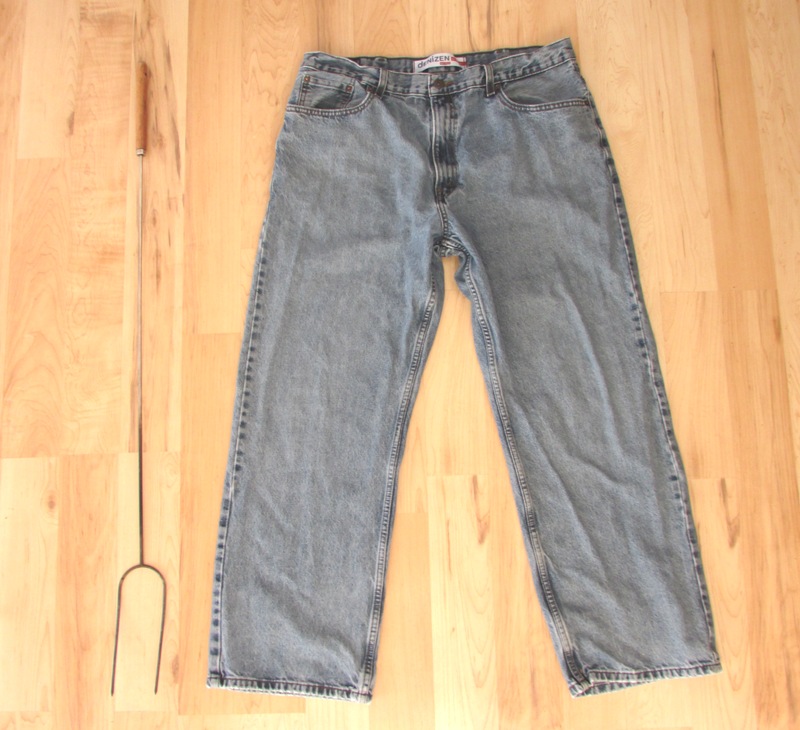
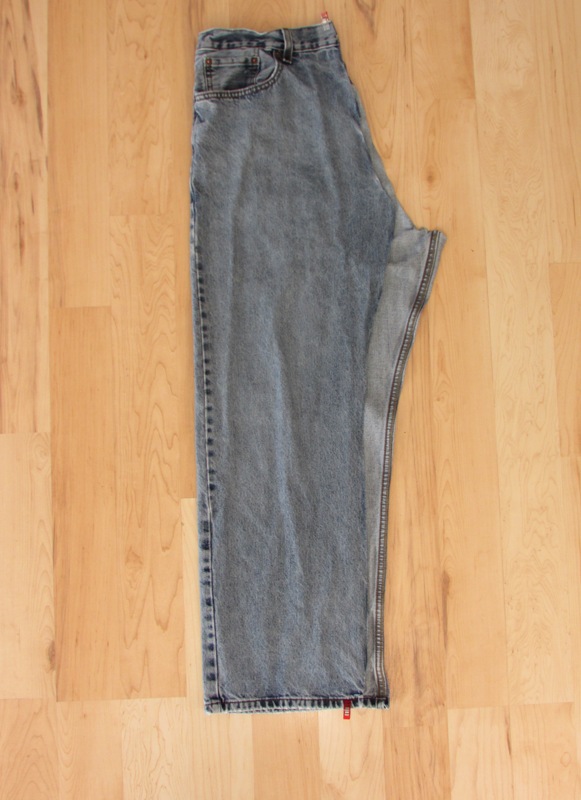
First, check to make sure your chosen pair of jeans are long enough for the roasting sticks. It's okay if the sticks are a little longer, but you want the bag to be as deep as possible in relation to it. I think most adult jeans should be fine.
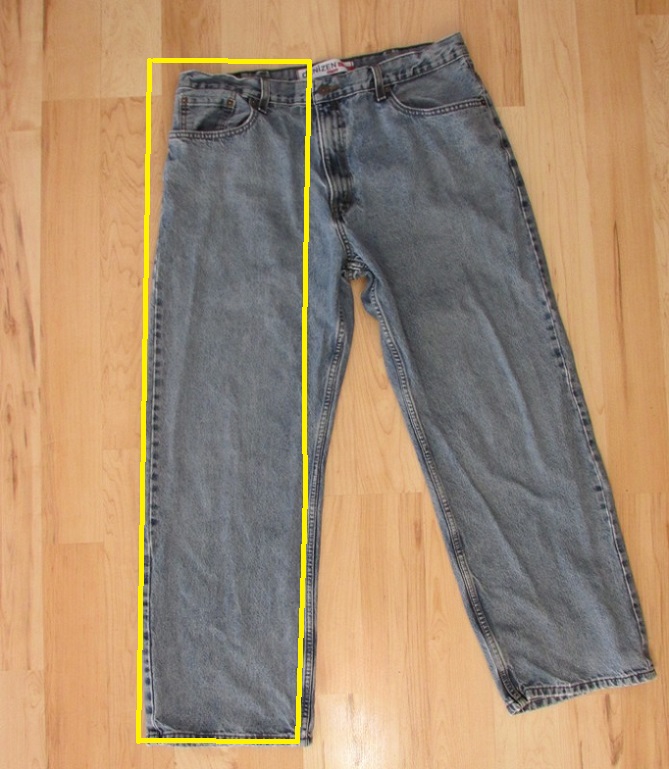
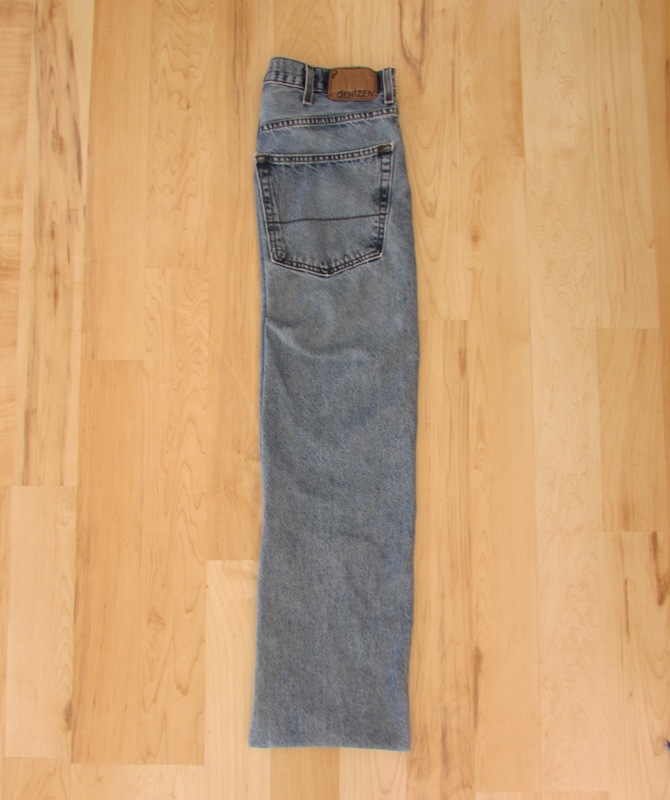
For one bag you will only be using half of the jeans. The photo above shows the portion of the jeans you will be using. I usually like to use the left side (as shown here) because on the back of the jeans it will include the brand tag on the waistband, which looks pretty cool.
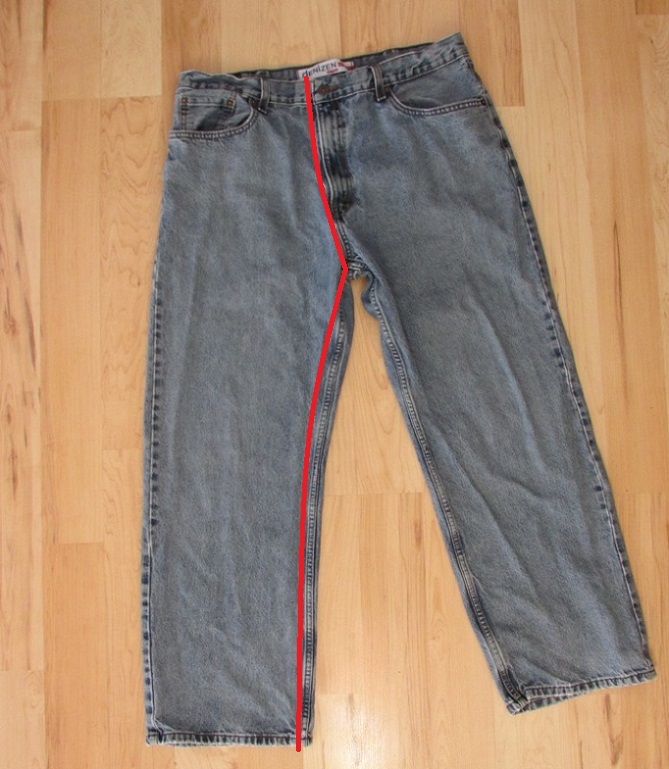
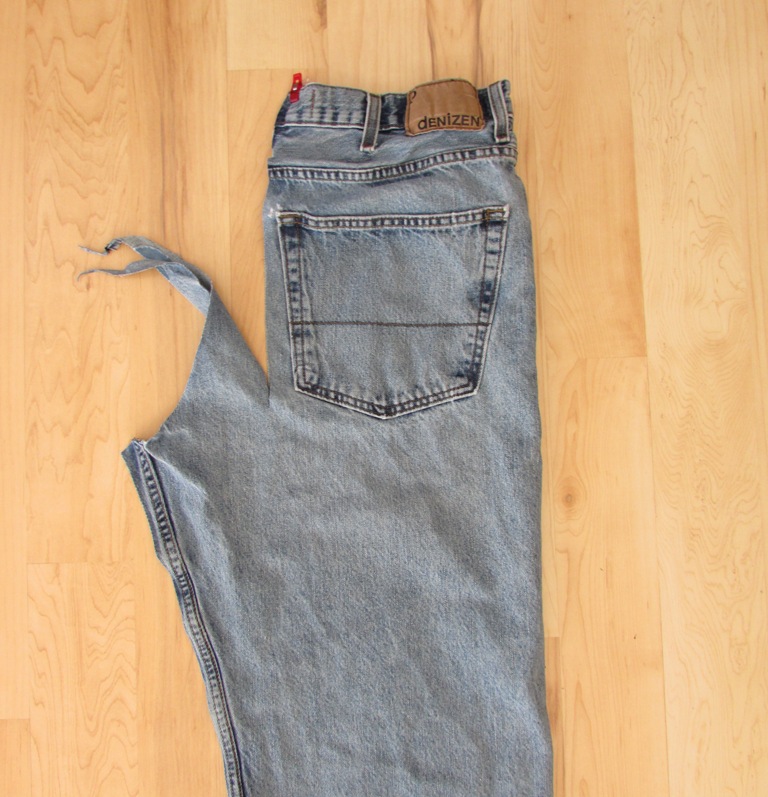
Starting at the bottom front of the jeans' leg, cut through the top layer only up along the inseam and then up along the fly, as shown in red above.
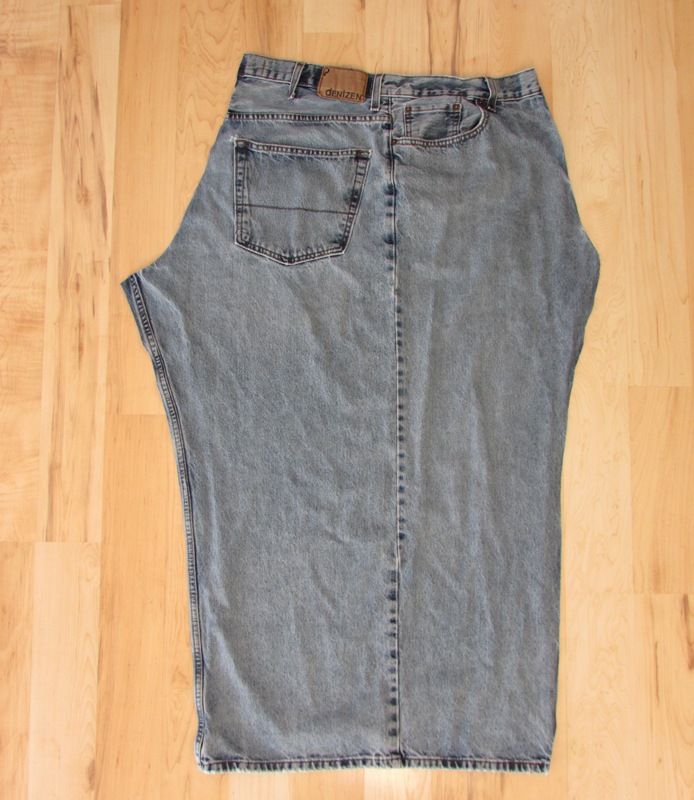
Flip the jeans over and do the same on the back, cutting close to the seams. When you're done it will look like the photo above. Notice that the front and back are still connected at the side seam.
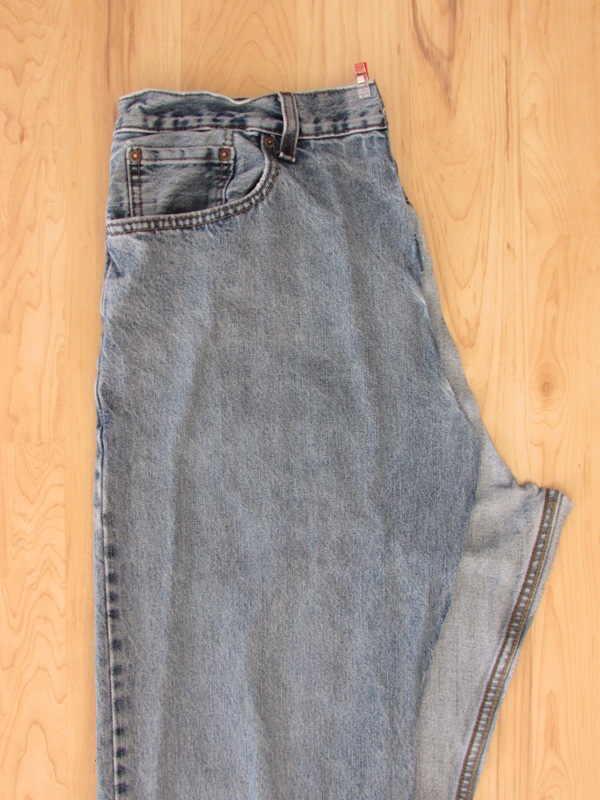
Fold the piece in half with right sides out. Match up the raw edges at the very top and use one pin or clip to hold it in place right at the top. I used fabric clips because of the thick layers.
Then at the very bottom using one pin or clip to match up the bottom hems at the point where they lay flat. Notice in the photo above that bottoms aren't matched up on the side edges; only at the bottom where they can lay flat. You will trim the excess in a minute, creating a straight line from the top to the bottom.
Flip the jeans so you're looking at the side with the back pocket. Beginning at the top, cut a line straight down, through both layers, leaving as much space as possible to the side of the pocket. Cut that straight line until you're just below the pocket.
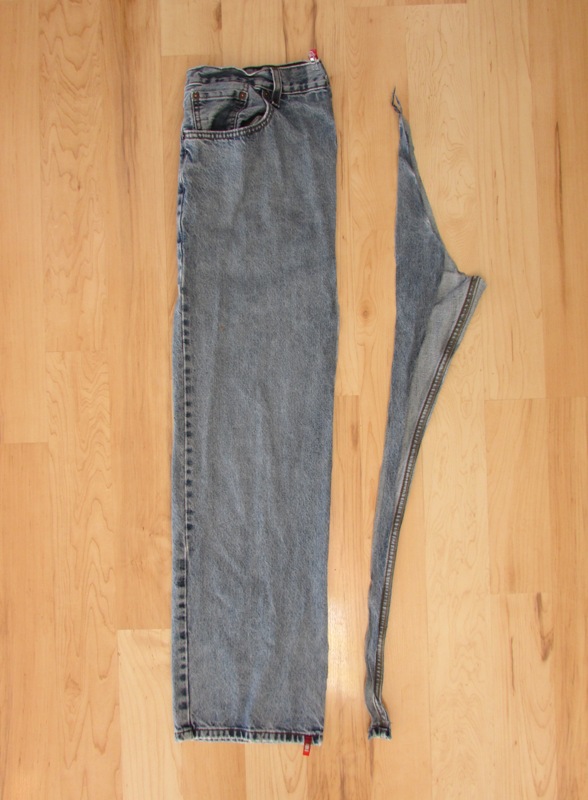
Flip the jeans over so you're now looking at the "front" side of the jeans. Continue cutting the straight line down through both layers until you have a nice rectangle of the jean layers, as shown above.
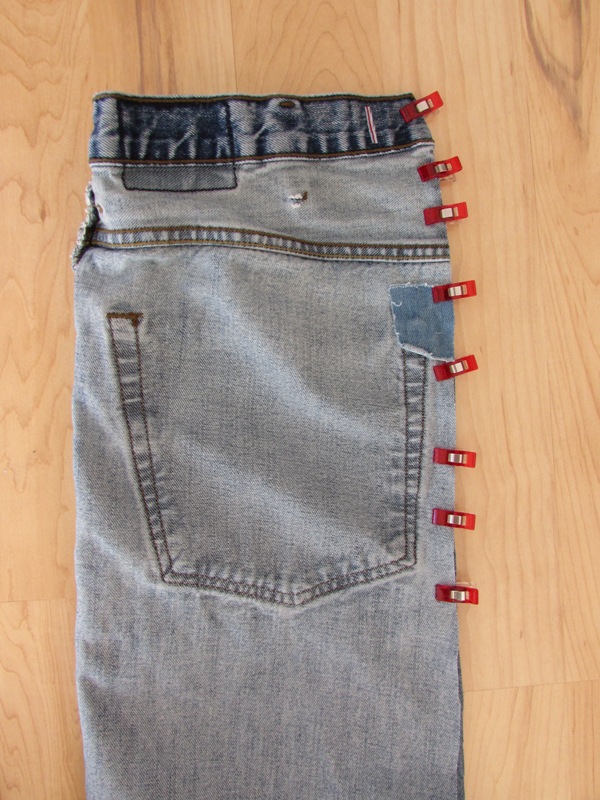
Now you're ready to open up the piece and then fold it the other way, with right sides together. Match up the raw edges at the top and pin or clip them in place from the top down to just below the pocket.
Skip down to the bottom of the pants. Cut off the bottom hem close to the edge -- it is much too bulky to leave there.
Pin or clip the bottom edges together. Then pin or clip the side edge beginning at the bottom and working upward until you get about halfway.
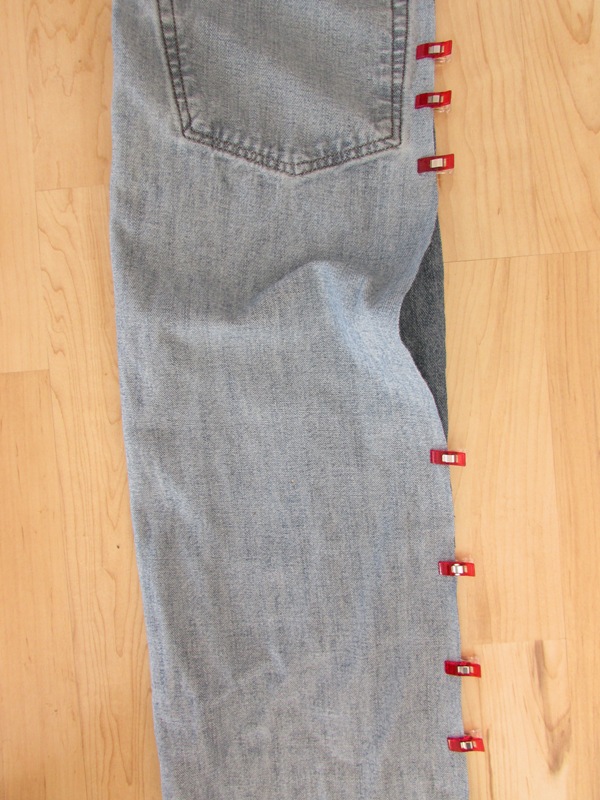
When you get to this point pinning you will notice there's some excess on the "back" edge of the pants.

Grab that excess a couple inches below the pocket.
Fold the excess down so it lays flat and matches the other raw edge.
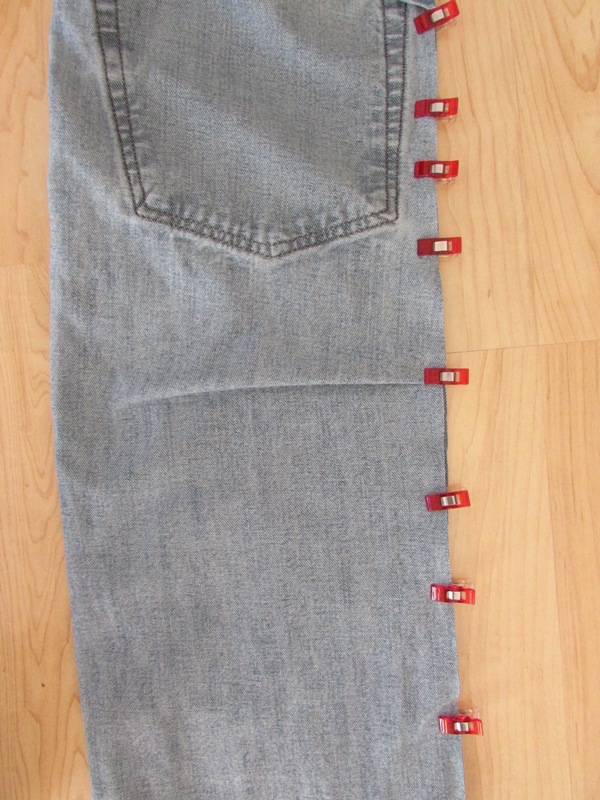
Pin or clip that fold in place. The edges of your pieces should now all be neatly pinned.
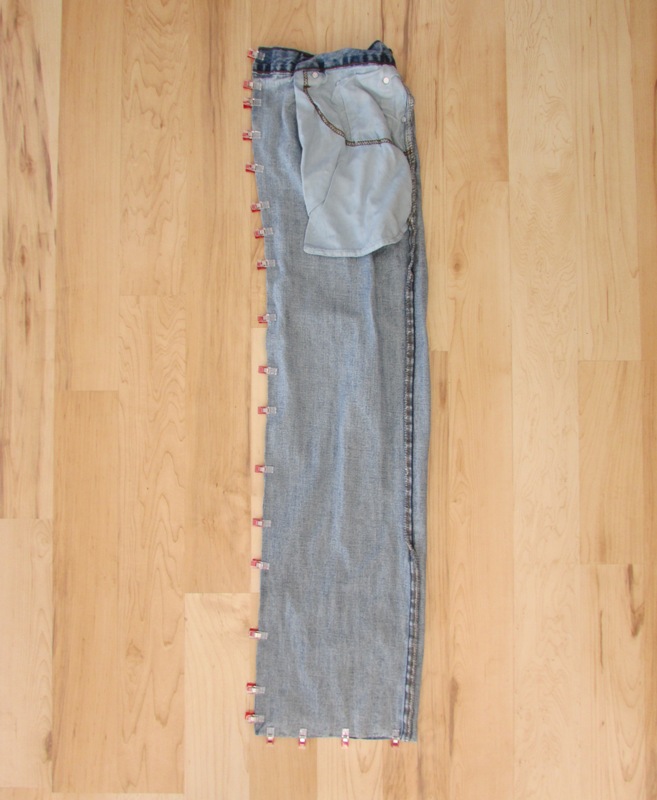
Flip it over and make sure everything looks good on the other side too.
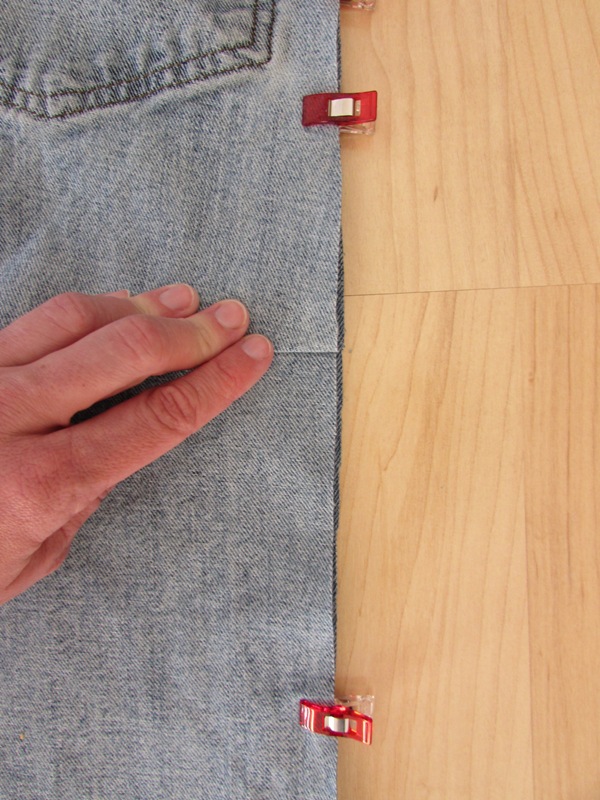
Now you're ready to sew! You MUST use a denim or leather needle to sew through the denim layers. Beginning with the bottom of the leg, sew the pinned/clipped edges using a 3/8" seam allowance. After sewing the bottom edge, sew up the side pinned edge, again starting at the bottom because the layers aren't as thick there.
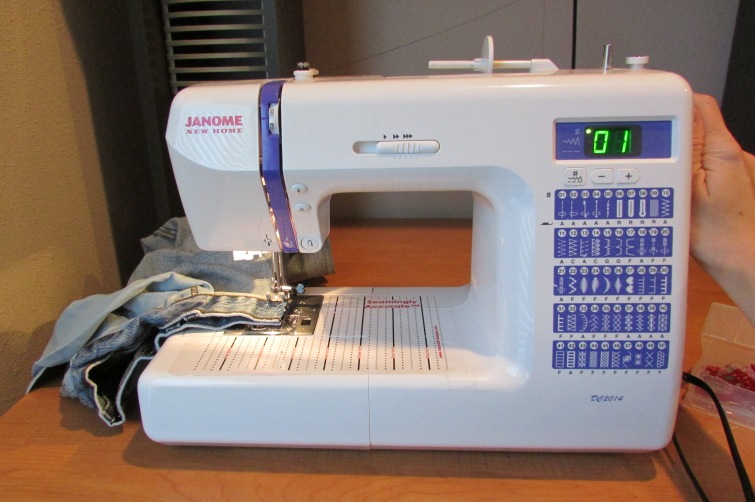
When you get up to the waistband area at the top where there are even more layers, you may find it necessary to hand-crank the machine rather than using the foot medal. Turn the knob toward you slowly, advancing the needle through the stitches, sewing toward the top. If you get to an especially thick part where the needle refuses to go down, lift your pressure foot and move the fabric ahead a *tiny* bit and then try again. It's a lot easier/safer to work through areas like this by hand instead of fighting your machine who may or may not like the thick layers. The stronger/sharper your needle, the better your machine will handle it. If you absolutely can't get it through, you may want to finish by hand with needle and thread. (I haven't ever had to do that though, even with a basic machine.)
After sewing the bottom and sides, go back and finish the raw edges using a zigzag stitch. You can use your serger if it's strong enough but my serger doesn't like denim layers. With the zigzag stitch you still may need to handcrank again.
At the very top of the pants be sure to backstitch several times for durability, and you can even go back and sew a couple bartacks like I did above. (For a bartack I did a zigzag stitch with the stitch length set to 0, or you can lower your feed dogs.)
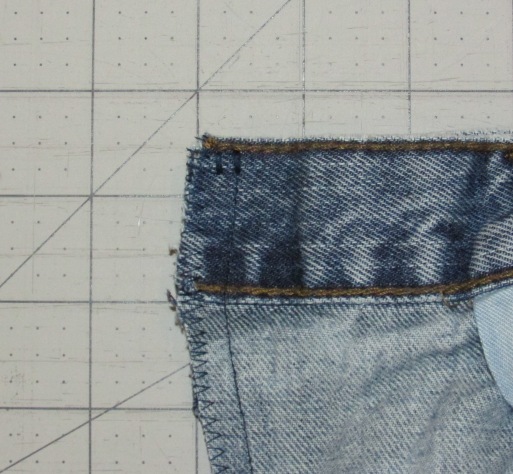
Clip the bottom corners close to the stitching and turn the entire bag right side out. Use a dowel to push the corners out so they form a nice rectangle. It's looking pretty awesome at this point!
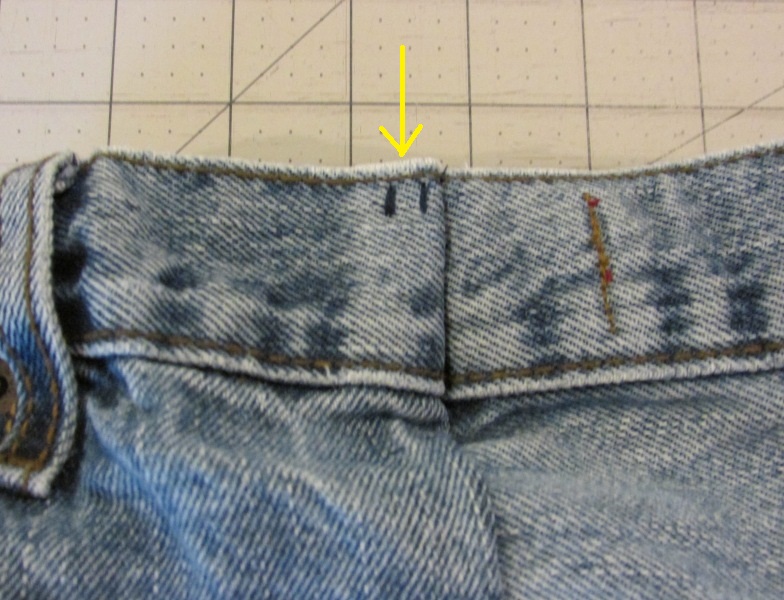
If you want, at the very top you can also bartack the seam to one side, as shown above. Again, I used a zigzag stitch with the stitch length set to 0, in two places. This just makes it a little more sturdy.
Now for the fun part!
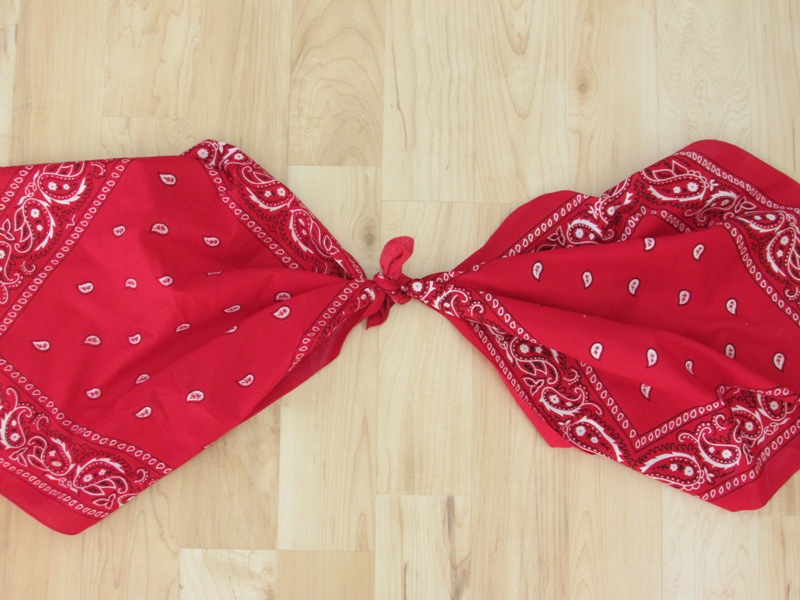
Take your two bandannas and tie two of their corners together in a square knot.
(Square knot: Right over left, left over right. It shouldn't slip when you're done.)
Note: If you want to make your own bandannas using fabric your man will love, simply cut two squares that are 21" x 21" each and do a rolled hem around the edges. Then tie as shown above.
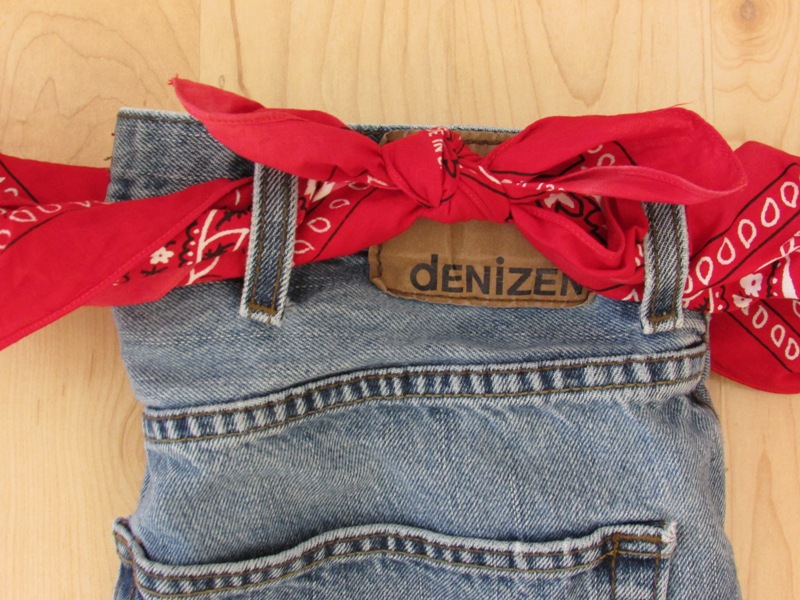
Roll up each of the bandannas so they are thin enough to feed through the belt loops. Bring the two loose ends together and tie another square knot. Make sure it doesn't slip.
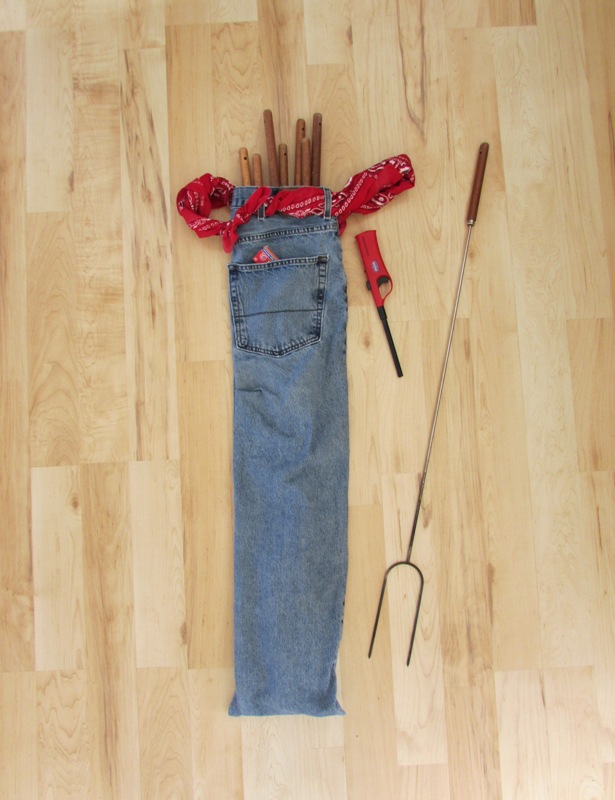
And now load it up with all the goodies! What an AWESOME gift that every man (almost) will love!
Final note: Make sure you're careful with the bag and tools if kids are around, and of course you always want to burn off and cool your roasting sticks all the way before putting them back in the bag!
We hope you enjoy this set as much as our family does.
Let's Create! ~ Kristen
No comments:
Post a Comment