

A pretty sash adds both function and style to many of our patterns. And while we do include the sash instructions right in the patterns, we thought it would be helpful to have a tutorial and video here on the blog for our Sewing 101 friends! First, we will use photos to show two ways to turn a sash, and then if you stick around there's a video to show just how quick and easy it can be to turn a sash using a dowel! There is a slow way to do it and a fast way to do it -- we much prefer the fast way so we can get on with our creativity!
A Sash that is Open on Both Ends
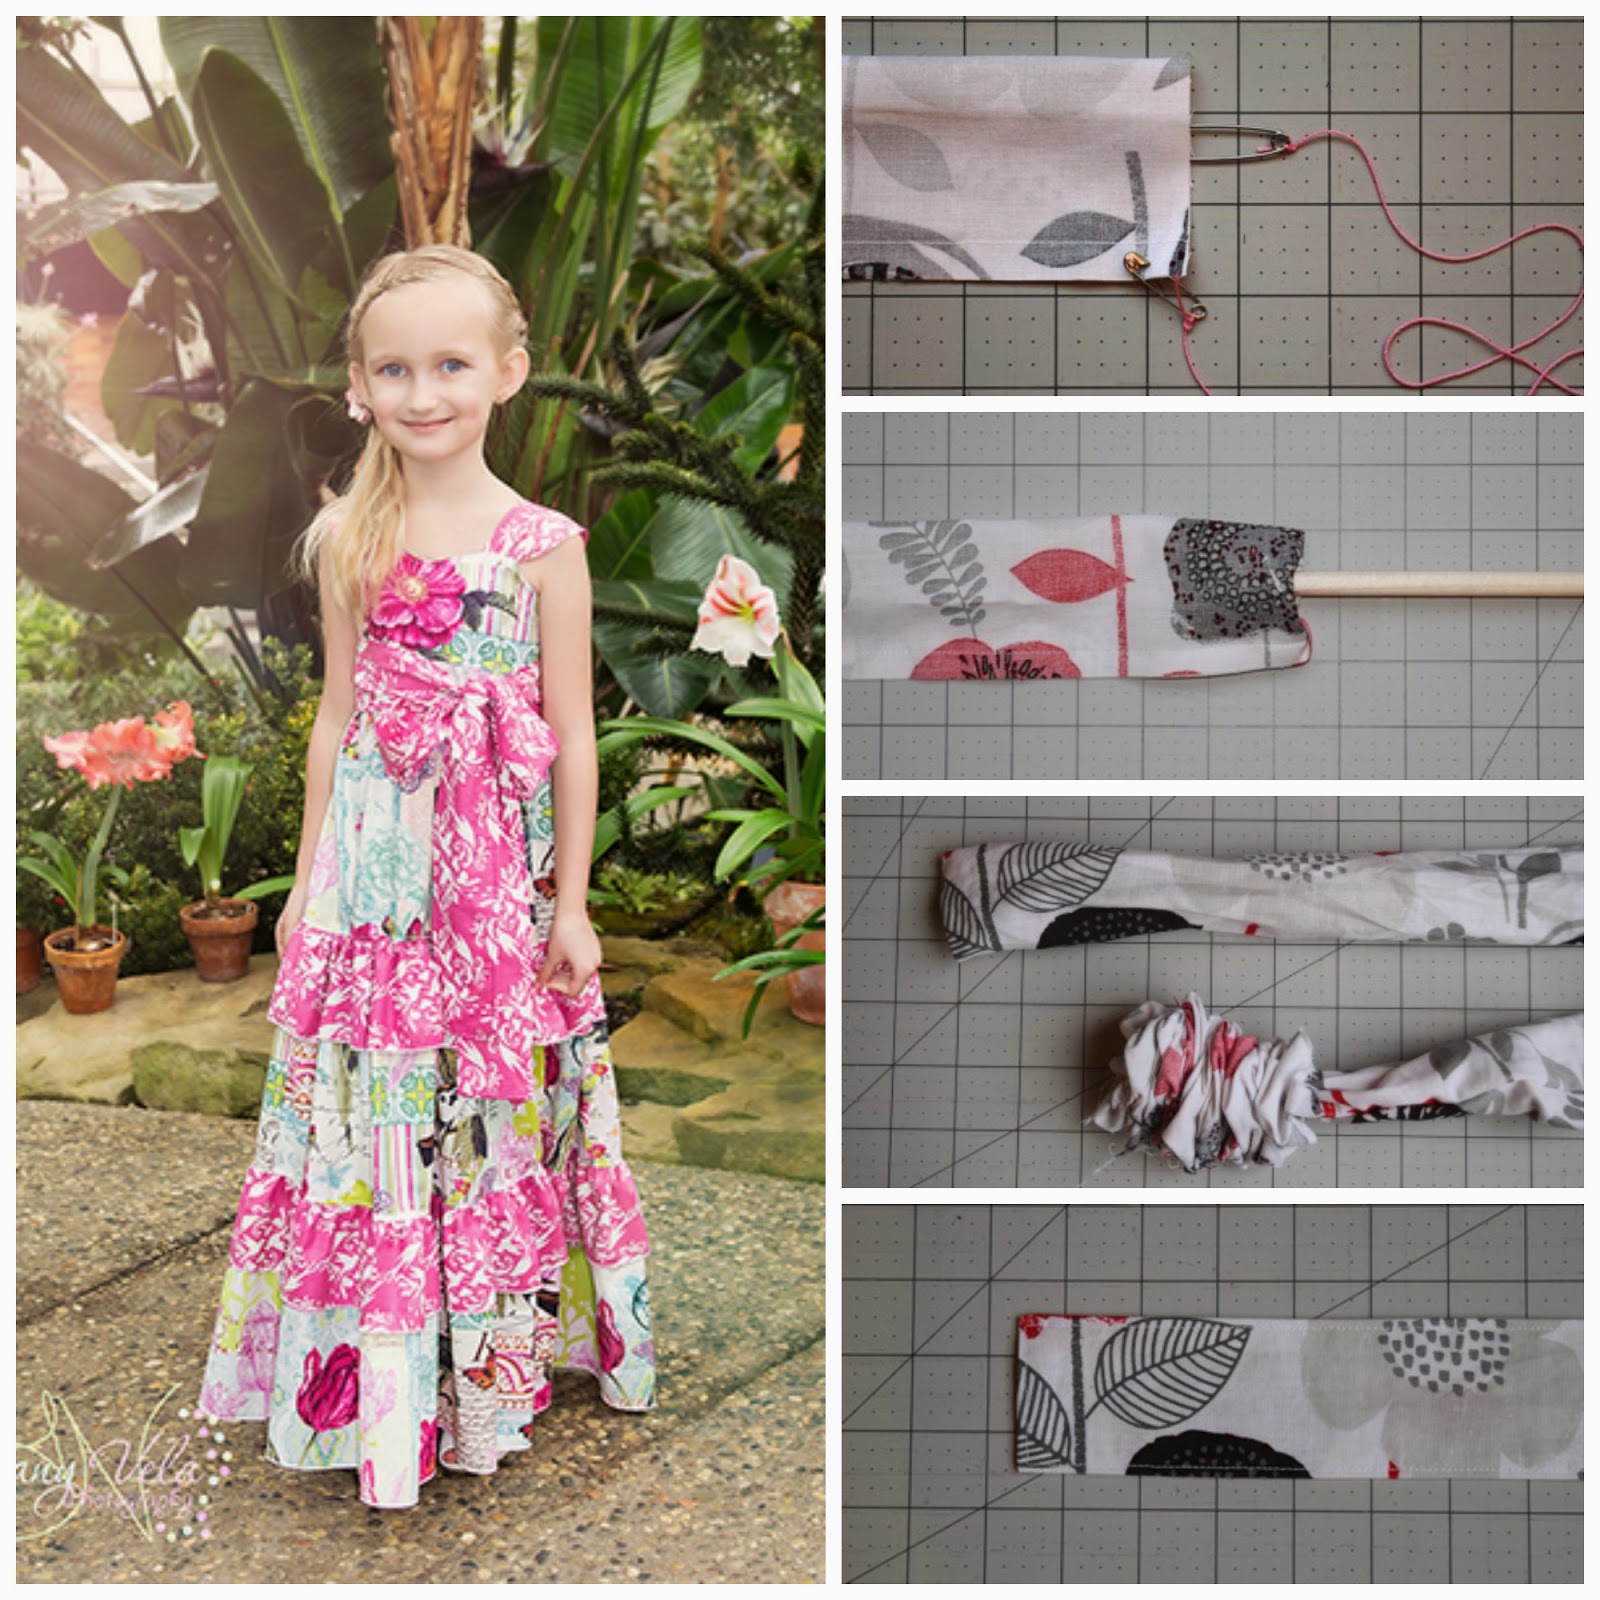
If you need to turn a sash or strap that is open on both ends, you will use the safety pin method. This means that you would have already sewn one long edge and left the two ends un-sewn.

There are fancy sash-turners that you can buy, but I prefer using two safety pins and a string. As shown above, you can tie a long string the the back ends of two safety pins. I like to use one small safety pin and one large one.

Attach the small safety pin to the seam allowance of one end of the strap. Attach it far enough from the edge that it won't tear through the fabric when you pull on it. Then slide the large safety pin into the hole of the sash and feed it through the sash. When it comes out the other end, you simply pull on it, and the string will pull the small safety pin through. Just remove the safety pins and you're done!
A Sash that is Closed on One End

To turn a sash that is closed on one end, you will first clip the corners so they will have a nice point after turning. Then take a large dowel or other long stick to use for turning. Mine is about 12" long.

On the closed end of the sash, make a somewhat flat edge at the seam and press the dowel into it, as shown above. It is very important to do this on the closed end of the sash if you want to get done quickly!

Push the dowel into the sash and continue pushing as you bunch the fabric up around the dowel. It should not be hard to push through, but it does go faster if you push on the dowel using a hard surface, or even your leg or belly. (That will make more sense when you watch the video below.)

Continue pushing the dowel through, until the end of the sash/dowel comes through the other end. See photo above.

Slide the bunched up inside-out fabric down the sash, away from the dowel, until the sash is completely right side out. Then just slide the dowel out through the opening. Your sash is now turned!

I then use a creaser or other pointed tip to make the corners of the sash nice and crisp.

We recommend topstitching all sides of your sash so it will stay nice and flat after washing. It also gives it a professional finish.
Now you're ready to add a cute sash to all your outfits! That might have seemed like a process, but you can actually turn a sash in 30 seconds or less! Here's the video I promised you. I think it always helps to see these steps in action:
https://youtu.be/P3eGvvxVHxw
And that's how it's done! Thanks for joining us in this Sewing 101 tutorial. If you want to see more, be sure to search the blog for our other Sewing 101 tips! The search box is right up in the top corner and we have hundreds of helpful blog posts for you to search by topic!
Let's Create! ~ Kristen

Thank you so much admin for uploading such amazing content with us your blog is really helpful for me.
ReplyDelete