
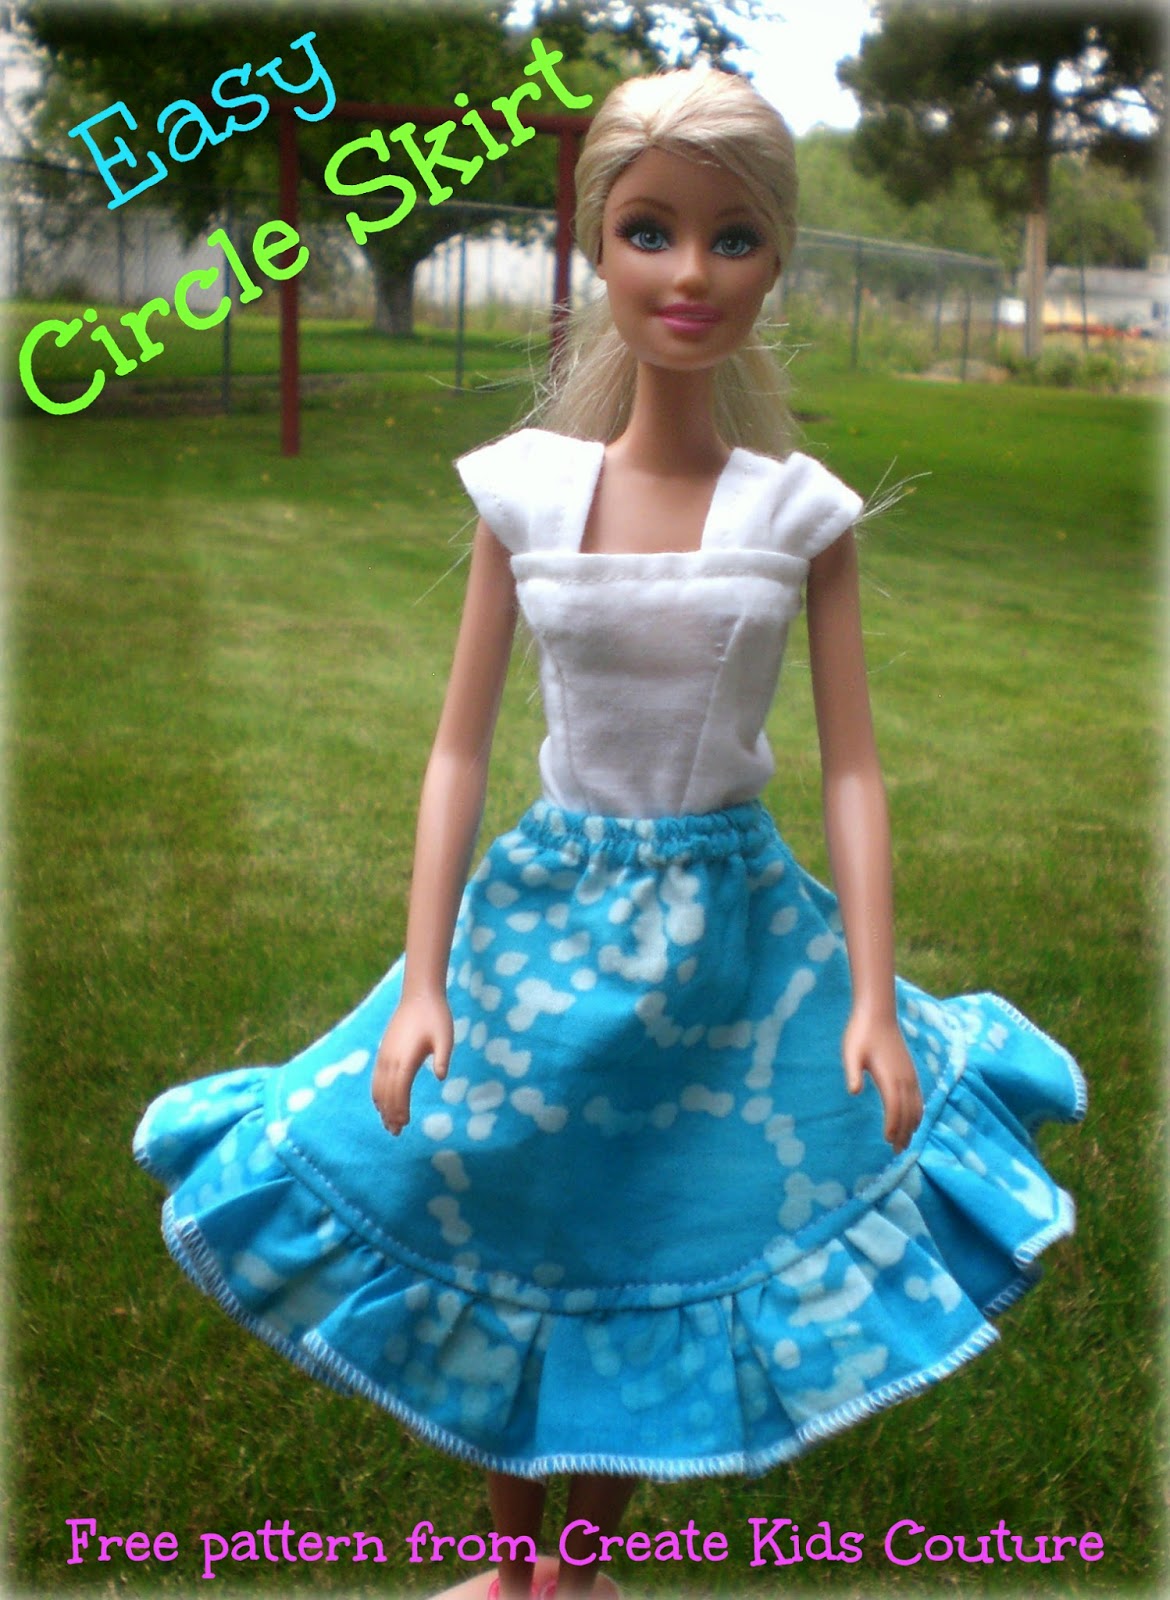
Today we have Tasha Engh here as a guest to show us how she took our popular Cece's Circle Skirt pattern and used it to create a Cece-inspired skirt for Barbies! Since the iconic dolls are so tiny, their clothes require different steps than the children's clothing we're used to making. I'm so excited that Tasha has agreed to share this with us today. Here she is!
Thanks so much for letting me share this cute little Barbie
skirt through your blog! I primarily sew for my daughter (which is why I
decided to momentarily lose my marbles and sew teeny tiny Barbie clothes!); you
can find more of my sewn, ready-to-ship stuffs at Little Chickadee Boutique.
Barbie’s
Cece-inspired Circle Skirt
You will need: One scrap/small piece of fabric
approximately 17”x 8”, 1/8 yd, or scraps!
One
4” long piece of ¼” elastic
Matching
thread
Since this pattern is for such a small piece of clothing,
seam allowances throughout with be ¼”. If you are finishing your seams with a
serger, you may find it easier if you do a three thread serge (as if you were
doing a rolled hem) to make it a little narrower.

Cutting: Cut 2 of
skirt pattern piece, each on the fold
Cut 1 ruffle piece 1.5” H x 32” L OR 2 pieces, 1.5” H x16.5” L ( the two pieces will
work better if you are using a scrap of fabric or something small such as a fat
quarter).
If you are doing a narrow hem by hand on your ruffle, you will need
to increase the height of the ruffle to 1.75”.
-If you are using 1/8 yard, cut
your two skirt pieces first. Then use the remainder to cut your ruffle pieces.

Step 1: If you
are using two pieces for your ruffle, sew the short sides together to make one
piece. Finish as desired. Make sure you DO NOT sew the ruffle pieces into a loop
as you would with a girl’s skirt.

Step 2: Pin one
edge of your skirt pieces, right sides together. Sew and finish seams as
desired.

Step 3: Serge or
zigzag across the top of the skirt pieces (at the waistline). Set aside.

Step 4: Roll hem
of your ruffle.

Gather ruffle and pin to bottom edge of the skirt. If you
used two pieces in your ruffle, match up the center seam with the side seam of
the skirt. I find it easiest to leave the very ends of the ruffle flat, as
shown.

Step 6: Sew the
ruffle to the skirt. Finish as desired.

Step 7: If
desired (or if it will drive you crazy to not finish it right), press seam
toward body of skirt. Top stitch from the right side, 1/8” from seam.

Step 8: We will
now be doing the elastic waist at the top of the skirt. Make sure that you have
your bobbin loaded with thread that matches your skirt (again, if that’s
something that will bother you. If you’re more of the “Meh, it’s going on a Barbie” type, use
whatever you want). Lay your skirt piece
right side down. Match the end of your elastic to the side of the skirt, just
above the ‘notch’. Stitch forward a few
stitches, then backstitch. We will now stretch the elastic as we sew it down.
The elastic needs to be about ½” from the top edge. I find it most helpful to
keep the edge of the fabric at my ½” mark on my plate, then center the elastic
under my presser foot as I sew. Make
sure the needle is down before you start to stretch your elastic! Or you WILL
pop that puppy right out! I also find it helpful to use my left hand to held
the tail of my fabric that has already had the elastic stitched to it.

Sew straight until you reach the seam joining your two skirt
pieces. At this point, you may need to
put your needle down and pivot slightly. Stretch the remaining amount of
elastic to the notch on the other side of the skirt, and continue sewing. Once
you reach the edge of the fabric backstitch several times to finish. If you
have a little bit of elastic hanging past your skirt, trim it off.

Once you are finished with step 8, your skirt should look
something like this:

Step 9: Now to make the casing! Starting at one end,
we are simply going to fold the top edge of the skirt down over the elastic
(see why we finished that edge?!) and stitch close to the side, about 1/8”, as
if we were topstitching it. Because it is going right over onto the elastic, I
choose not to iron mine. You can pin here if you feel like you need to. You may need to stretch the elastic slightly
as you sew to help the casing lay flat.
Now step back and admire your, erm, skirt?

Step 10: To
finish! Fold your skirt in half, right sides together, pin the unfinished edges
together. You will notice that our little “notch has disappeared on this side
because we’ve sewn the casing. Just match your sides up as best as possible.
Sew. Serge or zig-zag as desired.

And Ta-da! You are
done! Quick, now go find a Barbie to stick it on! (I find that she is much more
cooperative about modeling my creations when and where I want her to than some
of the other models I get to work with). Was it as difficult as you imagined?

Let's Create! ~ Kristen
where is the pattern for the top that is with the skirt above
ReplyDeleteHow do you copy the pattern? I don't get it!
ReplyDeleteUnder the title there is a downloadable link to the pattern.
DeleteThank you so much this pattern is lovely
ReplyDeleteI absolutely loved your blog post on creating a maxi dress from a long skirt! Your DIY tips and step-by-step instructions are so helpful and inspiring. It's fantastic how you're empowering your readers to get creative and make their own stylish outfits.
ReplyDeletehttps://www.promocodehq.com/blog/